In this tutorial, you’ll learn how to create a rainy scene of London city in Photoshop. We’ll be using only three stock images to create a rainy or you can say that after the rain atmosphere. The technique I used here for creating this kind of effect totally depends on the use of adjustment layers and the images you choose. I somehow managed to get this stormy lighting effect and I’ll show you how you can replicate it.
Tutorial Resources
Step 1
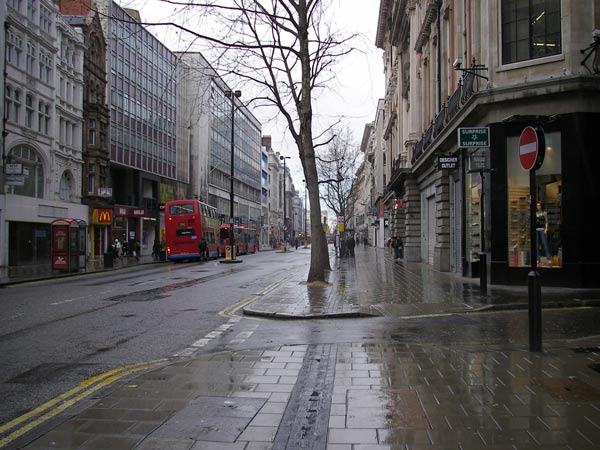
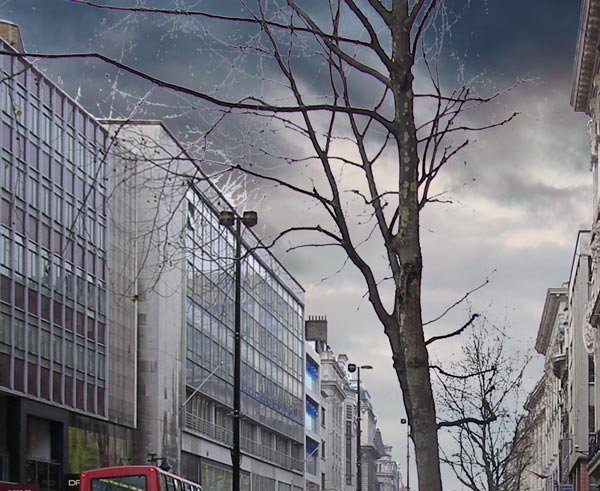
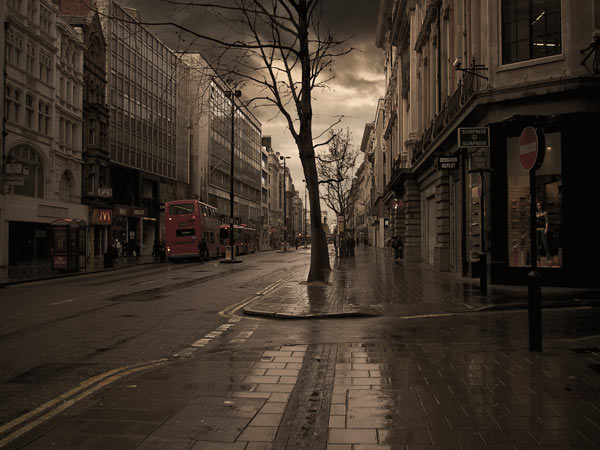
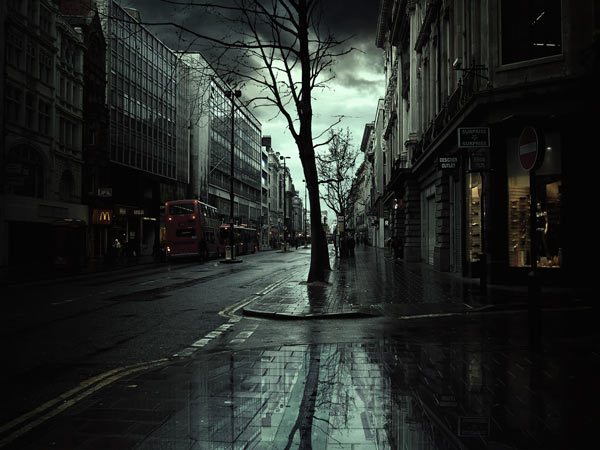
Open up the London city image in Photoshop. Go to File > Open and open the image. You can notice the image has already rain effect like you can see the wet footpath, the water on the road and the whole rainy environment as well. So choosing right image for your composition helps a lot.
Step 2
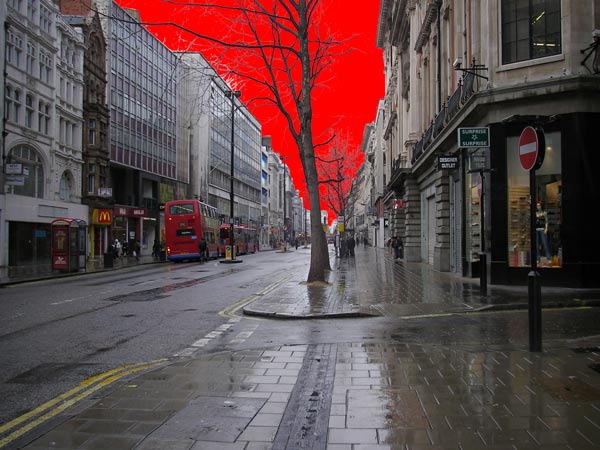
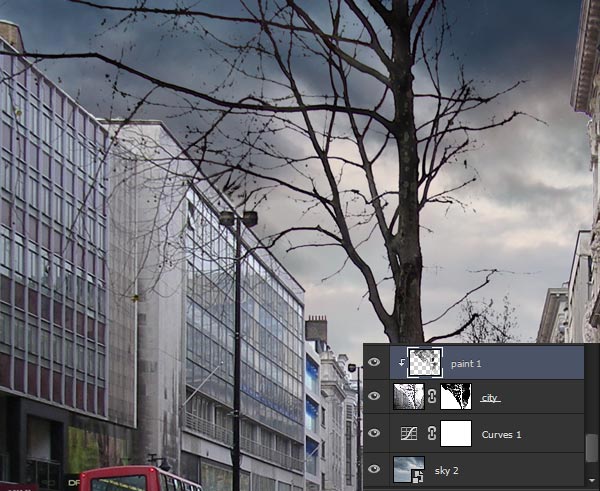
The very first step is to remove the bright sky of the city. But the problem while removing background is the tree which is just in the middle of the sky. To remove this background or sky I used Channel techniques and this is the best method to make a selection when you have this kind of situation.
So I removed the background and you can see the results here:
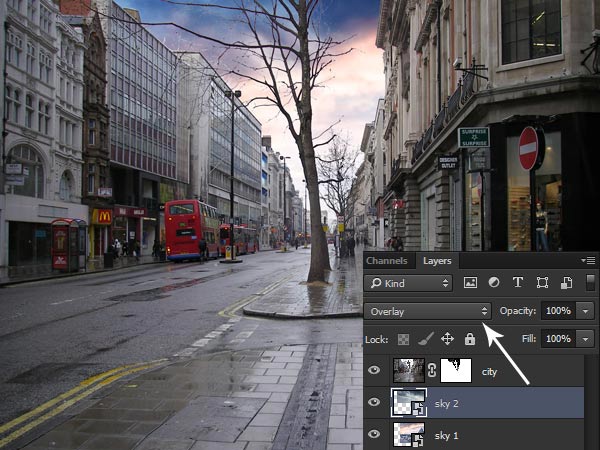
Of course, we need to create a new sky there something which has bright lighting. To do this, I use two sky photos for that.
First, use the sky 1 image and then place it below the city layer. In the sky 1 image you can notice we have the mountain since we only need the sky parts then just adjust the image according to that using Transform Tool (CTRL + T).
Step 3
Sky 1 has bright tones but it doesn’t have the dark tones which we needed to create a dark, lighting sky. So use the sky 2 image and then move it under the city layer. Also, try to adjust it like I did it below.
To blend the sky 2 with the sky 1, simply change the blending mode to Overlay.
Step 4
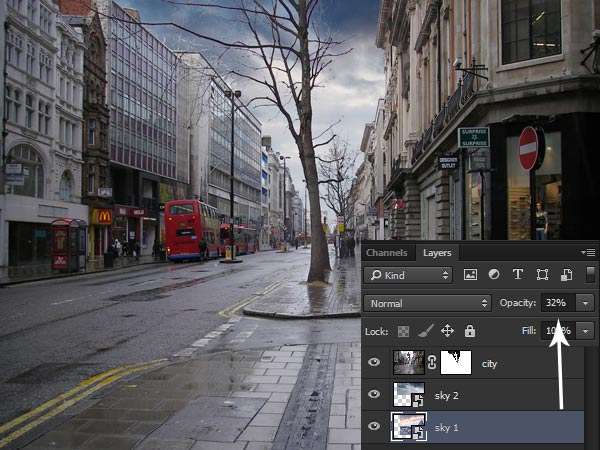
With Overlay mode we got bright sky but it is too much brightness and I don’t like it. To subtle its effect, I lowered opacity of the sky 1 to 32%.
Step 5
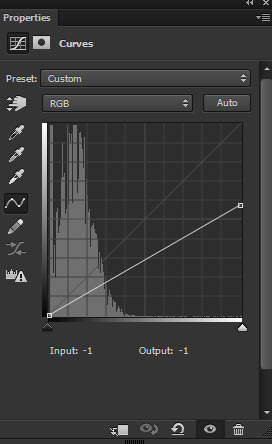
Create a Curves adjustment layer just below the city layer. I used all three channels (red, green and blue) to tweak the color of the sky which we created so far.
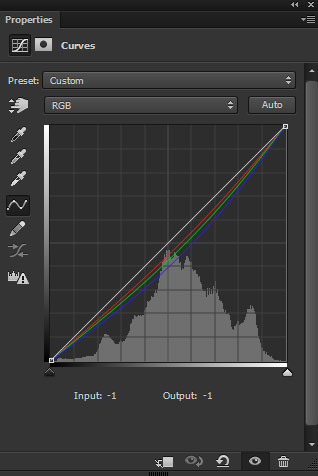
If you compare the image you can see that Curves eliminated the blue and red tones and we have some sort darkness on the sky.

Step 6
When I removed the background of the city, I had to select the tree as well. Even though I removed the sky very well but if you zoom in you’ll find some edges of the tree branches which have not extracted properly. Not only here whenever I use the Channels technique I got this type of unextracted edges and I’ll show you how to fix it.
Press CTRL + SHIFT + N to create a new layer and then clip this layer to city layer. Using a soft round black brush paint over those edges which are not extracted properly and simply fill them with black color. You can also sample the color from the tree for filling these edges.
Here you can see that the tree is fixed now and it looks very nice. Also, make sure to do this on the right side if you find the same problem on the tree branches there.
Step 7
Make a Levels adjustment layer for city and use it as Clipping Mask (click on the red icon).
Now increase the contrast using the following settings:
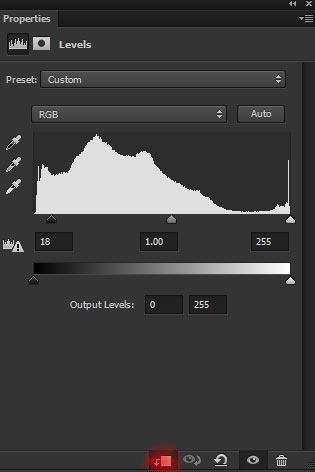
Effect of Levels:
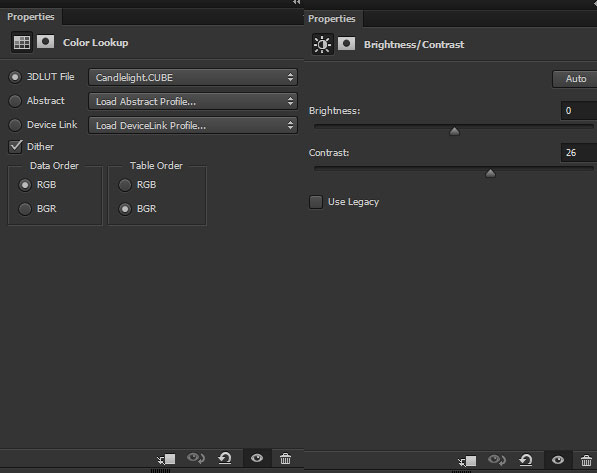
Step 8
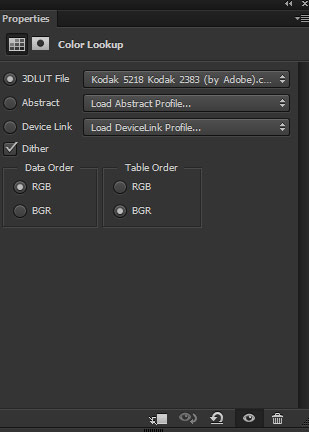
I used Color Lookup to change the color of the whole composition and its added the dark yellow tones. Using Brightness/Contrast I further increased the contrast.
Effect of both adjustment layers:
Step 9
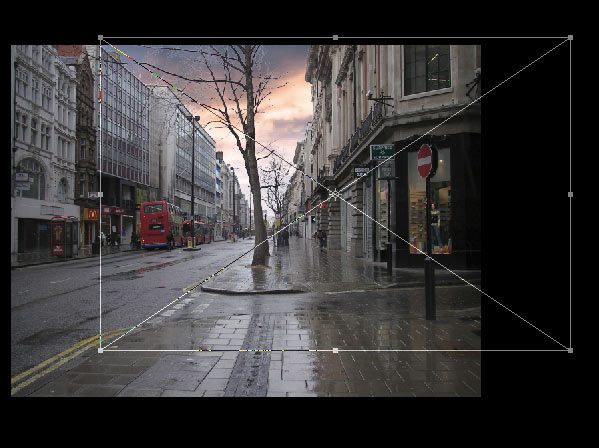
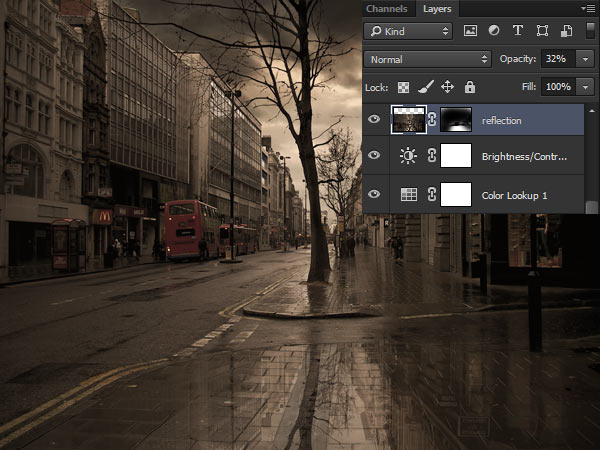
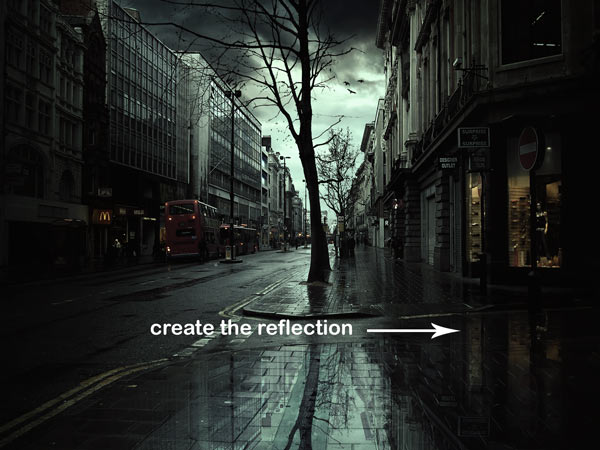
Now we’ll make the reflection using the same way like I did in my previous tutorial. You can notice the footpath (closer one) showing the reflection of the sky we are going to create the reflection there. First, I created a new layer and then press CTRL + ALT + SHIFT + E to create a copy of all layers in a single layer. Go to Edit > Free Transform > Flip Vertical and move it down just a bit.
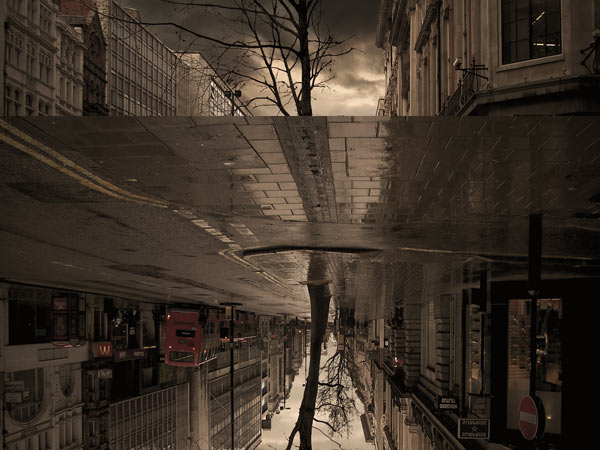
Lower the opacity of reflection layer to 32% to create the reflection.
Step 10
Since we don’t need other parts so I masked the parts highlighted in red color. First, add a mask to reflection layer (go to Layer > Layer Mask > Hide all) and then using a soft black brush mask the parts.
After masking:
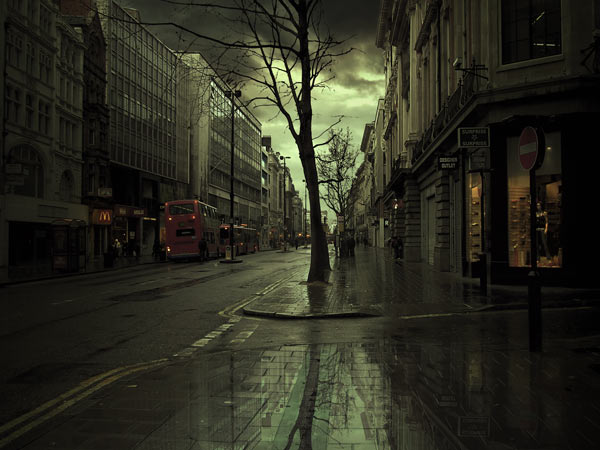
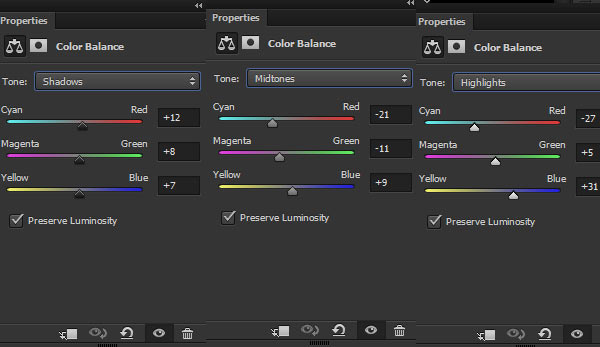
Step 11
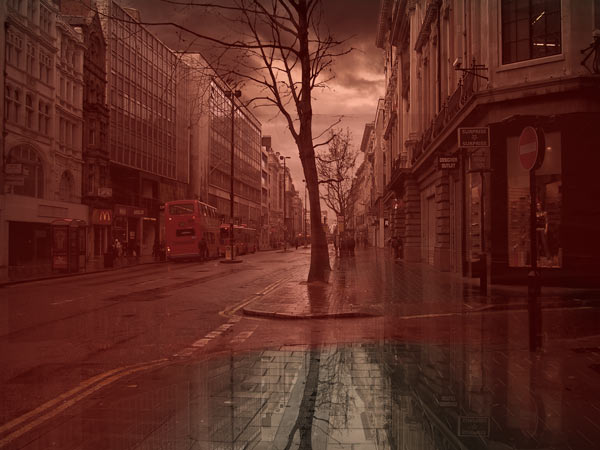
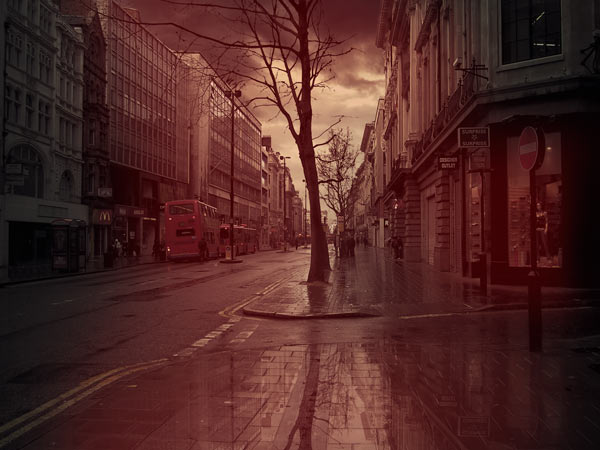
Now we’ll work on the effect and we’ll apply a bunch of adjustment to replicate a dark, lighting rainy effect. First, I used the Color Balance adjustment layer to change the colors as we have too much dark yellow tones on the composition right now.
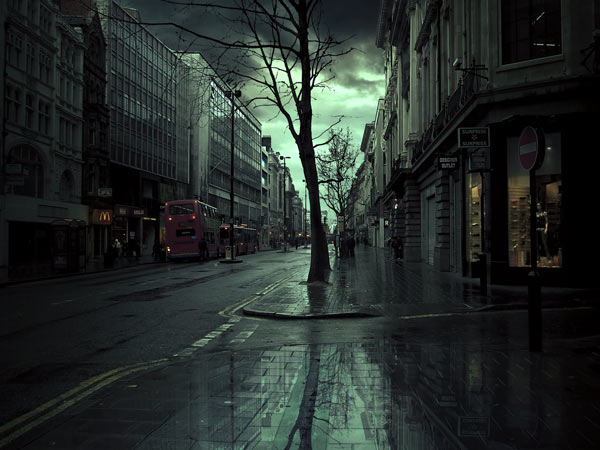
After altering colors:
Step 12
I darken both sides of the scene using the Curves adjustment layer. First, I lower the brightness using the following settings:
Then I masked the dark effect in the middle to maintain the light there. Remember you need to select the mask of the Curves in order to mask the effect.
Step 13
You can notice the light on the shop’s window, buses taillights, and there is traffic signal light having light as well. The light fades there so I painted the light using the color #634a15 on a new layer.
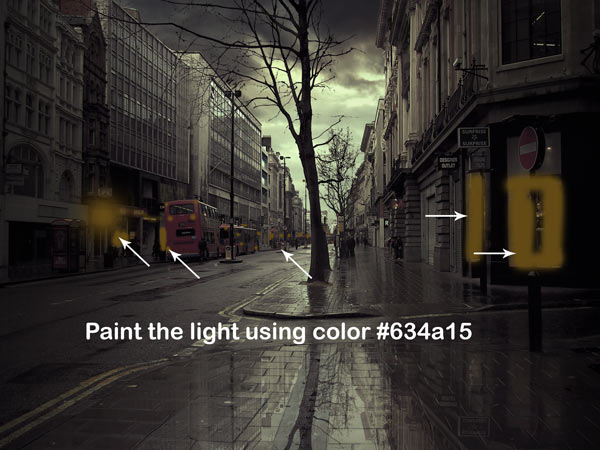
Change the blending mode to Color Dodge.
Step 14
Make a Solid Color adjustment layer.
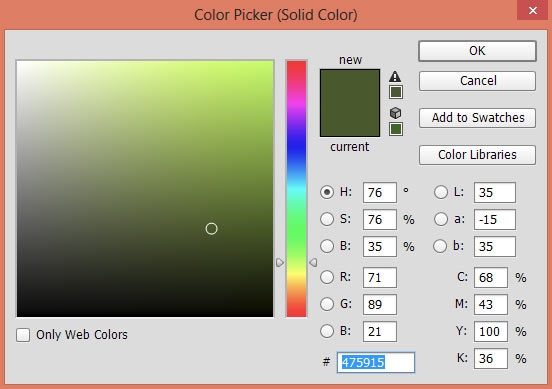
Set the blending mode of the Solid Color to Soft Light. Lower its opacity to 50%.
Step 15
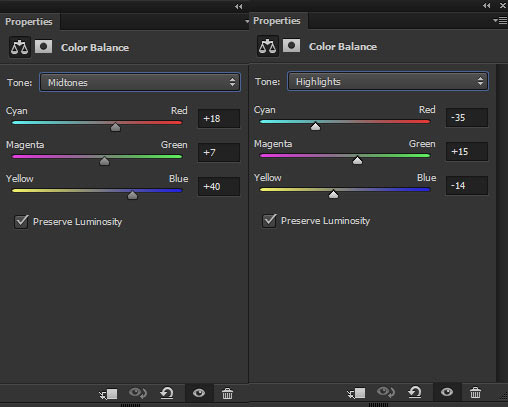
I used the Color Balance adjustment layer to tweak the colors.
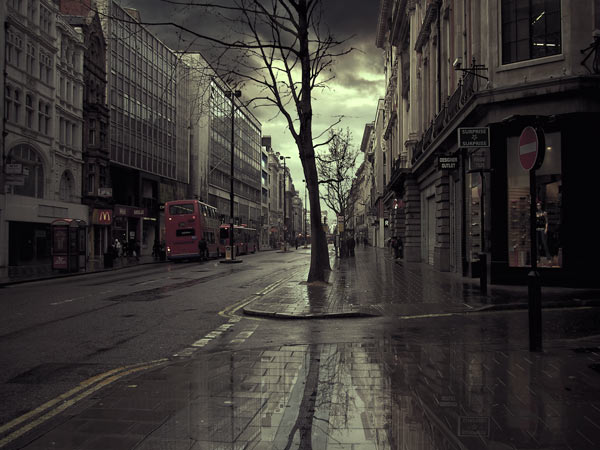
Results:
Step 16
Using a Color Lookup adjustment layer I gave boost of brightness to the scene.
Results:
Step 17
I painted some birds using birds’s brushes.

I found that the shop window lacking reflection so I fixed this as well by creating reflection like we did earlier in the tutorial.
Step 18
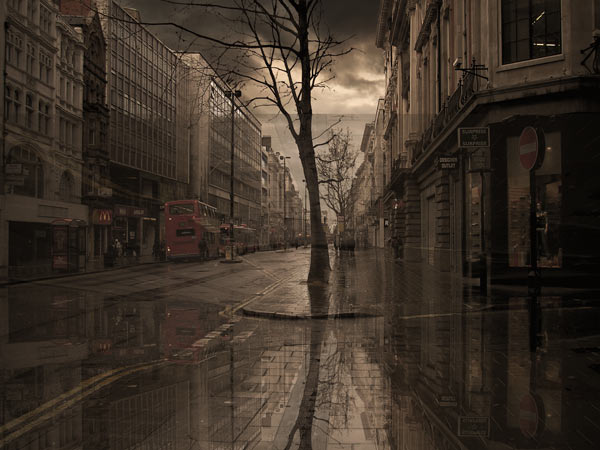
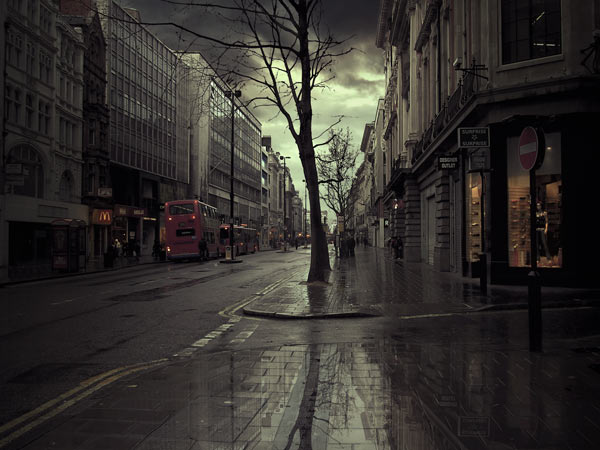
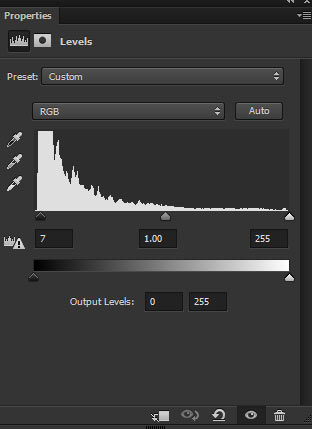
In the final step, I removed the low contrast which we got using Color Lookup in step 16. I used the Levels for that. You can also quit here if you think that the scene looks fine.
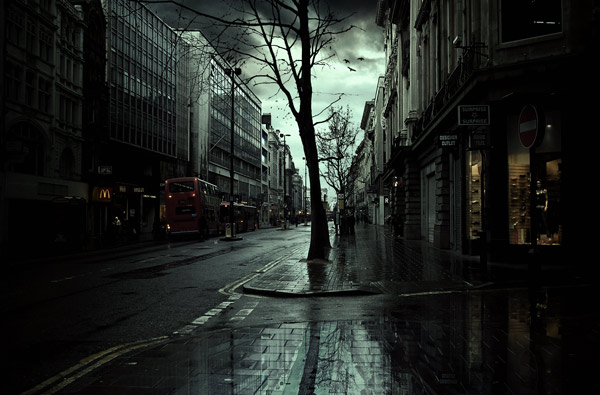
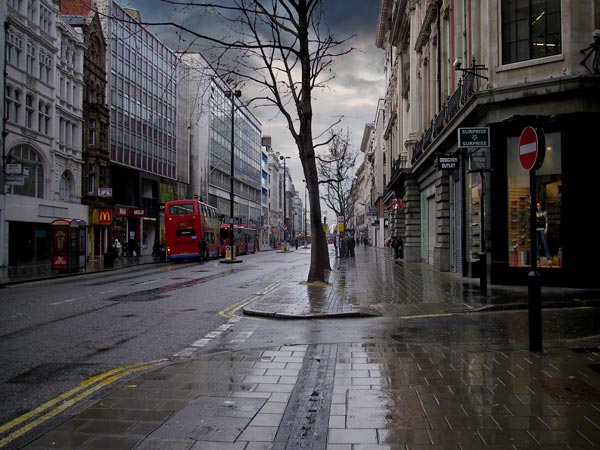
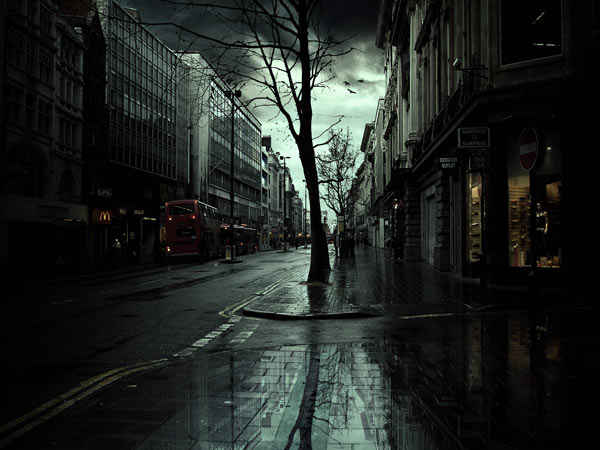
Final outcome:
Could you please tell me how to remove the bright sky of the city specifically? I’m korean. i’m sorry that my english is poor
Thanks for the question Park. As I said that I used the channel technique to remove sky the from the city. Here is the tutorial: https://www.psdstack.com/photoshop-tutorials/basic/top-3-selection-techniques-in-adobe-photoshop/ .
Let me know if you have any further question.
Useful tutorial, the final effect looks awesome!
Thanks Joana!
excellent, thank u