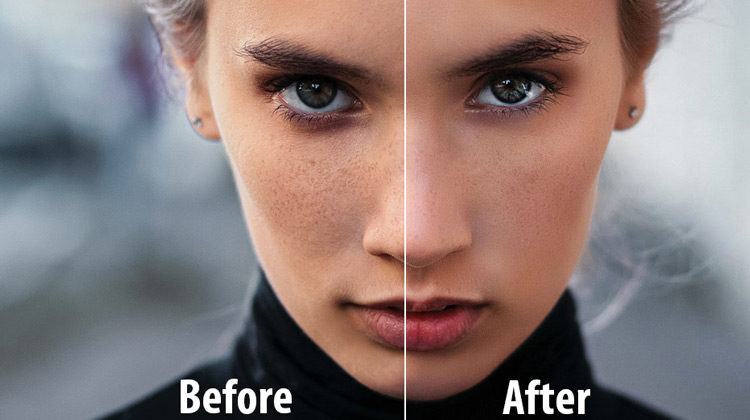
In this tutorial, you’ll learn how to edit a portrait using AI with Luminar 4. We gonna learn how AI automatically detects skin flaws, improves the eyes, lips, and brings a balanced exposure to your portraits.
I am gonna show you how you can use layers & masks in Luminar 4 to affect specific areas of the image. Even though Luminar 4 is a simple photo editor and its portrait panel is self-explanatory but still I’ll give you some more info on how Portrait AI controls work.
Later in the tutorial, I’m gonna throw some more portrait images to see how it works on those images that have a lot of skin flaws such as blemishes, skin pores, and reddish skin. Let’s get started with the tutorial!
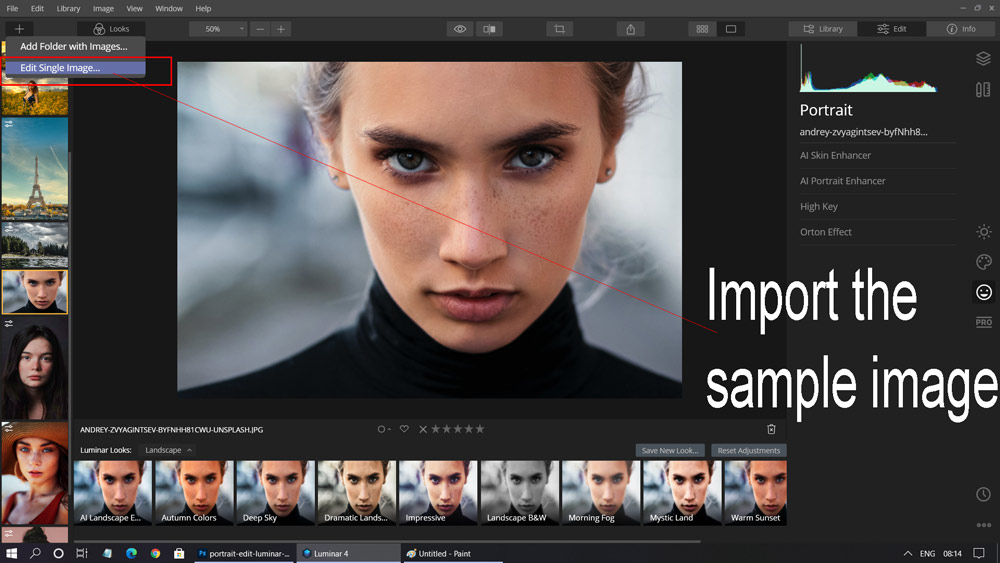
Step 1 – Open the Sample Image
Download the sample image from Unsplash open it up in Luminar 4. You can click on the (+) icon and then choose Edit Single Image and import the image in Luminar 4.
Step 2 – Portrait Panel For AI Portrait Editing
Luminar 4 automatically detects the type of image that you import and it knows whether the image is a landscape or a portrait image. You might not able to work in Portrait Panel if you import a landscape image because there is no need to. Once you have imported the sample image, switch to Portrait Panel on the right of the screen.

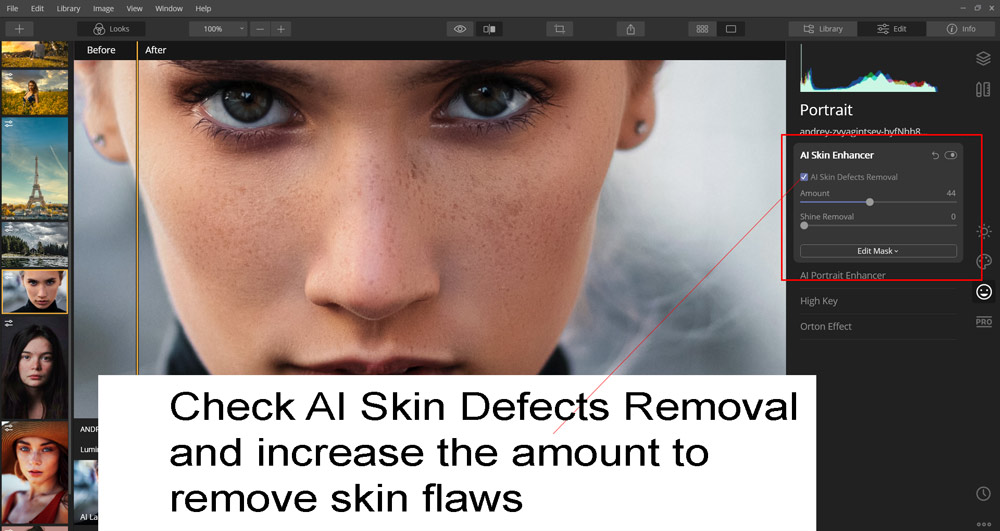
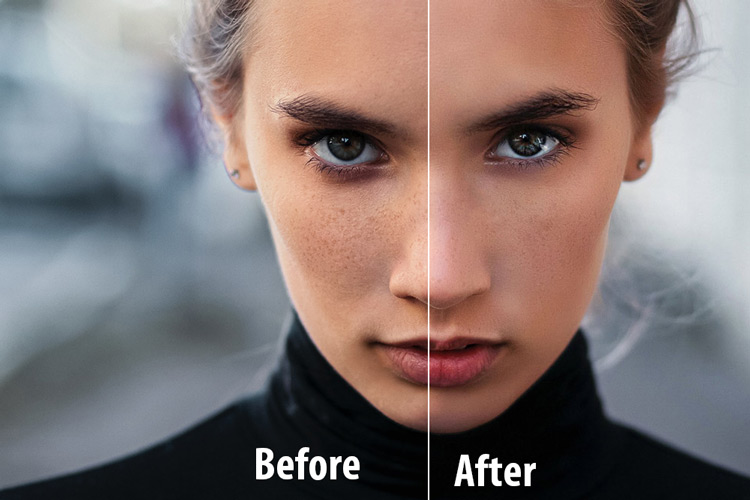
Step 3 – AI Skin Enhancer
AI Skin Enhancer as the name suggests it tries to find the skin flaws in the image and remove them automatically. You can check the AI Skin Defects Removal to automatically remove freckles, blemishes from the image. Once you checked it, increase the amount to start softening the skin. Increase it to the point where you see skin improvement without compromising with the skin texture.
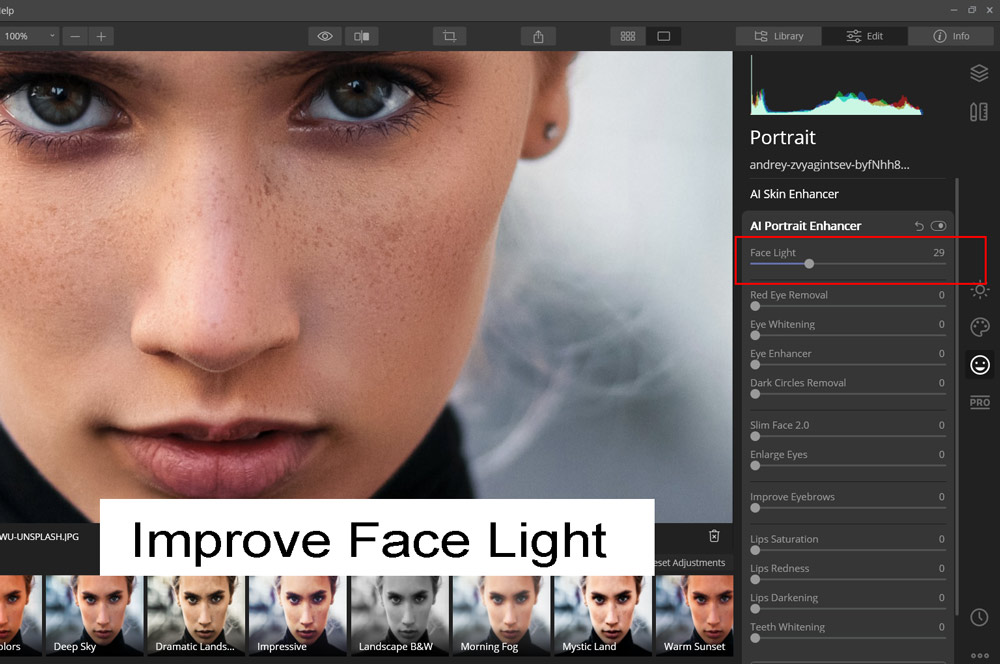
Step 4 – AI Portrait Enhancer
In AI Portrait Enhancers you can do a lot of stuff to improve the portrait image such as adjust facial light, sharpen eyes, eyes whitening, teeth whitening, dark circles removal, face slim, enlarge eyes, and a lot more.
I’ll begin with increasing the light on the face, I increased the Facial Light to 29
Step 5 – Eye Whitening, Sharpening & Dark Circles Removal
Next, I used the Eye Whitening, Sharpening & Dark Circles Removal slider to further improve the portrait. I have whitened the eyes, sharpened them, and removed the dark circles. Very easy to use just increase the sliders to enhance the portrait.

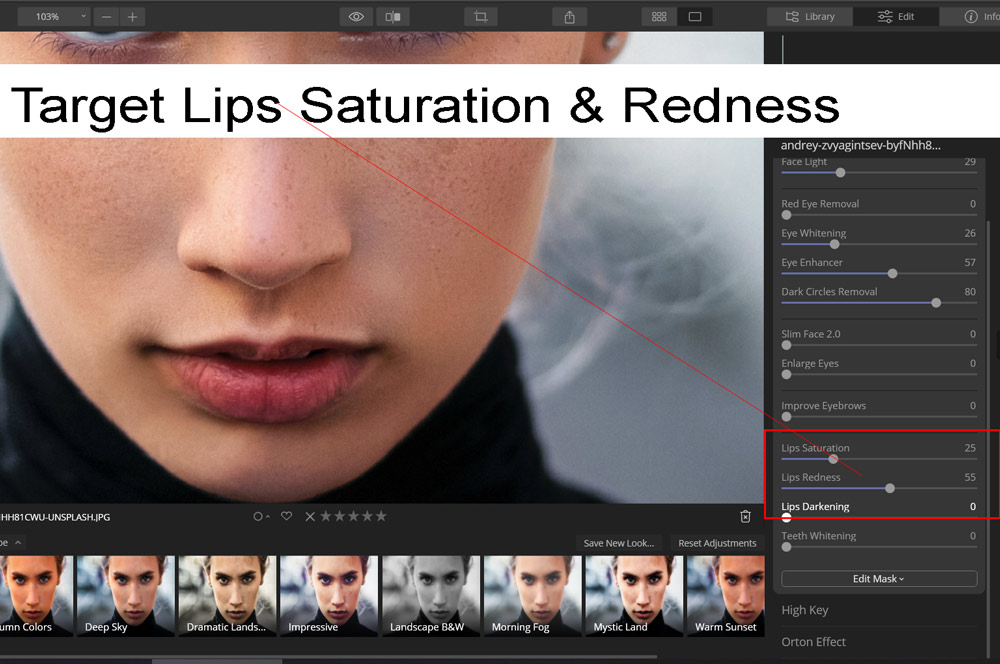
Step 6 – Target Lips & Eyebrows
You can even target lips, & eyebrows to enhance them. Just increase the value of Lips Saturation, Lips Redness & Improve Eyebrows Sliders.
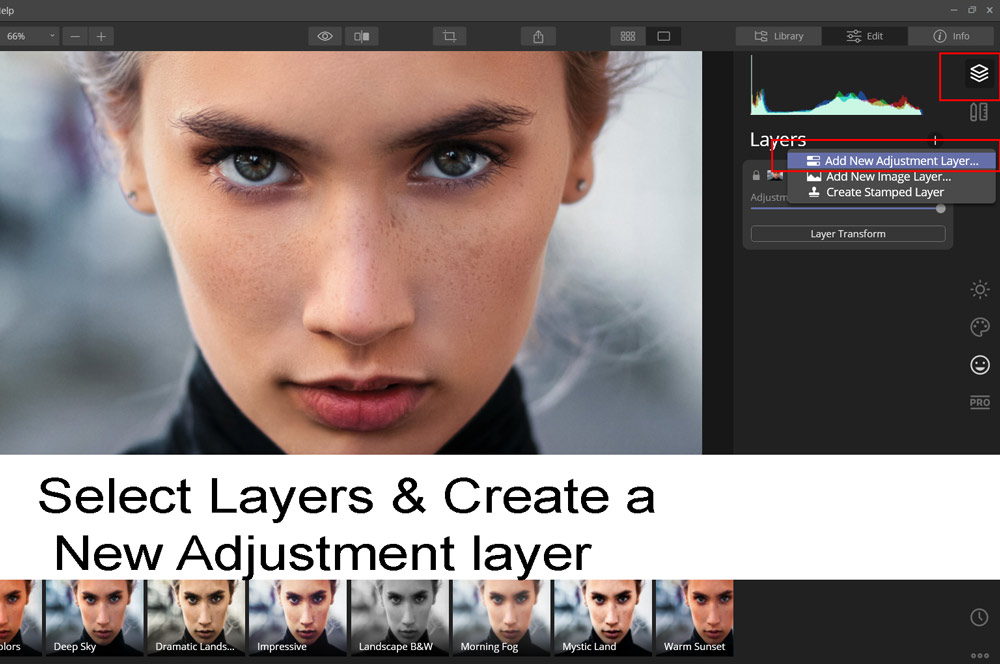
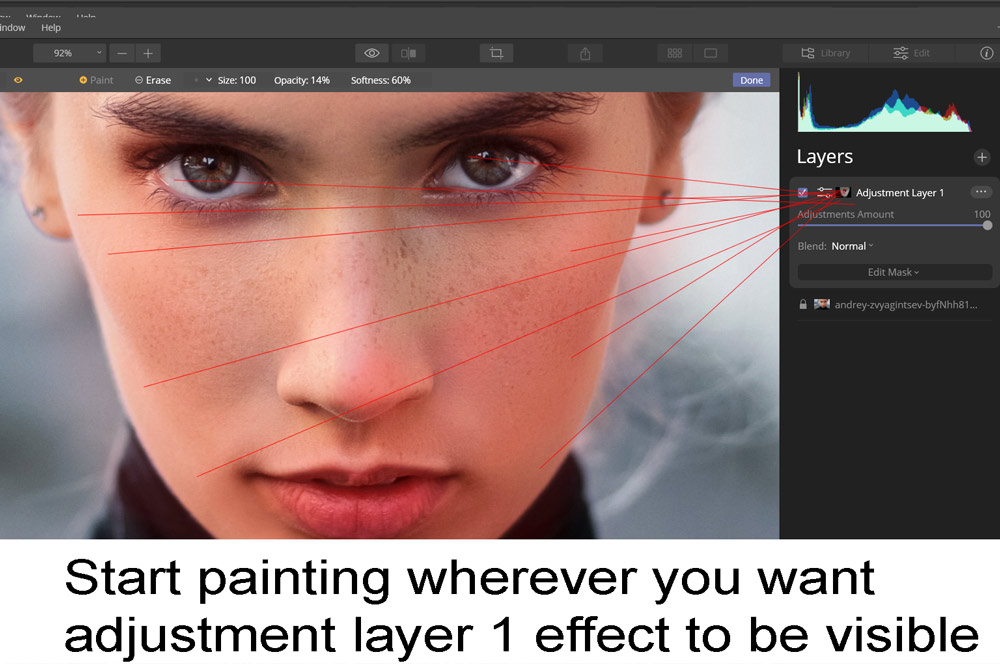
Step 7 – Target Specific Areas
With Luminar 4, you can even select areas which you’d like to have affected via Portrait Panel. You can take the advantage of adjustment layers and mask to target specific areas. To do this, create a New Adjustment Layer in the Layers panel. You can select the Layer Panel on the right top, then click on the tiny (+) icon to create a new layer & select New Adjustment Layer.
Here you can see we have a new adjustment layer:
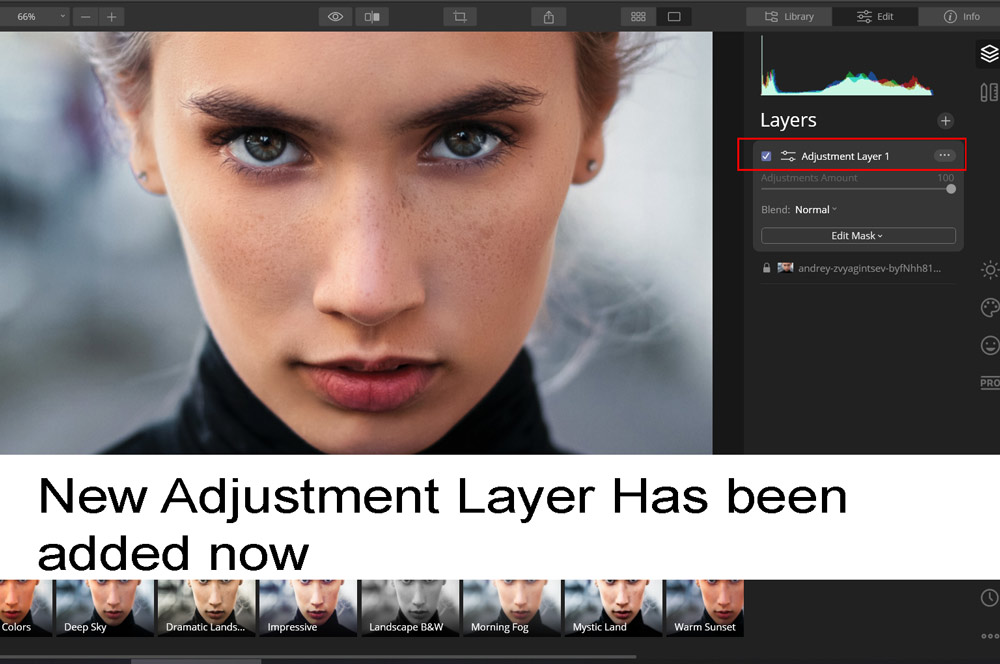
Now let’s say that I want to increase the exposure on specific areas, I can do this by applying the adjustments on the newly created adjustment layer and then making the adjustments visible wherever I want to using a mask.
I went to Essentials Panel & Increased the exposure of the entire image.
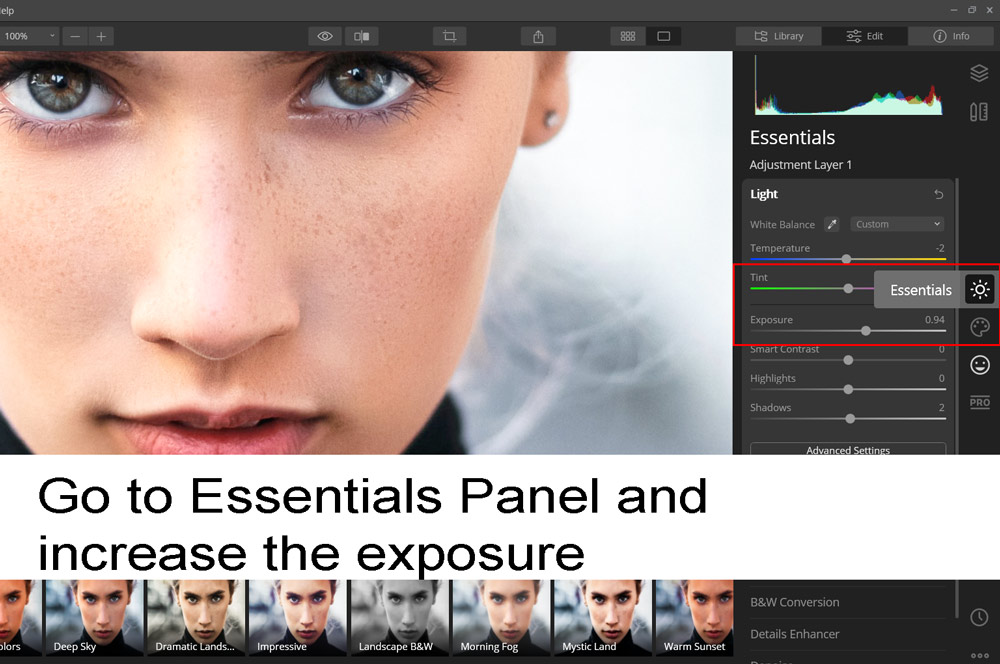
Next, I went back to Layers Panel and right-clicked on the New Adjustment Layer 1 then I selected Brush.

Once you have selected the brush start painting wherever you want adjustment layer 1 effect to be visible. For instance, you might want to increase the exposure on the lips or maybe on the specific parts of the portrait. You can change the brush Opacity & Softness on the top of the screen to make the brush stroke smooth.
Step 8 – Not Perfect For Every Image
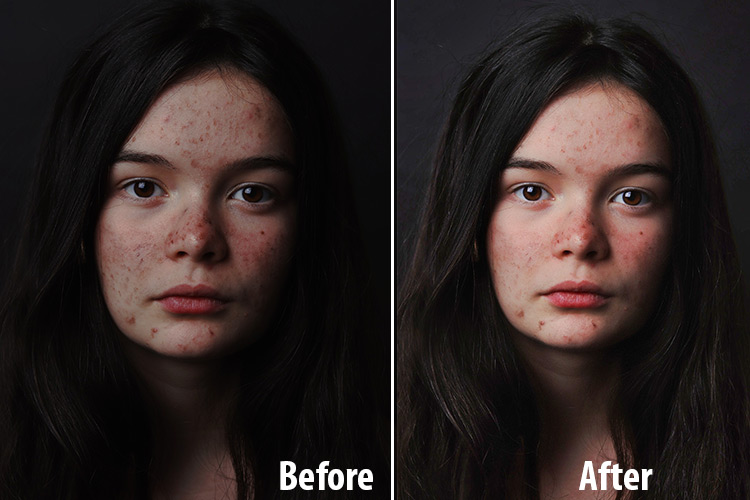
I tested another image to see how it works if AI had to remove a lot of skin flaws, surprisingly it did work and at least it gave me a good starting point on those images where it needs a lot of manual retouching treatment. Take a look at the example below:
Here is another example and it did a great job but requires manual retouching in Photoshop to remove acne:
When I used AI Skin Defects Removal, it filled the nose with some white texture of the skin. Not sure what went wrong here but I didn’t like it.
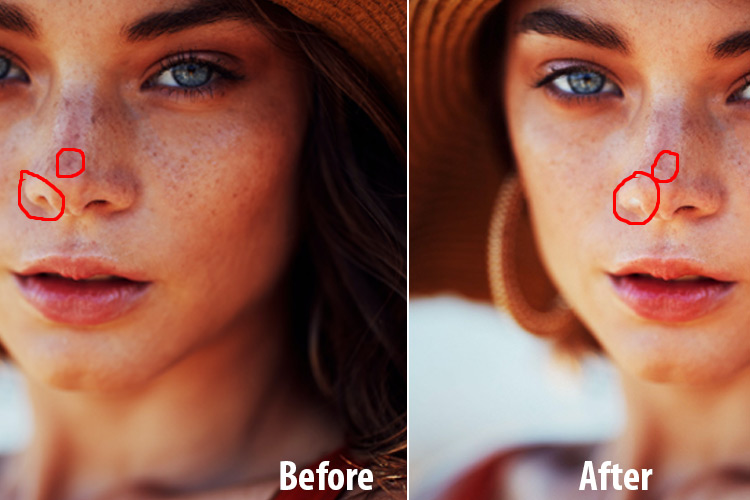
I had to took the image in Photoshop to do some spot healing and sharpening. Because of Luminar 4, it saved a lot of time as I only had to some minor retouching in Photoshop.
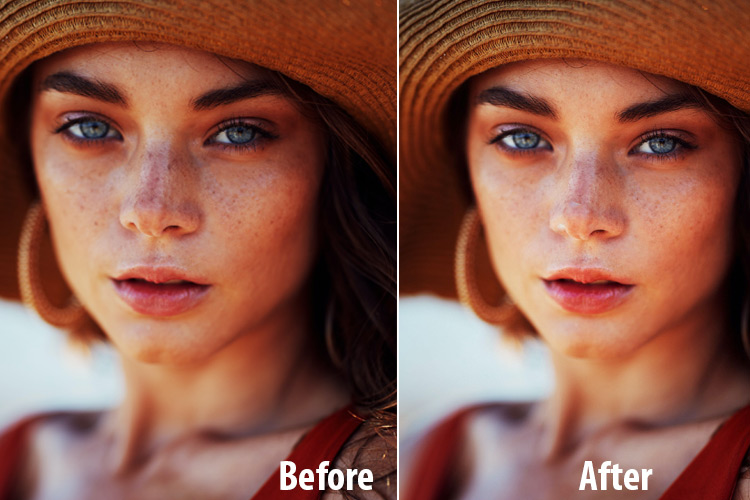
Final Results:
Conclusion
I think the conclusion is very clear from the tutorial that is if your image needs heavy retouching or manual retouching then it might not work for you but it can serve you a good starting point and then you can take the image to Photoshop for further retouching. On the other hand, if your image doesn’t need a lot of retouching then Lumiar 4 AI Portrait Editing is more than enough for you. I hope you enjoyed the tutorial and learned about the AI Portrait Editing in Luminar 4. Feel free to comment below for feedback.
Leave a Reply