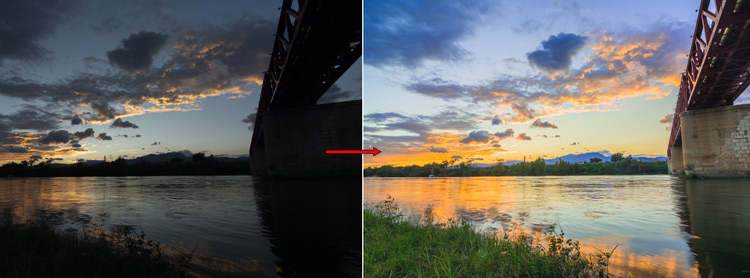
HDR stands for High Dynamic Range that means an HDR image can contain an equal amount of light information in shadows and highlights. It basically presents an image that our eyes might see but our cameras can’t.
You can create an HDR image using a single exposure, and using multiple exposures as well. In this tutorial, you’ll learn how you can create an HDR image by combining multiple exposures in Lightroom Classic. This process won’t take you more than 10 minutes and you’ll have an HDR image that contains a lot of light information throughout the image making every detail visible and clear to your eyes.
What is an HDR Image?
An HDR image is a combination of multiple exposures to produce an image that contains a greater range of light information than any single image.
In simple language, when you combine photos captured at different exposure levels together to produce an image that contains details throughout the darkest shadows to the brightest highlights.
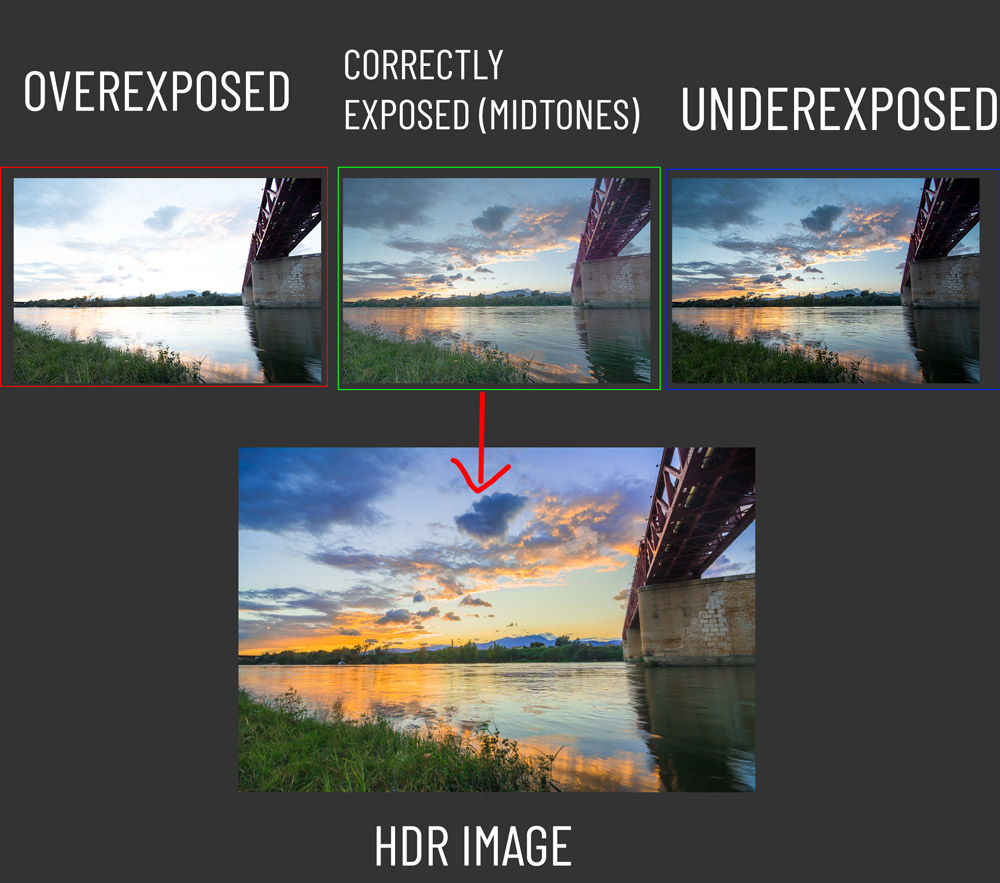
Step 1 – 3-Photo HDR
3-Photo HDR is very common in Photography. It contains 3 photos such as Underexposed to get the highlight details, Overexposed to capture shadow details, and Correctly Exposed (Midtones) that might be a little too dark or too bright. After getting all 3 shots you can start merging photos with Photo Merge in Lightroom.
As you can see I have 3 images ready:

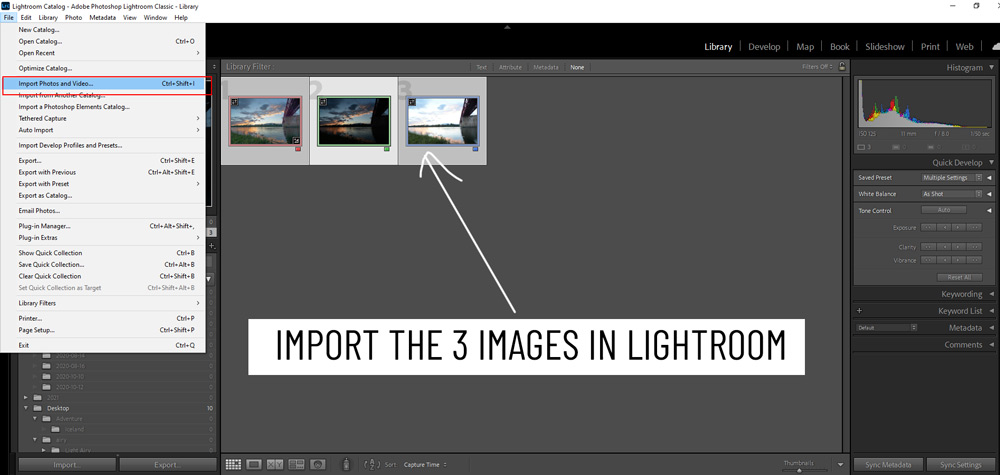
Step 2 – Import Photos
To create an HDR image, we have to import the 3 photos in Lightroom.
Go to File > Import Photos & Videos and import all the images as shown below:
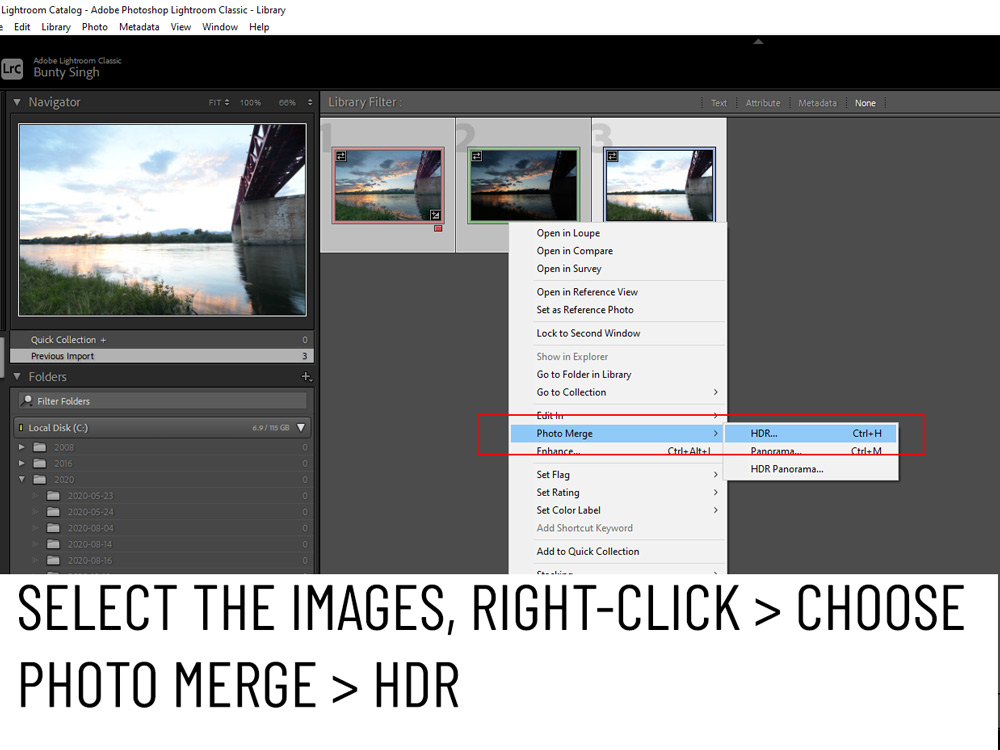
Step 3 – Photo Merge
Once you have imported all the images in Lightroom, select all the images by pressing CTRL + A and then right-click Choose Photo Merge > HDR as shown below.
Lightroom will merge all 3 images and will generate an HDR preview as you can see in the image below.
There is an option called Deghosting, I am leaving it unchecked and you don’t need to use it unless you have a moving object in your frames. This tool adjusts moving objects in your frames to avoid transparency in the overlay. Just leave it out otherwise might end up with distortions.
Hit The Merge Button:
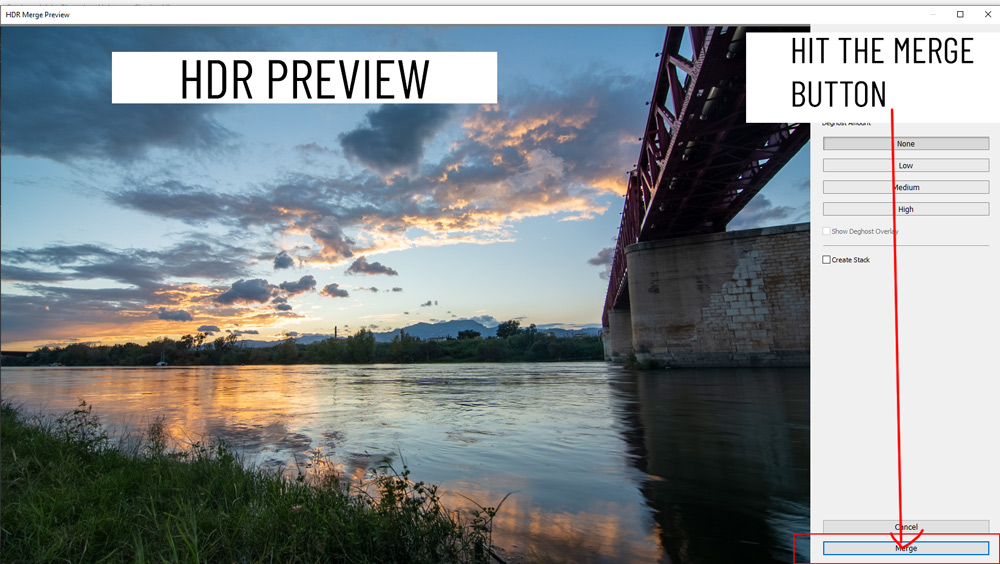
Once you hit the Merge button, you’ll see that our HDR image is ready and on the left-hand panel you can see we have the best settings applied to the photo by Lightroom automatically.

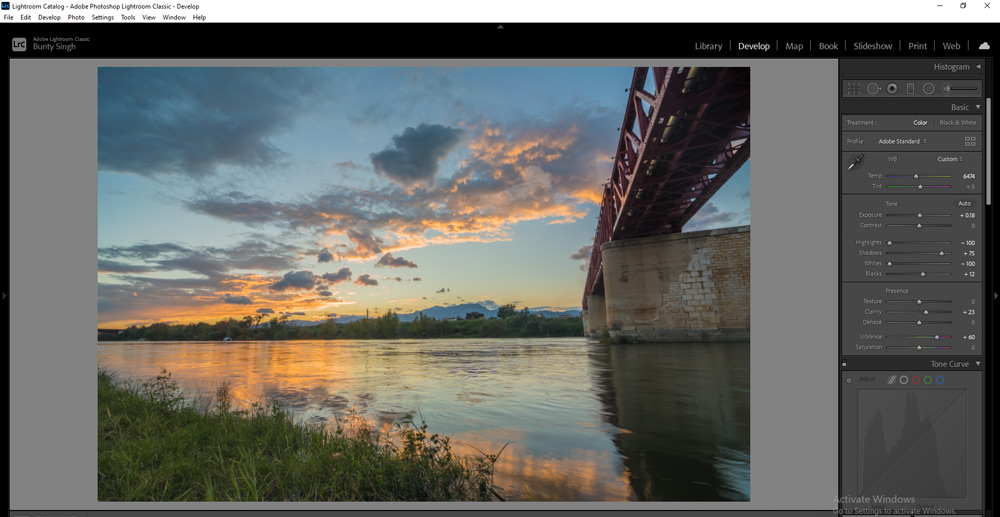
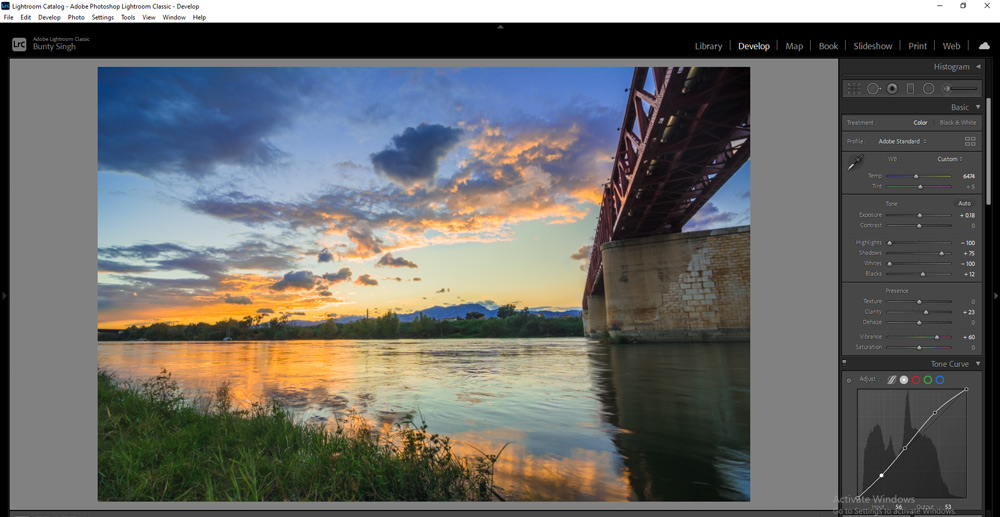
Step 4 – Further Edits
I am going to change the settings a little. You can also play around with the settings to get the most out of the image. I tried to pull more info by increasing the Exposure and Shadows levels. I increased the Vibrance to help the colors pop a bit.
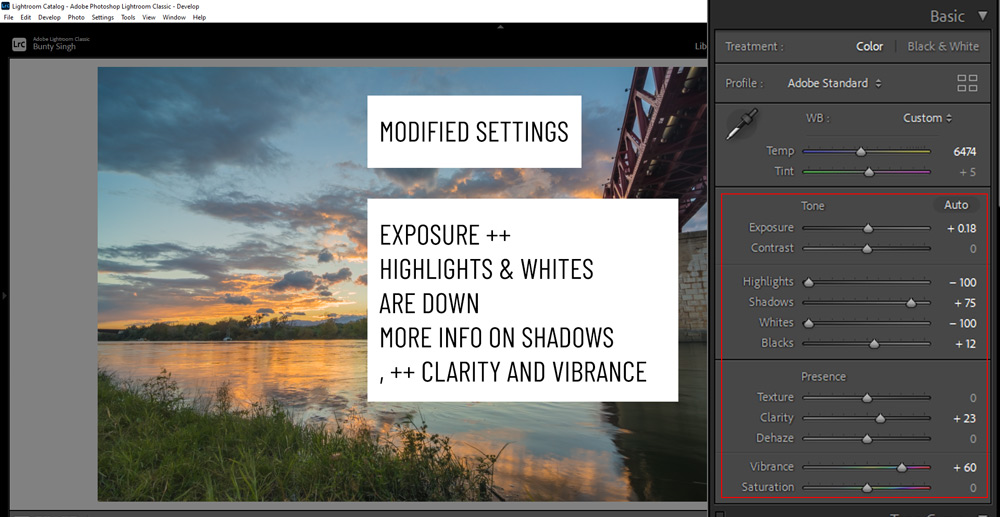
Here is the image so far:
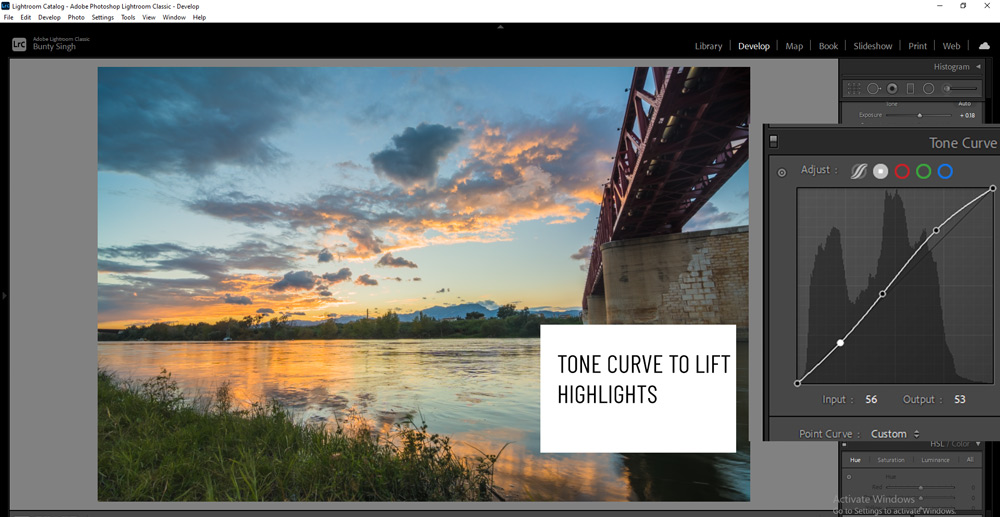
Step 5 – The Tone Curve
I used the Tone Curve to lift highlights a bit. You can see the settings below. You can play around with the tone curve to pull information or lift highlights and shadows.
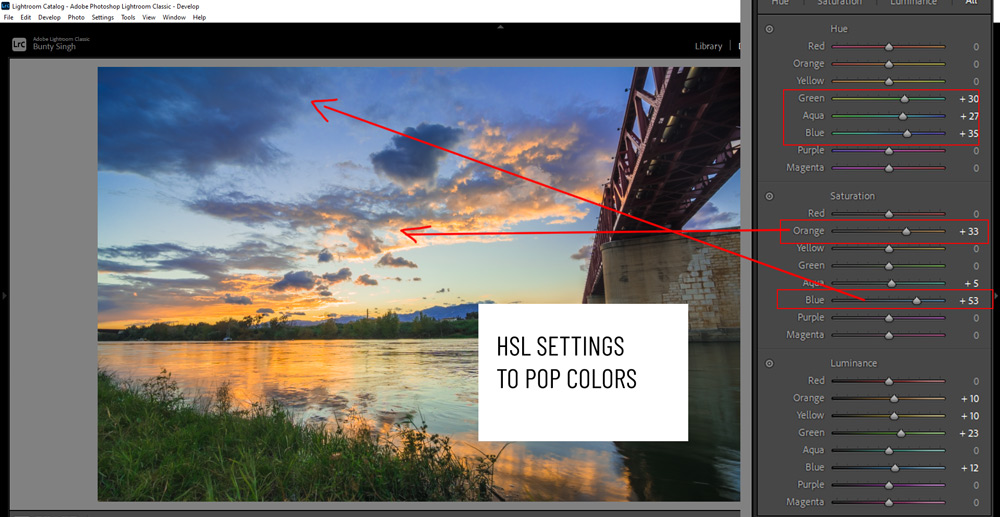
Step 6 – Pop Colors
In the HSL Panel, I targeted three colors Orange, Green & Blue. I increased the Saturation and Luminance of these colors.
Also, changed the hue of Green & Blue. You can play around here to target colors and make them pop.
Step 7 – Adjustment Brush
With an adjustment brush, I can make selective adjustments to the image. What I did this, I increased the temp on the horizon of the sky. You can clearly see where I painted using the adjustment brush in the red overlay.
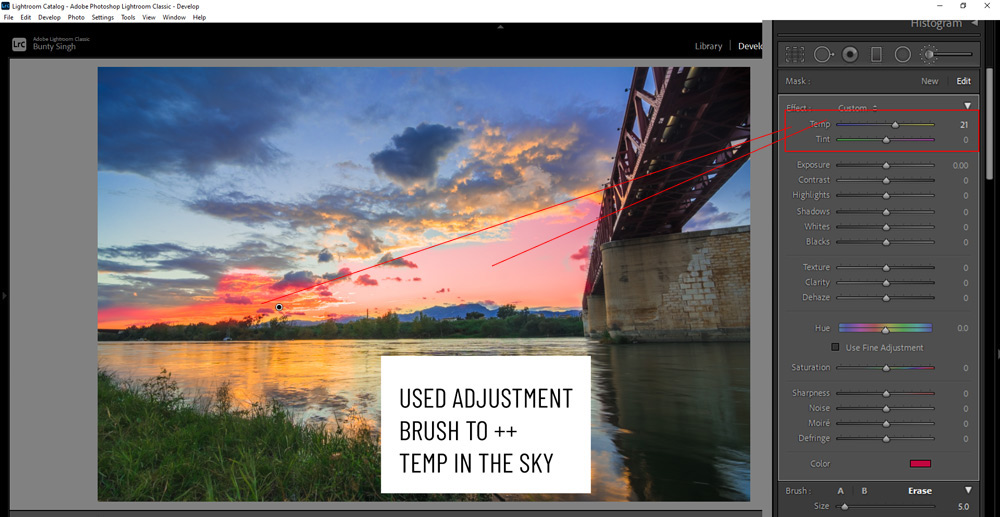
Here you can see the results after increasing the temp:
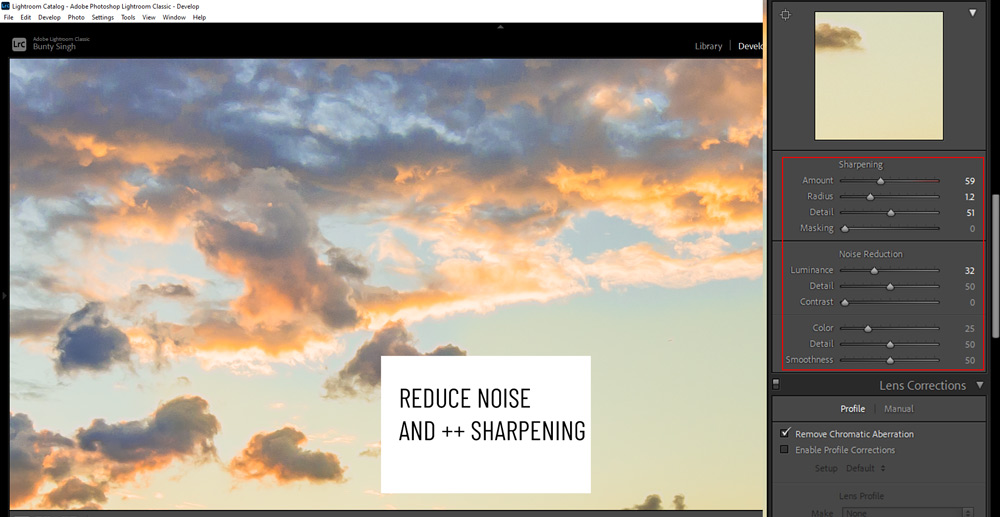
Step 8 – Reduce Noise & Pop Details
Finally, I increased the sharpening to help details pop and reduced the noise from the image.
You can see the settings below:
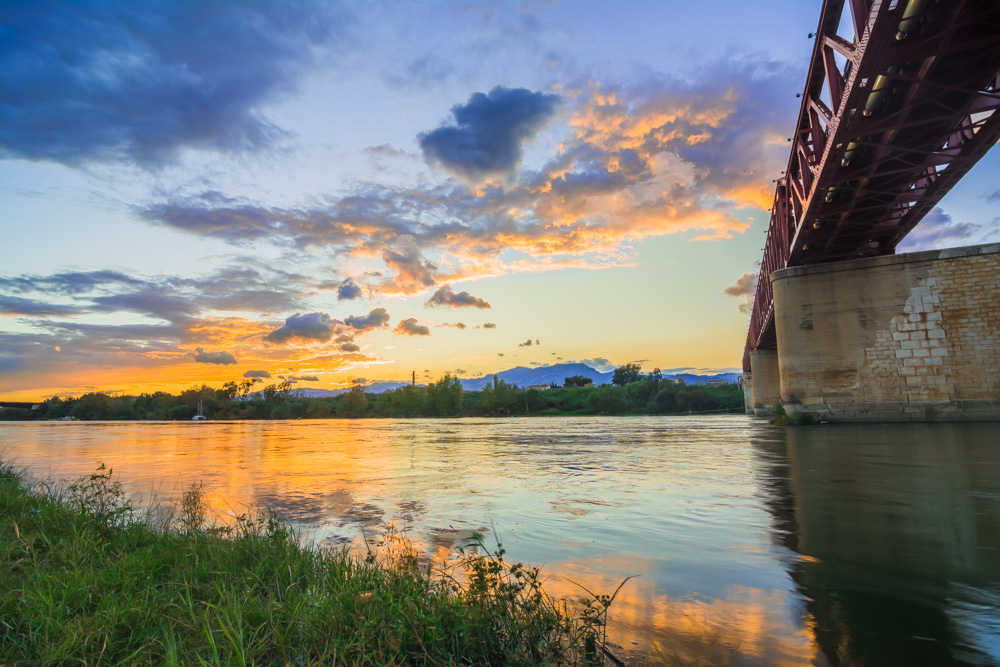
Here are my final results after a little more refinements:
I hope you enjoyed the tutorial and now you have a good understanding of an HDR image. If you have questions, do comment below.
Leave a Reply