A couple of weeks ago Adobe released its new Photoshop May 2021 update, with the rollout of the new update not only Adobe has added new neural filters such as depth blur but it has improved the existing one “Colorize Filter”.
The Colorize filter was released in October 2020 and since then it has improved a lot. This feature has a lot of new features such as new color profiles, controlling saturation of colors, reducing noise, and improved colorization of skin tones.
In this tutorial, you’ll learn how to use this neural filter. We’ll test it to its limit, where it works the best, and where it needs improvement. Let’s get into the tutorial.
Step 1 – Colorize Neural Filter
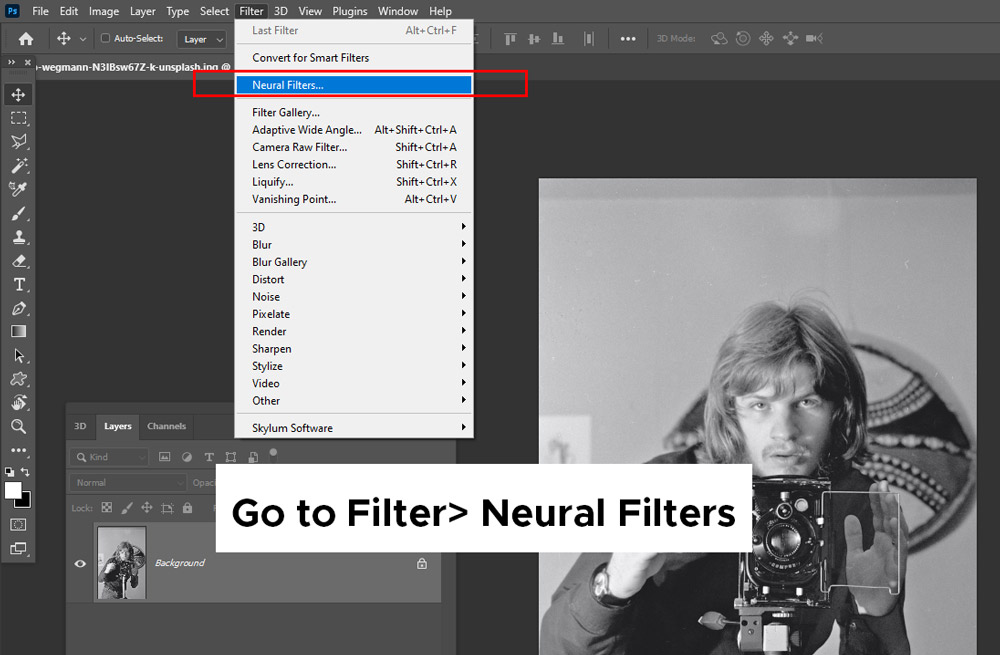
To access the Colorize Neural Filter, go to Filter > Neural Filter:
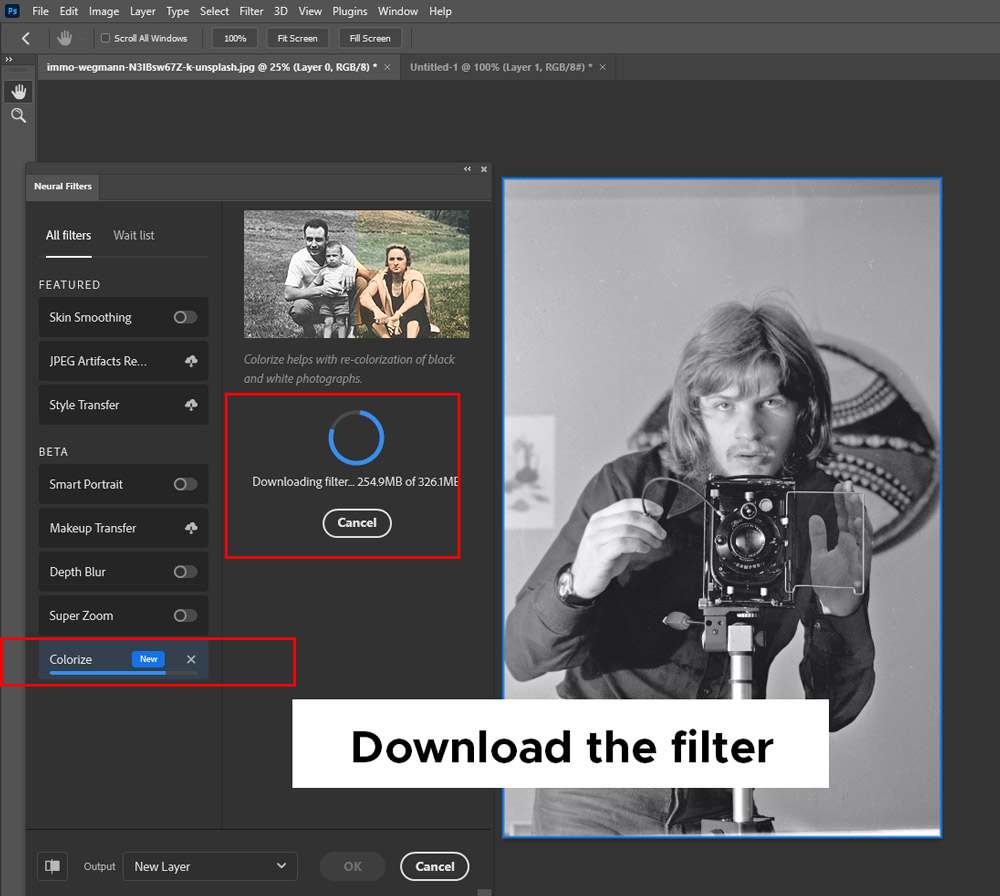
Since this filter process data on the cloud, you have to download it by clicking on the download button right next to the filter.
Download and install it:
Step 2- Colorizing Black/White Image in One-Click
Once the download finishes, you can click on the Colorize Button to activate the filter and it will do its job to colorize any black/white photo.
As soon as you run the filter, it will upload the image to the cloud and colorize the image as shown in the image below.
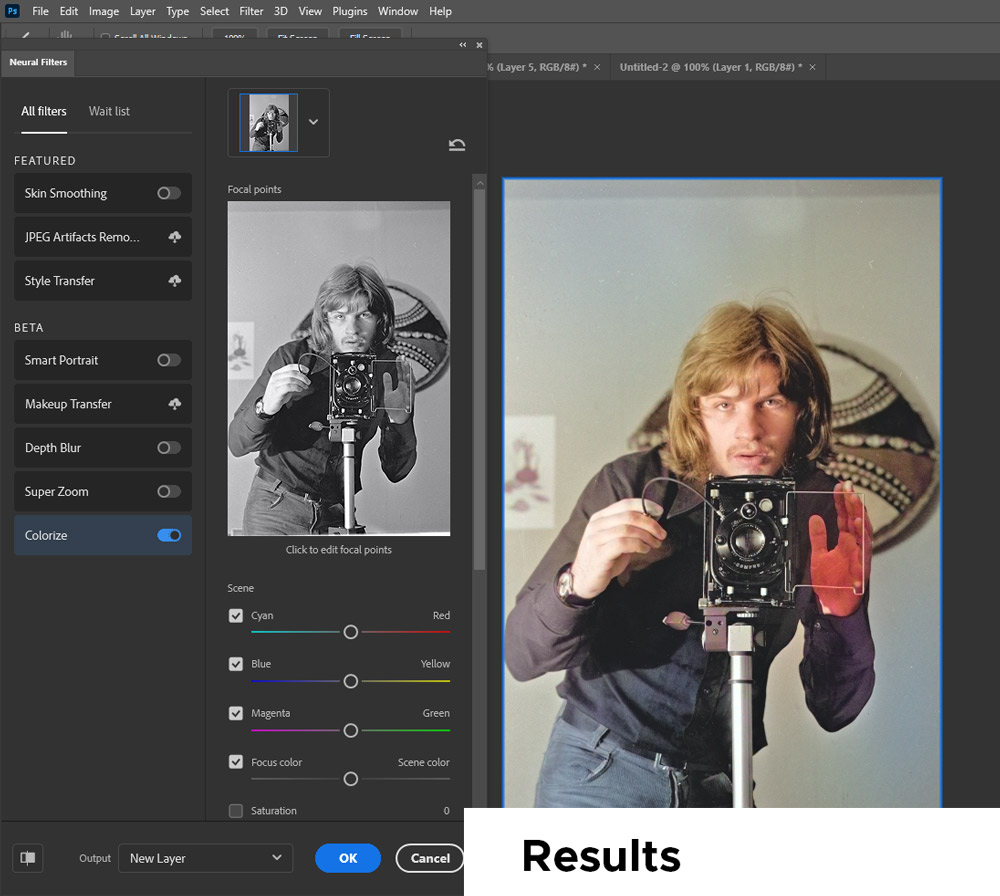
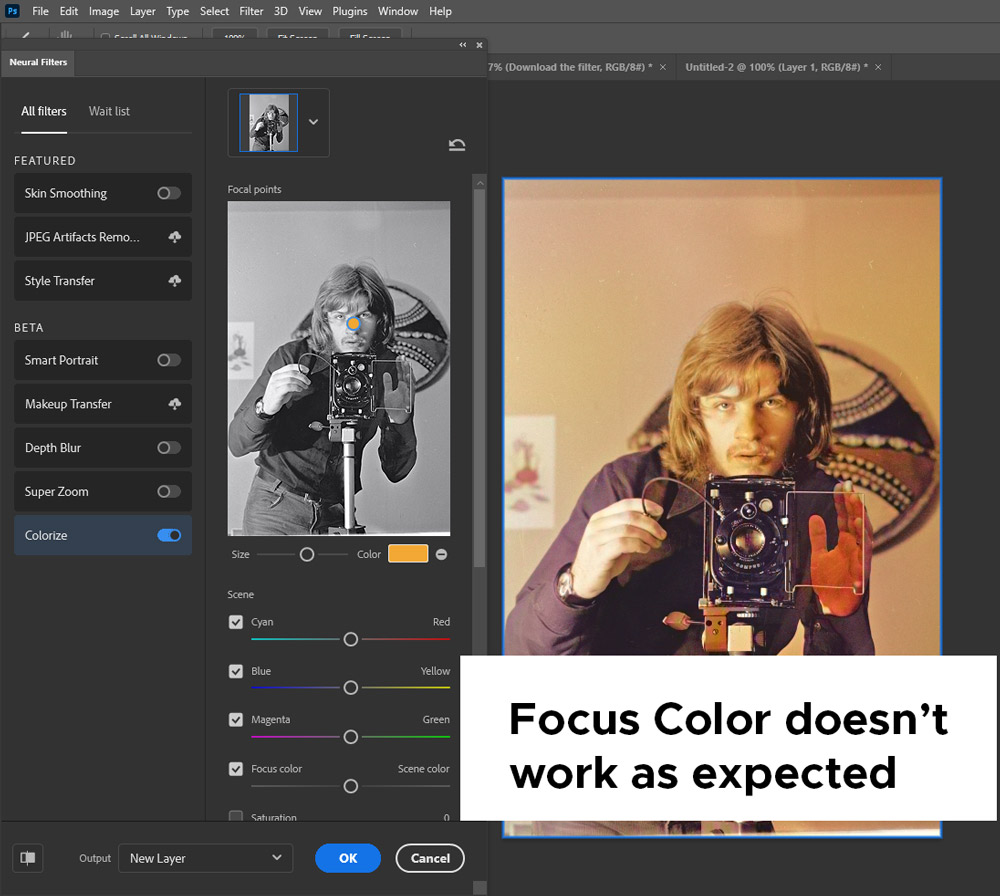
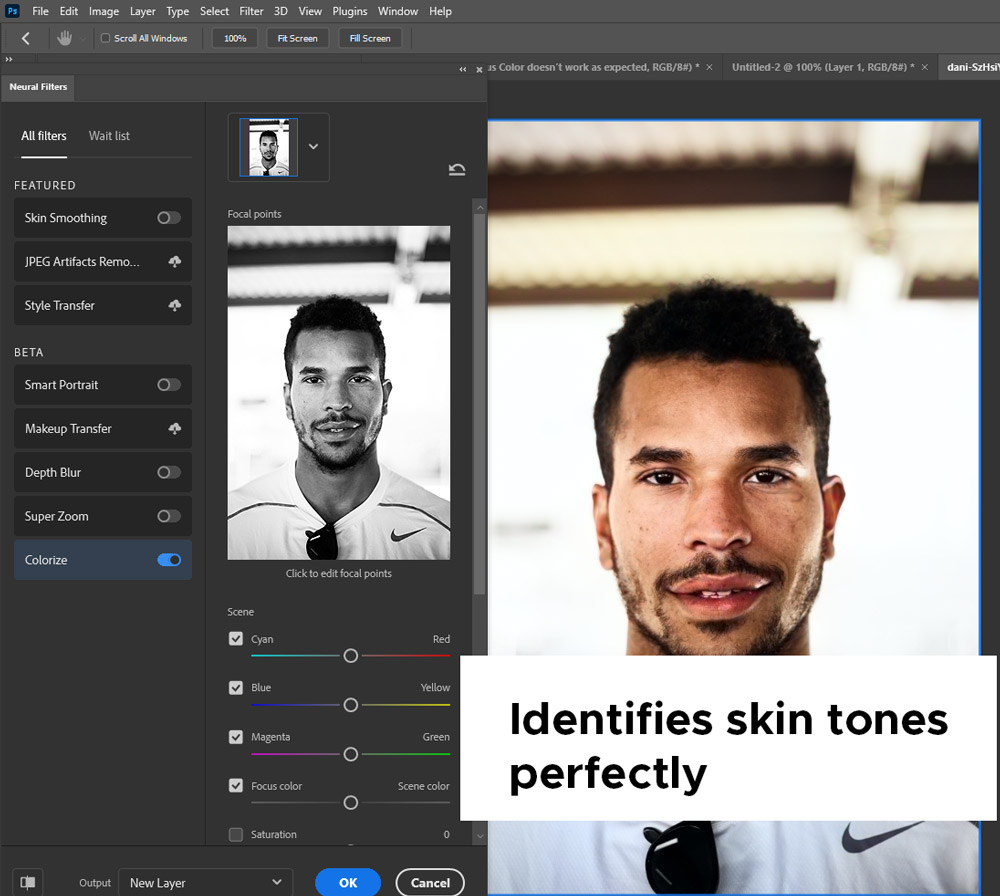
Step 3 – Focus Points
This filter allows you to edit the focal points of the photo. And this will help you selectively colorize the image by choosing an edit point.
You can click on the Click To Edit A Focal Point window to select a focal point as you can see I have selected face to further colorize it.
But instead of working only with the face, it has added the orange color to the entire image.
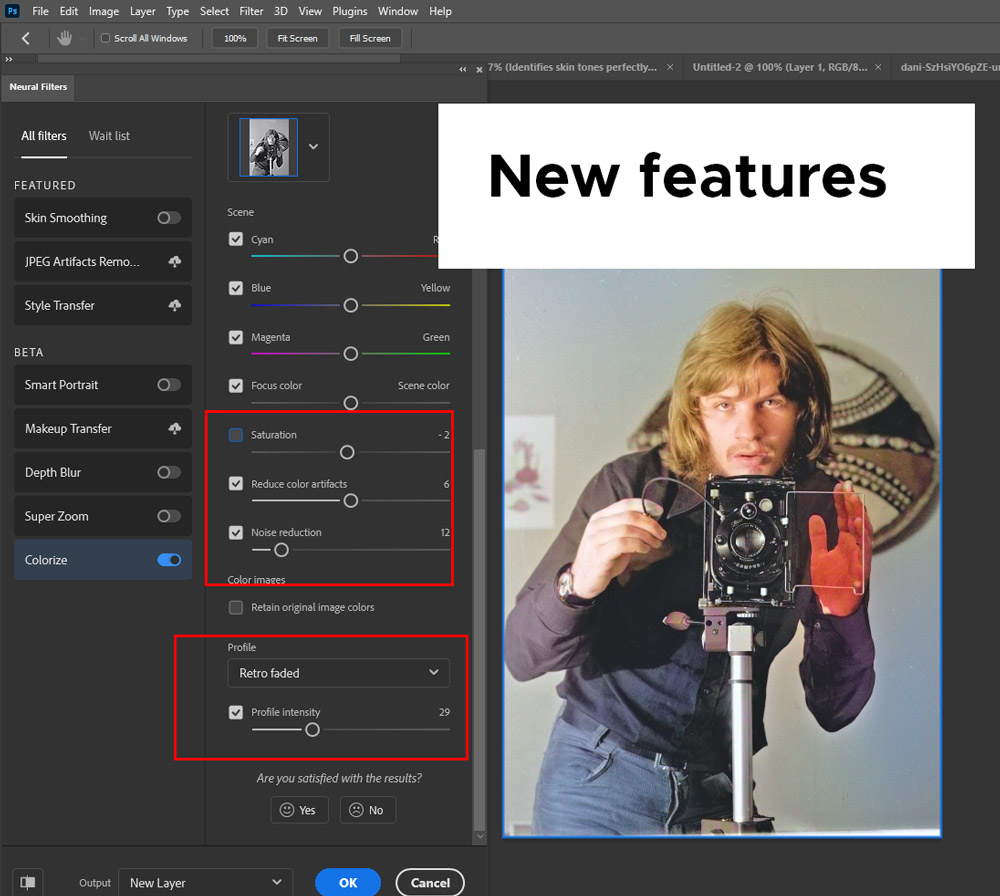
Step 4 – New Features
In October 2020, it didn’t have Saturation, Reduce Noise, Reduce Color Artifacts & Profiles. These all are brand new features added to this filter by Adobe in the May 2021 update.
Saturation, & Reduce Noise are self-explanatory.. Saturation controls the color intensity and Reduce Noise reduces noise in photos.
Reduce Color Artifacts deals with the artifacts results from JPEG compression. If you compressed your JPEG image, and it resulted in loss of pixels or jagged pixels, you can use this feature to remove those jagged pixels or artifacts from the image. That usually happens with the black/white images.
Profiles is the feature that stands out to me. It sort of Color Lookup tables, it has some default retro profiles that you can use to add retro effects to the image, and there is a slider Profile Intensity that sets the opacity of the applied profiles. For example, I used the Retro Faded profile with Profile intensity set to 29.
Step 5 – What to Do Next
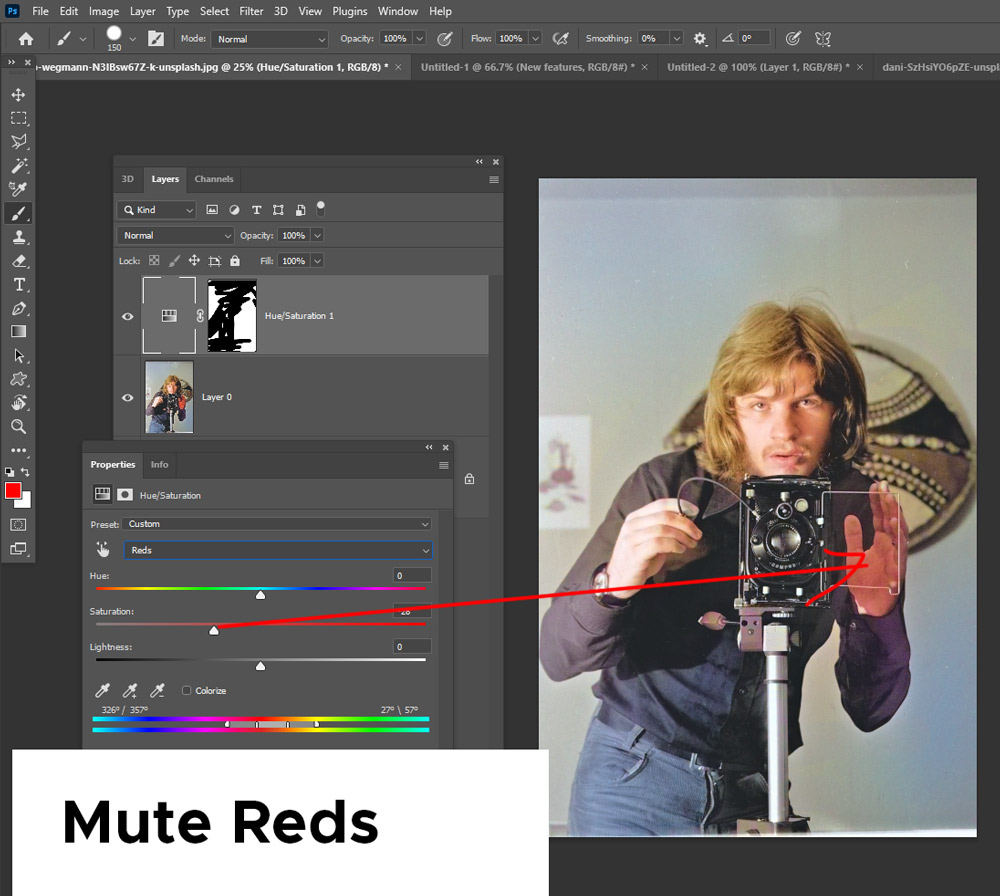
After instantly colorizing a photo using this filter, you can take the control in your hand. You can make the edits to the image manually.
The right hand of the subject looks a bit over-saturated and it’s all red.
I used a Layer > New Adjustment Layer > Hue/Saturation to mute reds a bit.
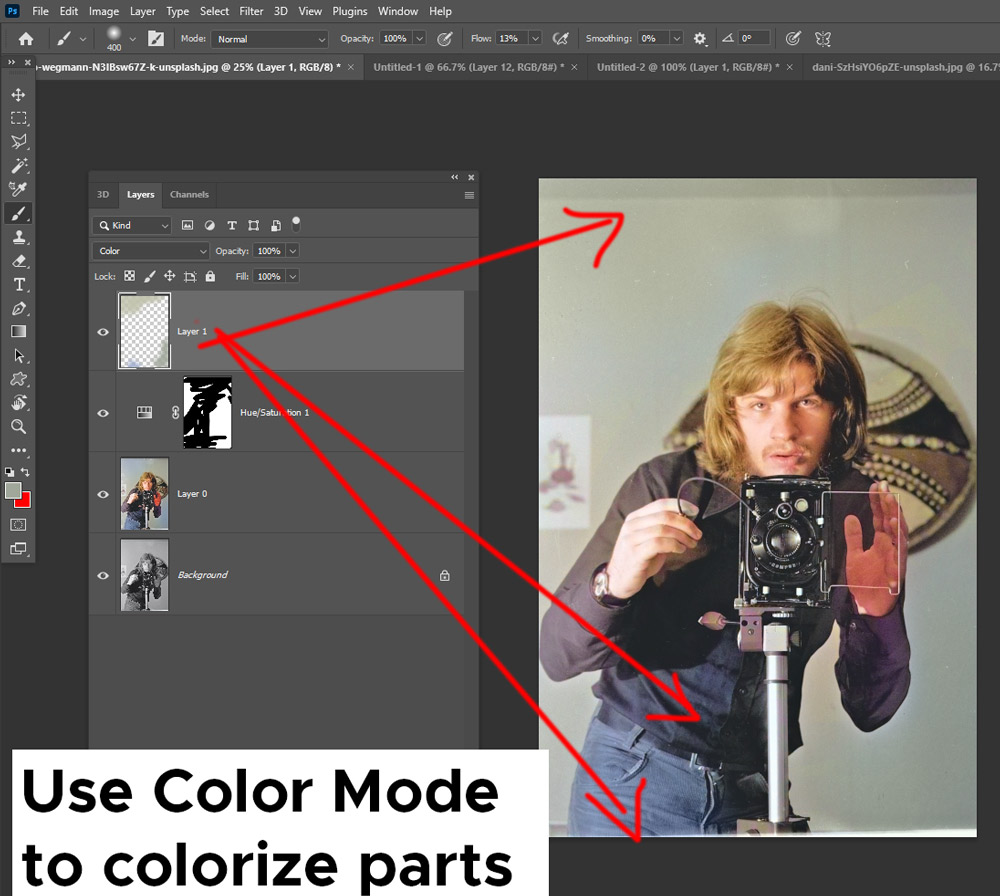
If you want a specific part of your photo to be colorized manually, you can use the Color Blend mode to do that. I have colorized the pant, shirt, and background of the photo using the Color Blend Mode.
Create a new layer and then paint using a soft round brush (make sure to select a color to colorize a part of the image) and then change the blending mode to Color.
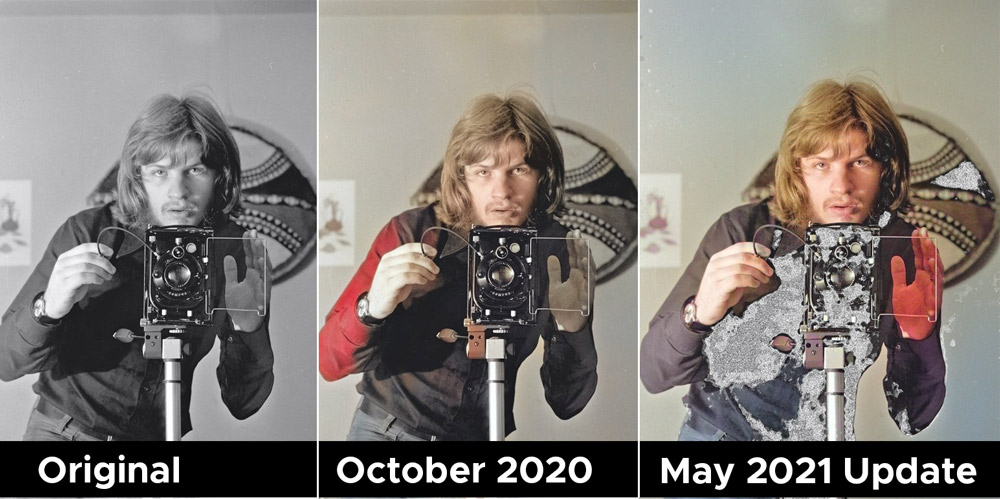
Step 6 – Previous Update vs New Update
When this filter was first released, I covered it in an article on Shift Art. The image that I tested was the same that I am currently using in the tutorial.
You can see the results of the previous version of this filter when it first came out, looking at the image it seems like this update of Photoshop does improve this filter:
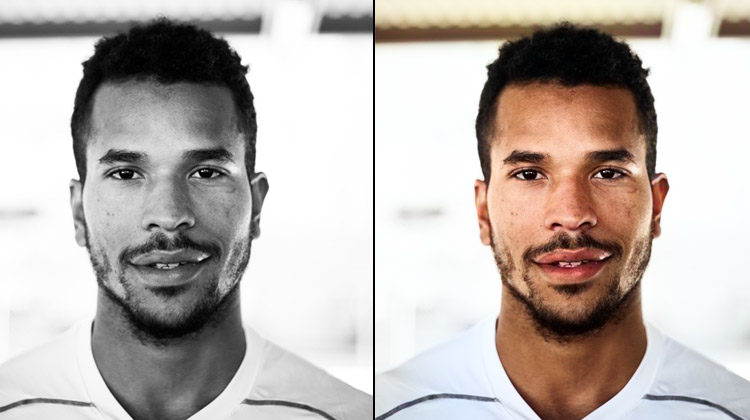
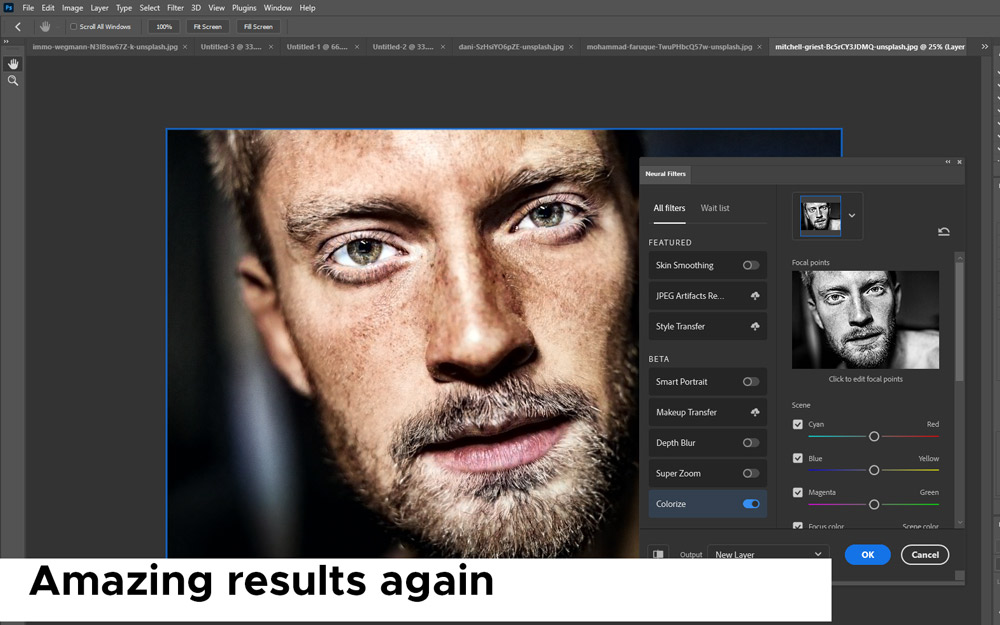
Step 7 – Testing with Non-Black/White Images
To see the accuracy of this filter, I have tested the filter with an image that is not black/white.
I have picked a photo and turned it to black/white by removing all the colors. You can put a Black/white adjustment layer on top of the layer stack to remove the colors of any image.
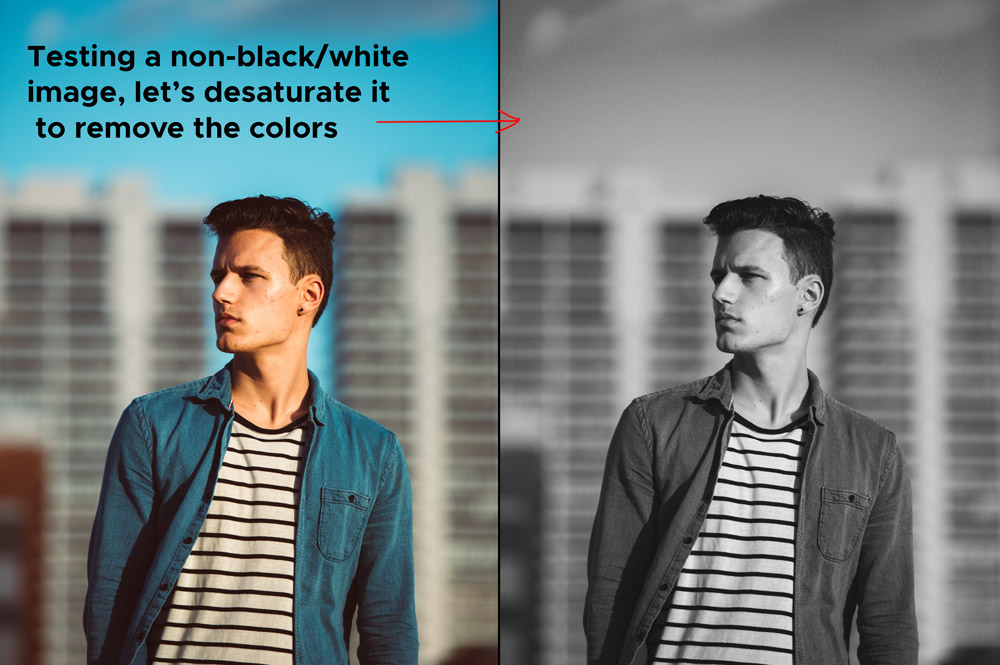
Then, I ran the Colorize Neural Filter, to see how this filter works. You can see it only did a pretty amazing job for the skin tones but failed to colorize the other colors.
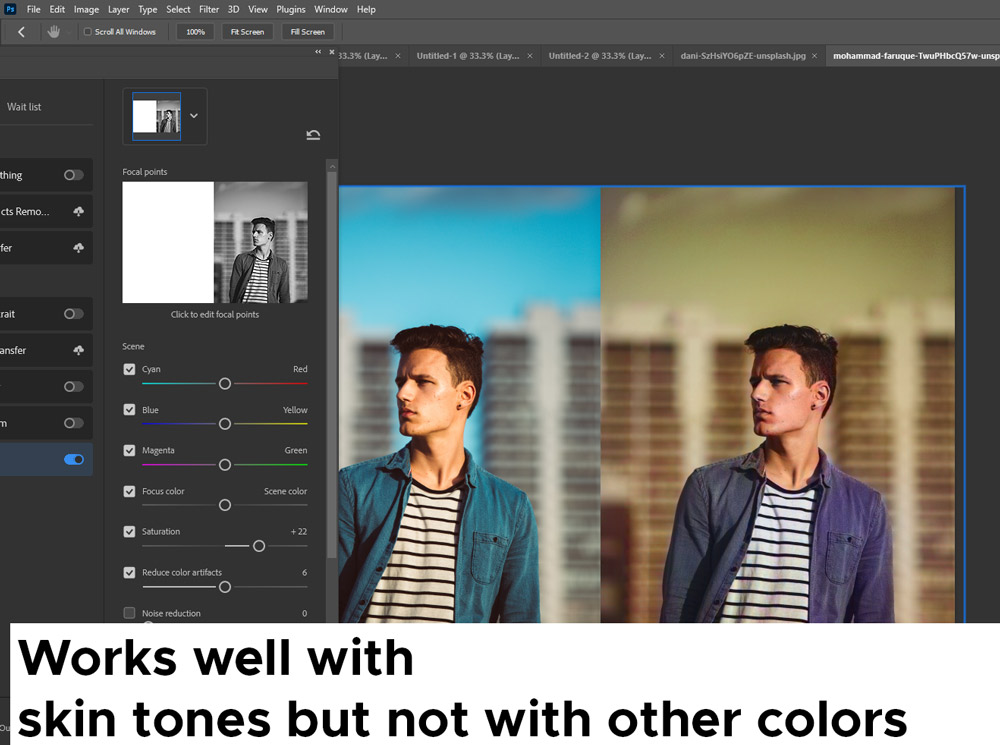
Here you can see the full comparison view, I am not sure but I have a feeling it tries to add orange color tones to the image, or maybe this filter trying to colorize the image with first priority of skin tones.
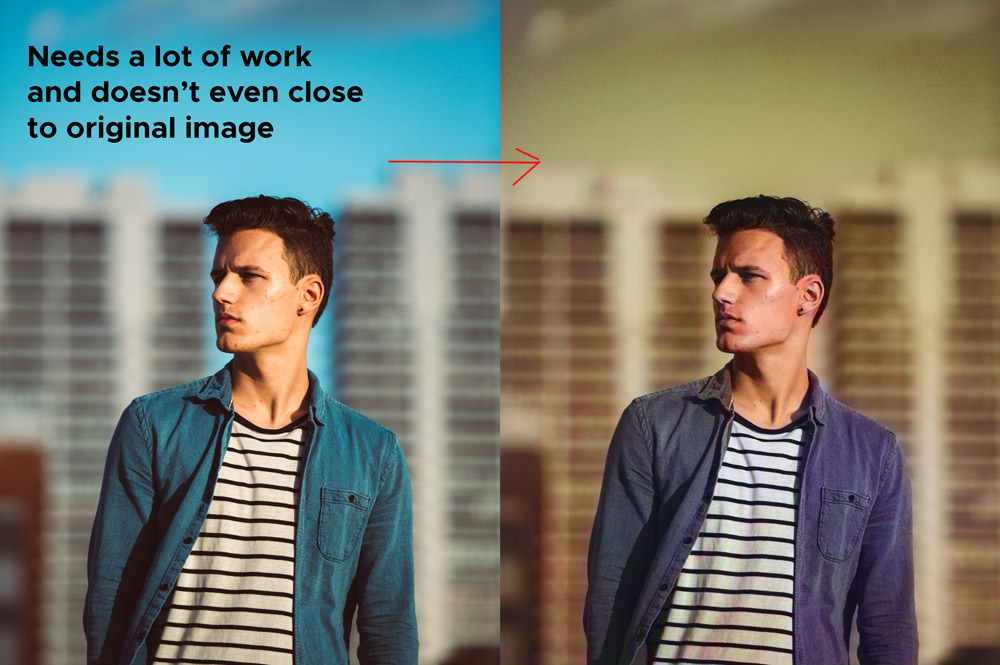
Definitely needs a lot of work, and objects identification in the filter is worse.
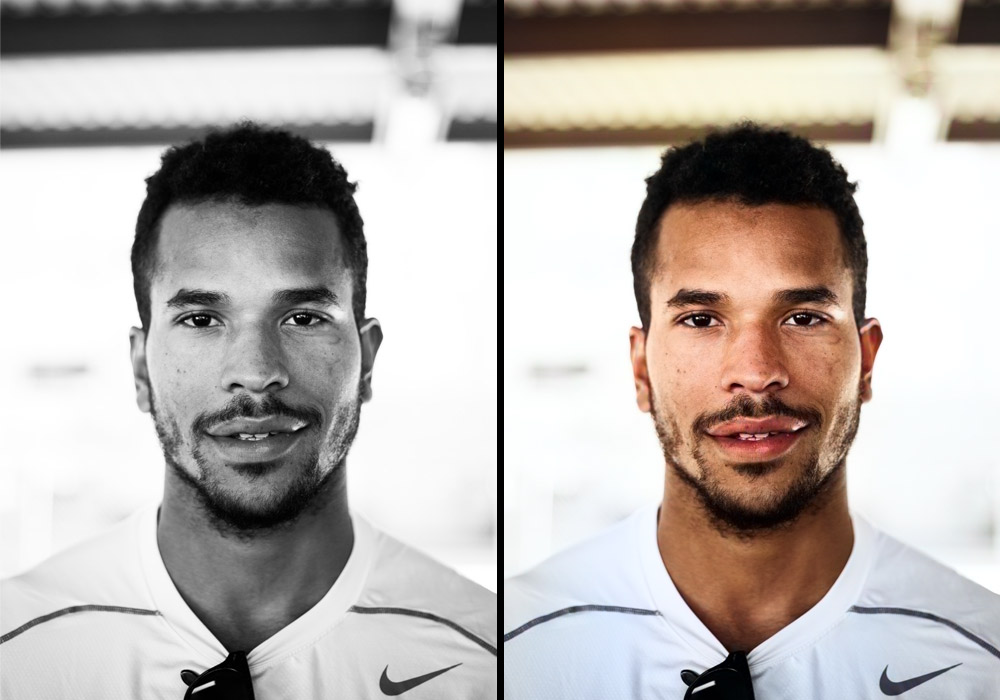
Step 8 – Works Well With Portrait Images
Instead of giving the filter a complicated image to colorize, I then tested the filter with some portrait images, and needless to say it did an outstanding job. I don’t even have to customize any settings.
Here you can see that I ran the filter on a portrait:
Here is the first example:
Here is the second example:
By far, I feel like you can use this filter on portraits as the filter will have less complication to colorized the image. I hope you enjoyed the tutorial. Let me know if you have questions or if you ever have colorize a black/white photo.
Leave a Reply