A couple of weeks ago Adobe announced the latest release of the Photoshop CC which is 19.1. Adobe introduces a bunch of great features with this release and one of them is the Select Subject that let you make selections with a single click. Yes, you heard it right from now on you can make the selection in Photoshop with just one click.
The new feature is based on Adobe Sensei technology which is machine learning algorithm used by Adobe. It basically determines the subject in an image and can recognize human, animal, and birds to make the selection process faster than ever before.
Accessing the Select Subject Feature
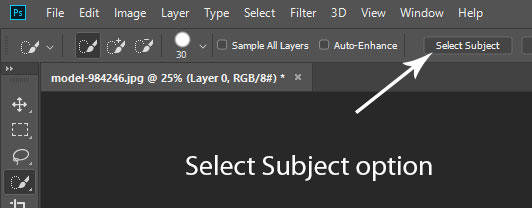
You can access this feature in a couple ways. You can activate the Quick Selection Tool and when you activate it you can see the Select Subject option on the options bar.
You can also go to Select > Select and Mask to use this feature once you opened an image in Photoshop.
Using the Select Subject
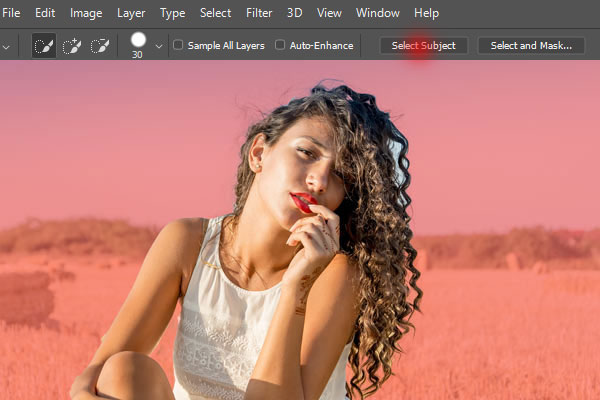
Let’s try this option and see how it works! I opened this girl image in Photoshop by selecting File > Open.
You can see the background isn’t that complex right but the hair can cause a problem with this feature. Let’s see how it tackle this situation:

Once you opened the image, select the Quick Selection Tool (W) and then click on the Select Subject to make the selection. Once you did the algorithm will make selection and here you can see how it has made the selection:

While the selection is still active, click on the Add Layer Mask Icon at the bottom of the layer to extract the background.
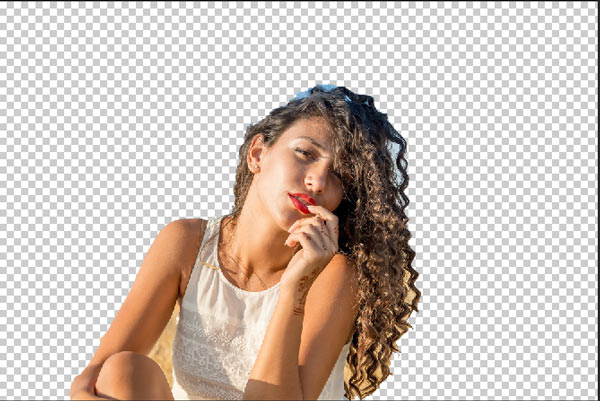
As you can see that it did the pretty good job but not that much as many of you may be expecting. You can see that it got some background left around the hair on the right side. The background under the hand and under her hair is still there. But it nicely removed the background on the left side like you see that it did a good job on the hand and a bit of the hair as well.
But still if I need a clean background I need to fix it further like using the Pen Tool (P) to select around under the arms, using the Select and Mask to refine the selection further, at last I also need to paint some hair or maybe adding the hair stock image there to fix it.
More Examples
Here you can see the nasty selection mady by Photoshop:
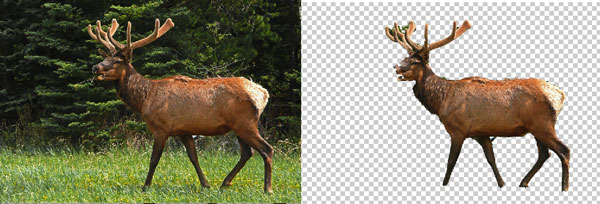
Here it did the best:

Is it Really Useful
Earlier, when we don’t have this feature we usually use the Quick Selection Tool to make a selection. If we got the complex background in an image then we also used the Quick Selection Tool for making a rough selection and then using the other technique like the channel techniques, which I have written a tutorial on it, to further remove the background properly. I think this feature will only avoid the use of the Quick Selection or Magic Wand Tool in some images but I don’t think so this will replace them completely.
So it probably Yes, in my opinion, to some extent. It will work great in the image which has a solid background like you see in the example of the bird. So when you have a solid background or it is clean then it will give you the best results.
But when the background got complicated like in the girl and deer image then it won’t work. It works in some areas but we expect much more from the Adobe. Overall, I’d say it’s a nice addition, especially for the beginners!
Leave a Reply