In this tutorial, you’ll learn how to fix underexposed photos in Photoshop. We’ll target shadows using Channels and make them brighter using a Curves adjustment layer. This is going to be a really handy tutorial to fix exposure in your photos if you have a photo that needs to fix exposure this tutorial might be handy for you. Let’s get started!
Step 1 – Select Appropriate Channel
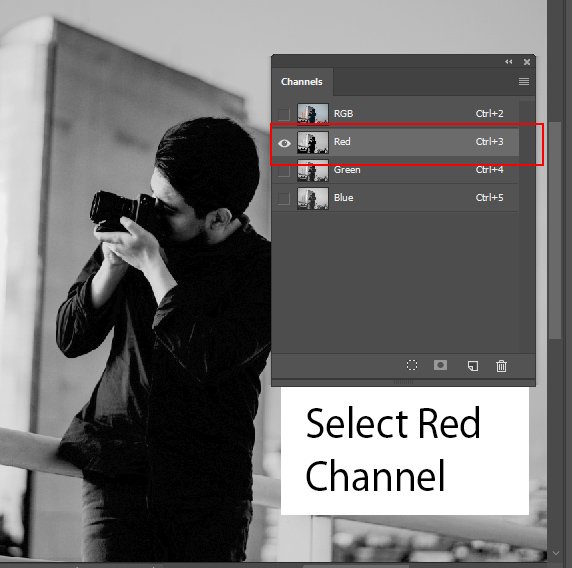
Underexposed photos mean image lacking details in shadows. When we fix the underexposed area of an image the goal should be to make the selection of shadows. In order to do that, we’ll use channels, go to Window > Channels.
Once you are in the Channel Tab select Red Channel. The reason why I selected the Red Channel is that the model skin tone is red. Right now I am selecting highlights in the image but once I selected the highlights then we can invert this selection to select shadows.
You can go with different channels if your image has highlights in a different color. You can also go with any channel if you care about only shadows and in that case any channel will work with any image.
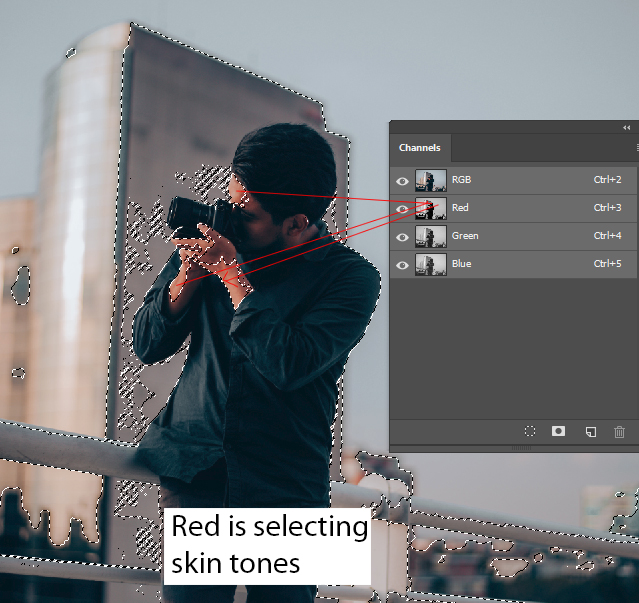
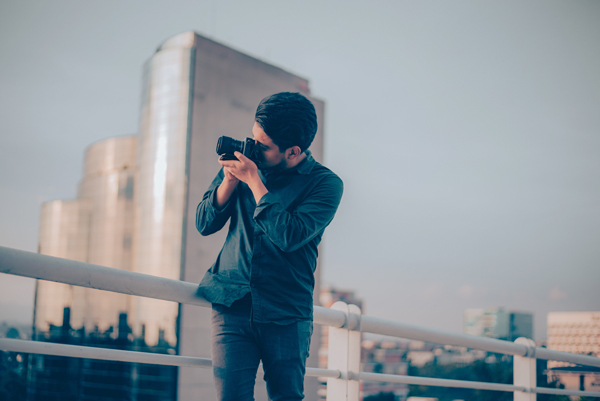
In the image below, you can see red channel selection is targeting skin which I want:
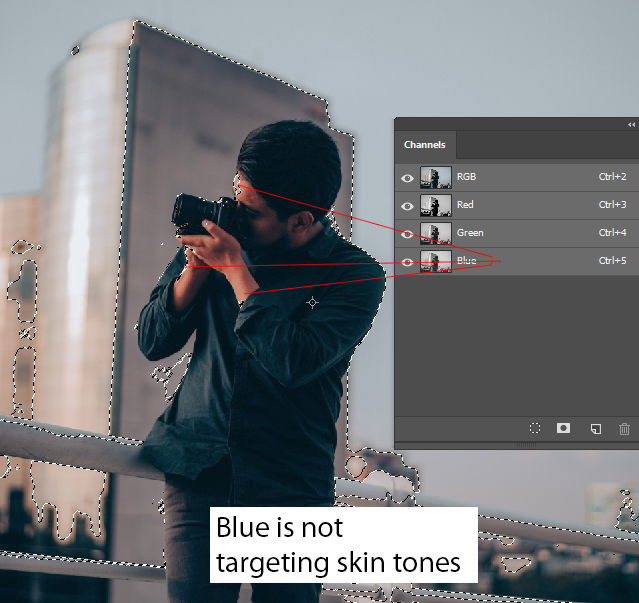
You can see here blue channel is not targeting skin color:
Step 2 – Load Selection
In order to load selection of the selected channel, you can click on the Little Circle Icon to load the selection as shown below.
As you can see, the highlights of the image have been selected:

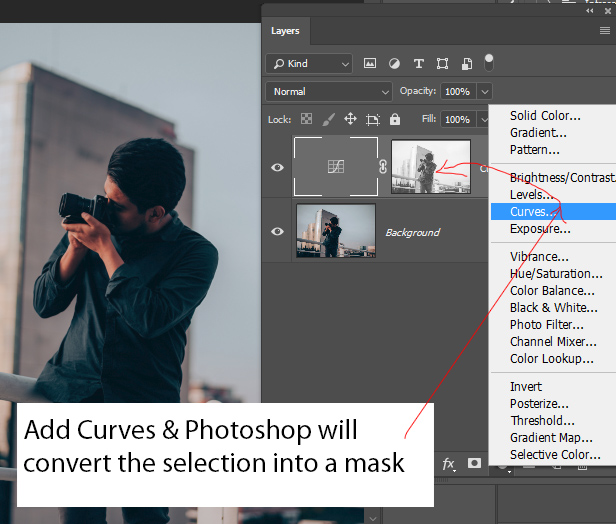
Step 3 – Add Curves Adjustment Layer
Now add a Curves adjustments by selecting Layer > New Adjustment Layers > Curves.
Once you add you’ll see that Photoshop has automatically converted the selection into a Layer Mask.
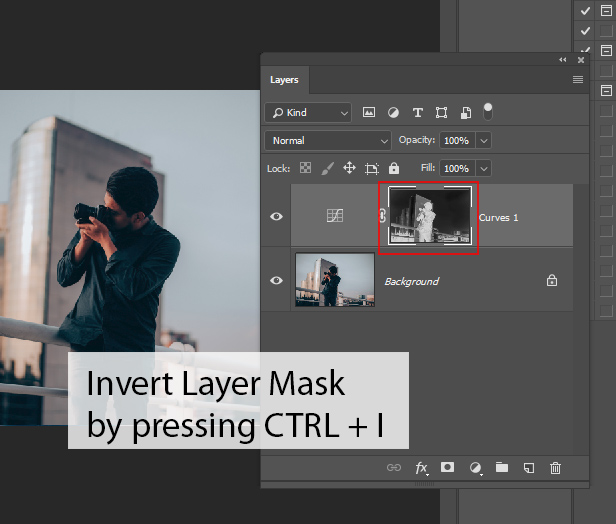
Step 4 – Invert the Selection
Since we have selected the highlights of the image but our goal as I said is to select shadows. To do so, Select Curves layer mask and then press CTRL + I to invert the layer mask.
In this way Curves will affect the shadows of the image which we want exactly.
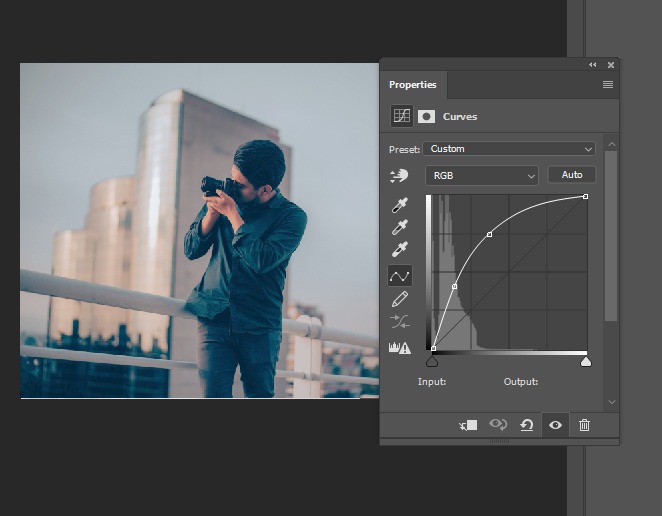
Step 5 – Fix the Exposure
To fix exposure, now we only have to do is to brighten up the image which you can easily do by using Curves. You can use Levels if you prefer but make sure to add it in the Step 3. Use the settings below to brighten up the image, and it doesn’t matter which settings we use it will only affect shadows areas because of layer mask.
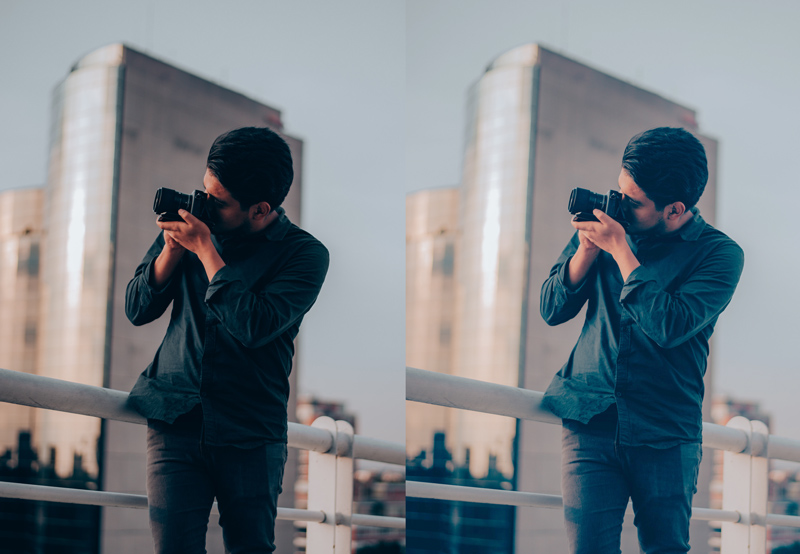
Here you can compare before and after results.
Before:
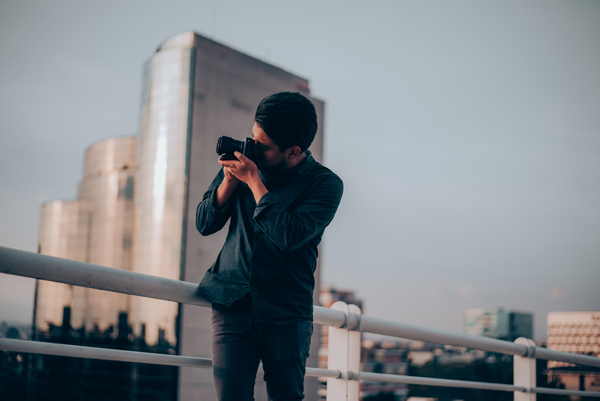
After:
Fix Under Exposed Photos: A Quick Summary
Step 1: Target Highlights using Channels.
Step 2: Load the selection into the Layer Mask of Curves or Levels.
Step 3: Invert the Selection to Affect Shadows Only
Step 4: Finally, Fix the Exposure by Brightening image.
Leave a Reply