
In this tutorial, you’ll learn how to replace a sky using Luminar AI technology that promises to replace the sky in just one click. I am also gonna explain tons of features of AI Sky Replacement that will come handy while editing a sky and will help you achieve a photo-realistic look. Luminar Photo Editing software is really simple to use and very easy to get your edit done in just a matter of minutes.
I think it is the best software for those who are just getting started in Photography & photo editing. Although, I was surprised to see a ton of features such as split toning, advanced contrast, dodge & burning, and many more for pro editors.
Step 1 – Add & Edit Single Image in Luminar 4
First, we need to import images to work in Luminar 4. You can easily add an image to edit by clicking on the + Icon & then choose Edit Single Image. Navigate through your image library and then select an image that you’d like to edit in Luminar 4.

Step 2 – Luminar 4 Interface
A quick rundown of Luminar 4 interface for you guys. I’ll be explaining only the things that will get you going with this amazing software.
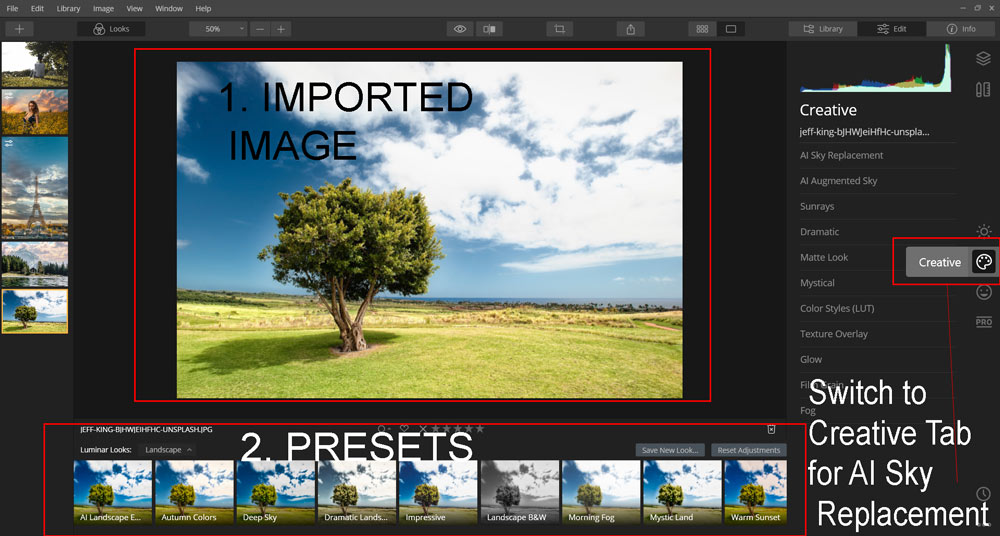
1. You can see the image imported in Luminar. It’s your working screen where you’ll see all of your edit happening.
2. At the bottom, you’ll have a tab called Look Tab. The Looks basically like Lightroom Presets or Photoshop actions where you can apply pre-built effects to your images. Just hover over each of the looks to preview what kinda settings they are applying to your images. For many users, it can be a good starting point to begin with photo editing.
3. We have some panels, on the right, that you can use to edit your images but I am interested in the Creative Panel where we’ll replace the sky using AI. You can activate these panels by clicking on them.
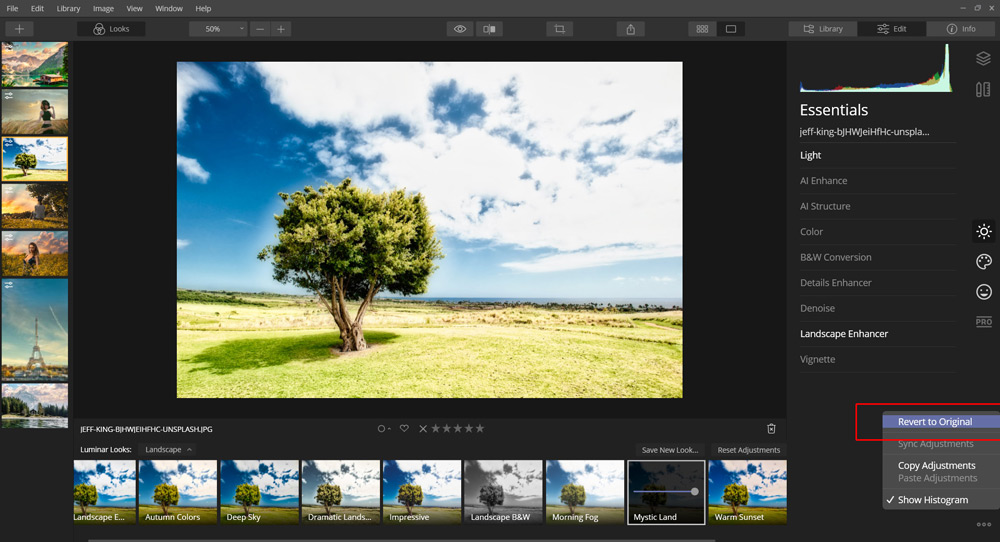
4. Before we begin editing if anything goes wrong or maybe you want to revert to the original image, click on the very right bottom … The three-dot icon then Select Revert To Original to get your original image back.
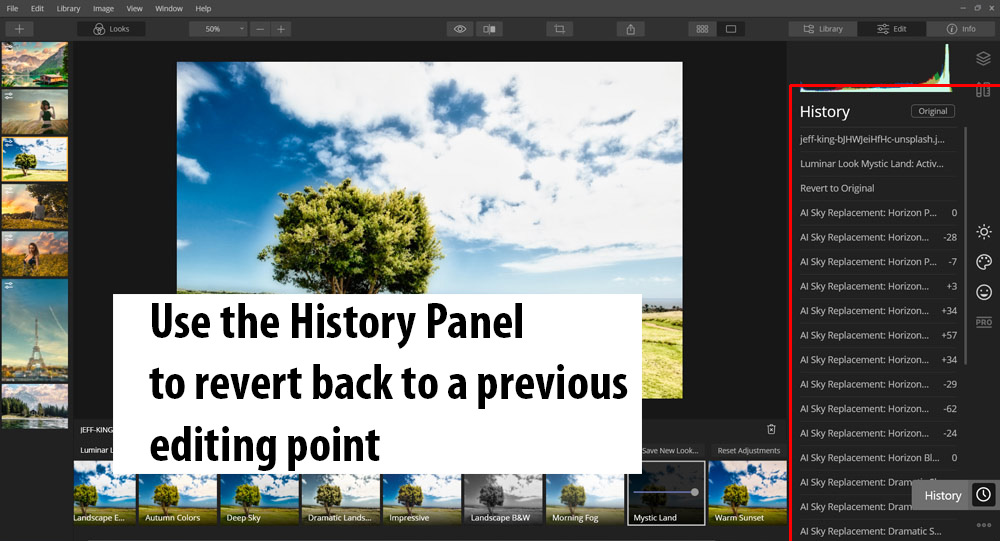
5. You can also take a look at the history panel, to revert to a previous editing point.
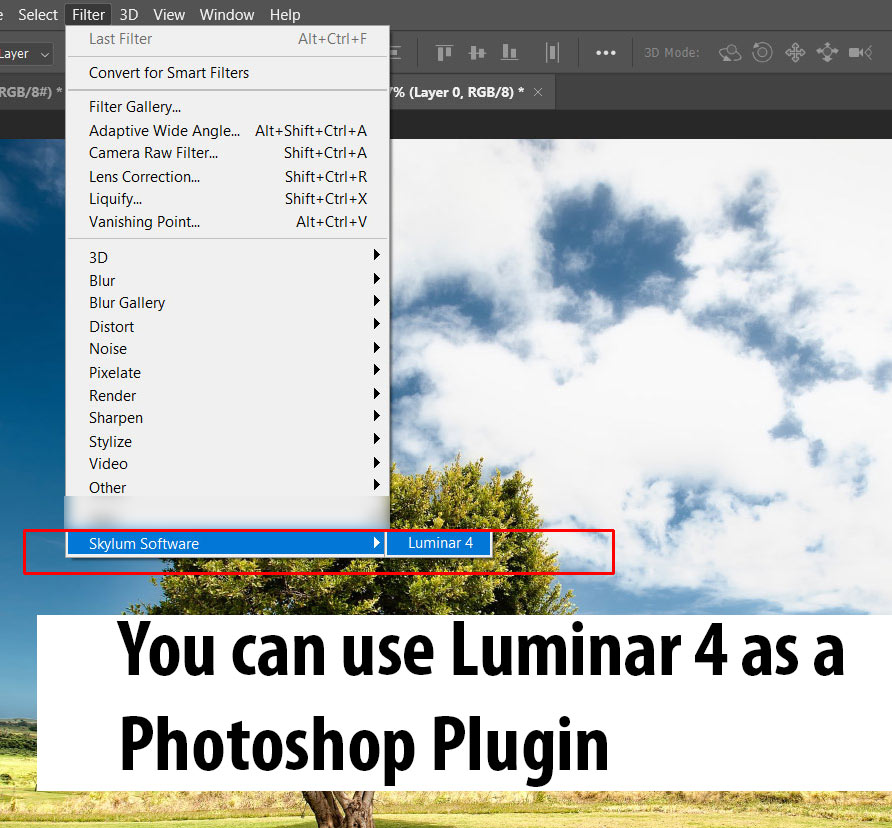
6. You can even use this as a Photoshop Plugin but I am using it as a Standalone photo editor. To use it as a Photoshop plugins, go to Filter > Skylum Software > Luminar 4.
Step 3 – Let’s Replace The Sky with AI Sky Replacement
In the Creative panel, click on the AI Sky Replacement & Select Sky Selection:
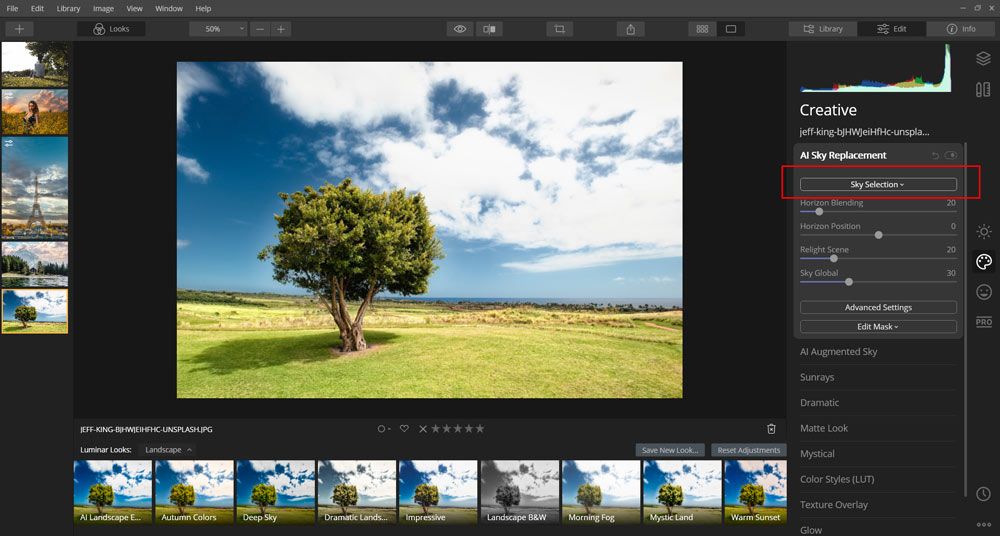
Now you’ll have a lot of options for sky selections. You can use these default sky images to replace the sky. It’s very simple, just select the sky and AI will replace the sky. As you can see I have replaced the sky in just one click and it did a pretty amazing job.

Also, I zoomed in to see the extraction closely, as you can see it just did a clean & neat extraction which I couldn’t do it if I used Photoshop to replace a sky especially in minutes or seconds. That’s awesome.

Step 4 – Load Custom Sky Image
First, I thought that I am only allowed to use their default sky images, then I stumbled upon Load Custom Sky Image which you can find at the very bottom. You can use this feature to add a custom sky.
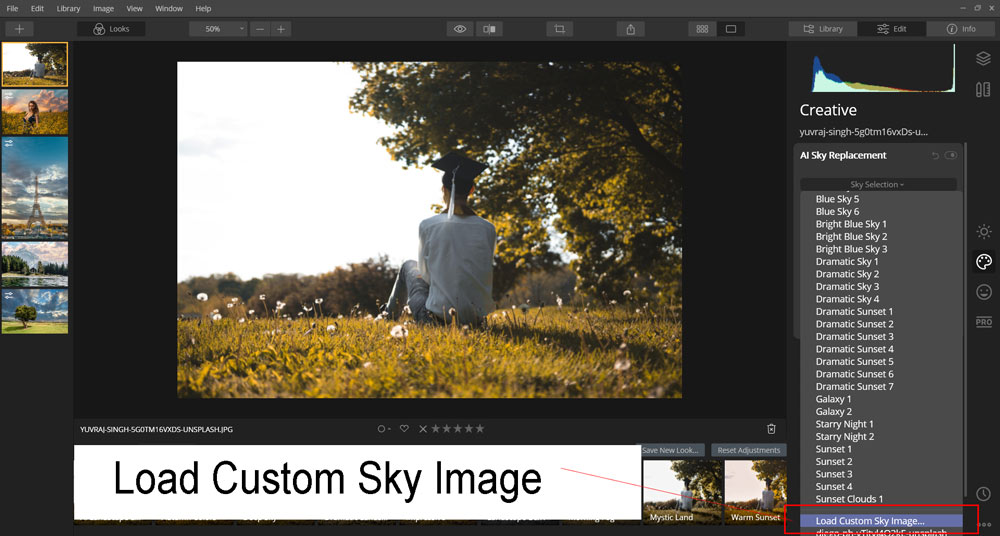
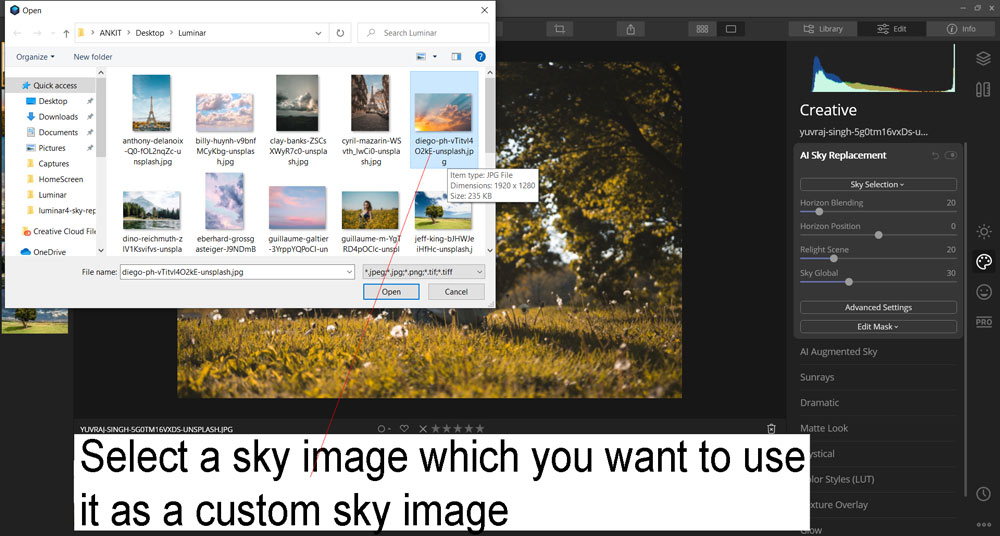
Click on the Load Custom Sky Image and navigate through the image that you’d like to add, select it, and boom you are done.
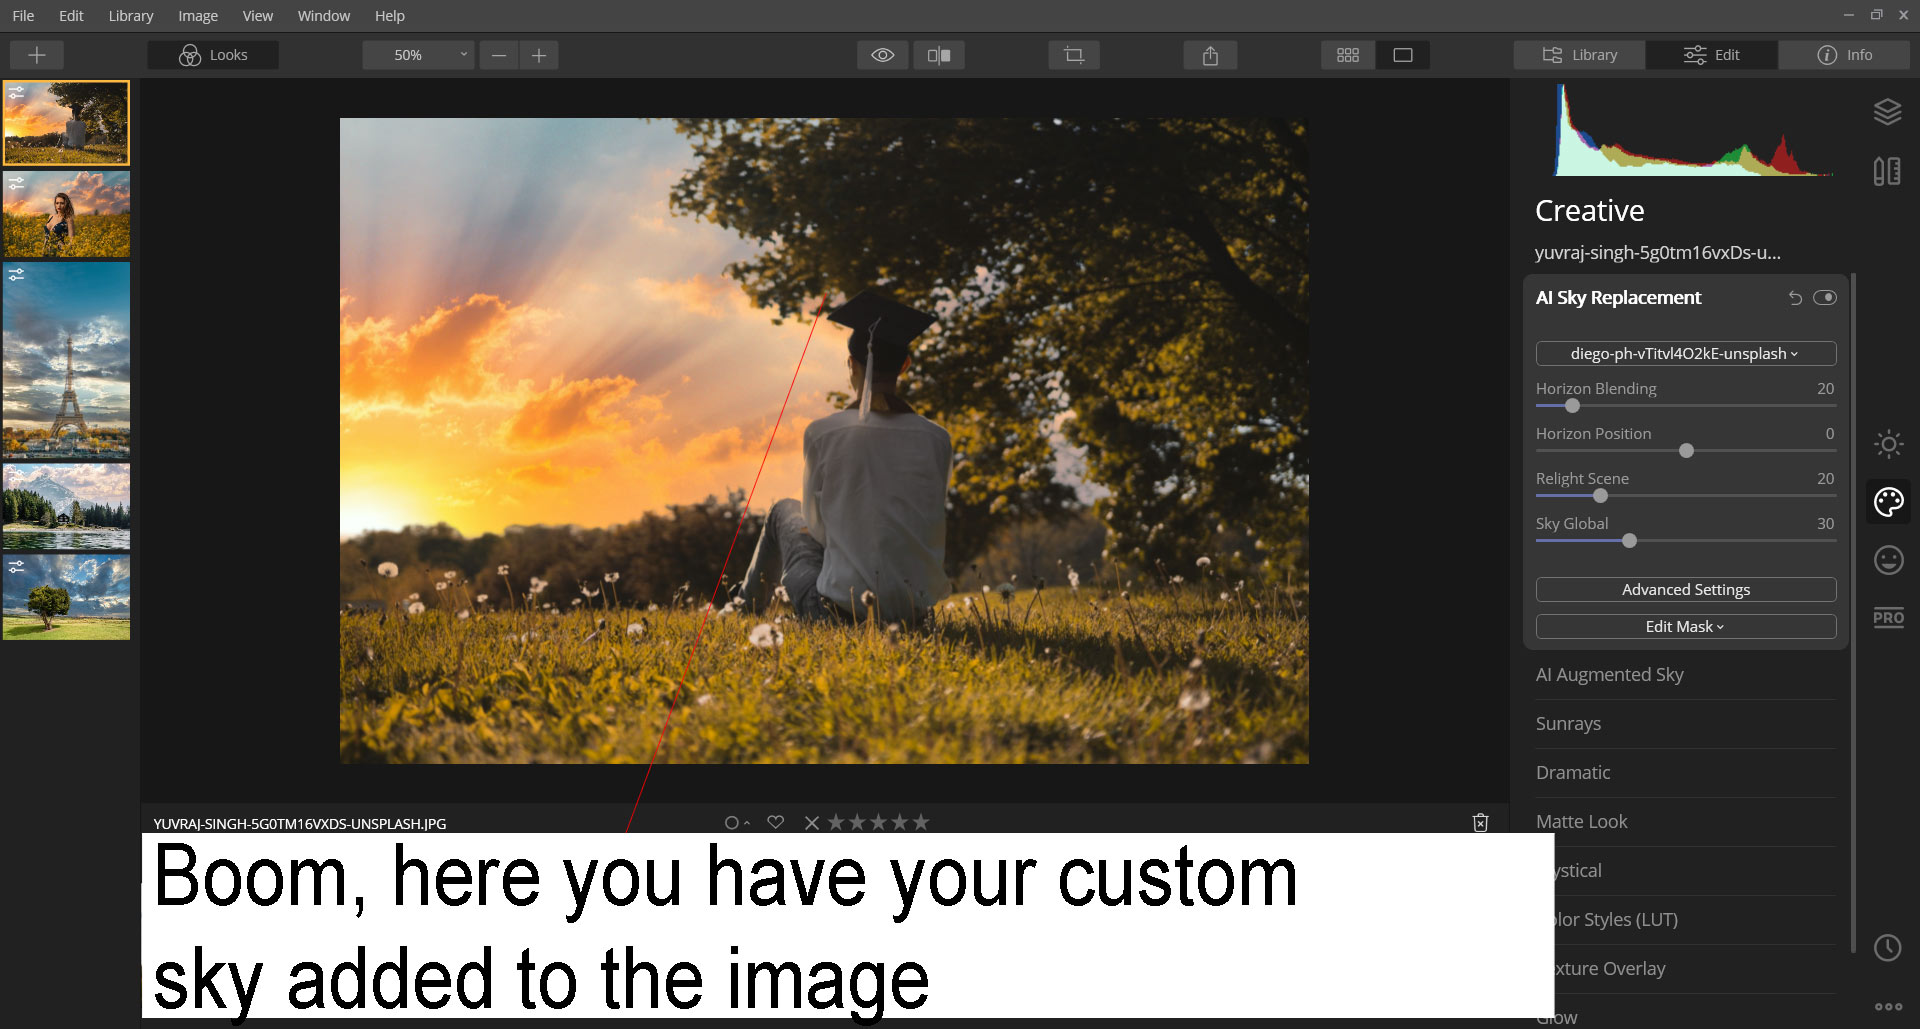
Boom, here you have your new custom sky added in just seconds.
Step 5 – Horizon Settings
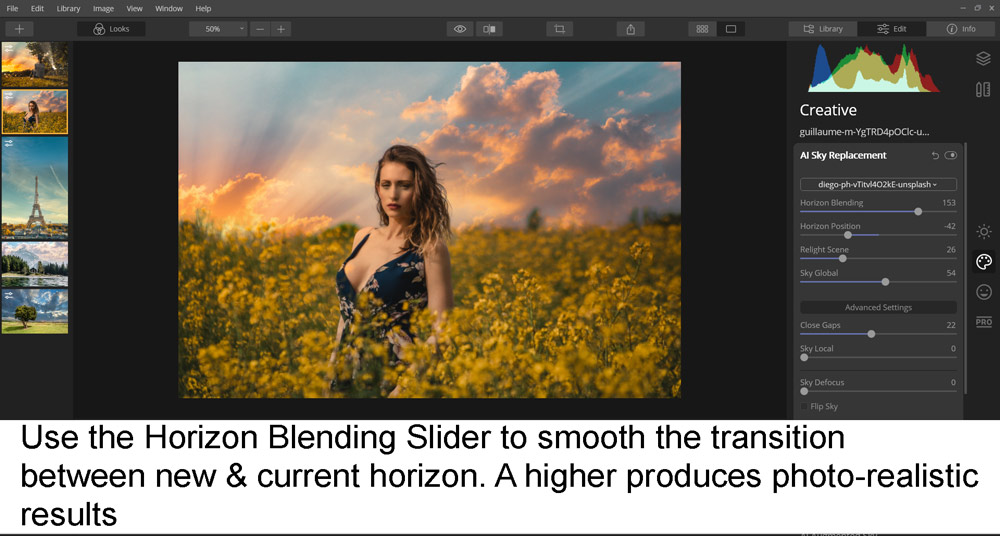
In the Horizon Blending you can increase/decrease the value to create a smooth transition between the new & the current horizon of the sky that is added. You won’t see much difference here but when you zoom in you might be able to notice significant smooth results that lead to a photo-realistic look.
I didn’t like the white areas in the new sky image and I want to move it a little bit below the horizon.

You can use the Horizon Position Slider to move the sky image below/above the horizon line by either decreasing/increasing it. Since I want to move it below the Horizon, I decreased the value of Horizon Position.

Step 6 – Matching Light, Colors & Control The Visibility of Sky
When you add an image to your images the exposure and colors should match to get a photo-realistic look. This is where the Relight Scene Slider comes into to play. I increased it so it can match the lighting & the colors of the new sky with the rest of the image.
Usually, a medium value is a good starting point but you can go for a higher value if you want to, so it all depends on your image. When you increase/decrease the Relight Scene value keep an eye on your image to see what’s going on.

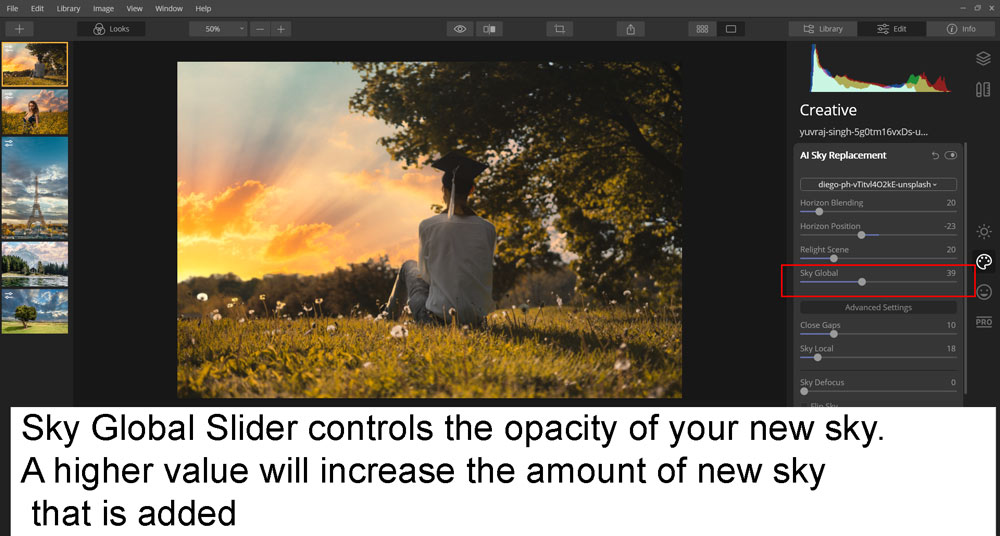
Next, we have Sky Global Slider and you can use this slider to control the visibility or opacity of the new sky. A higher value would be ideal if you don’t want the existing sky of the image visible but a medium value will give you composite looking results (you’ll see both skies, old & new, parts in the image).
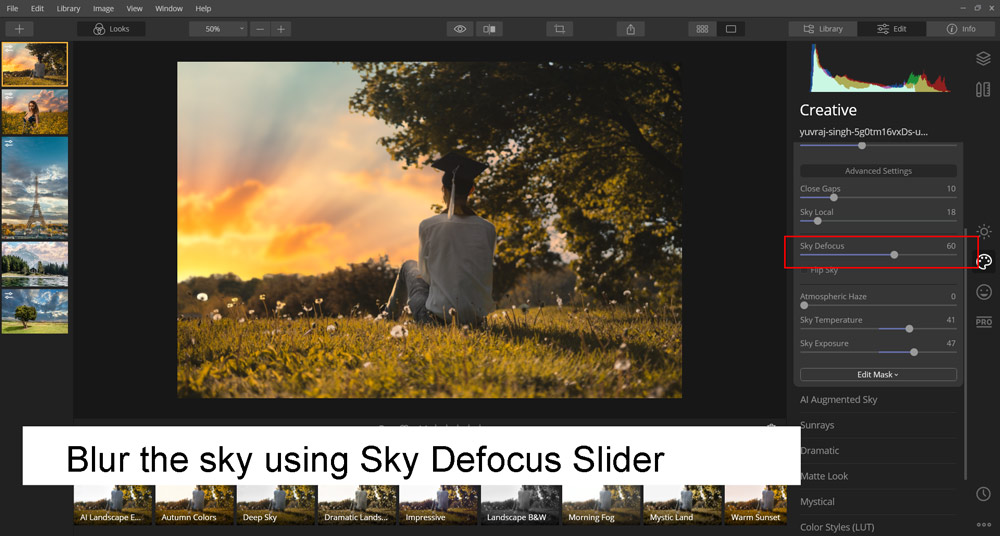
In the Advanced settings, you can blur the sky if you want to by increasing the value of Sky Defocus which is self-explanatory & it will blur the sky making it out of focus.
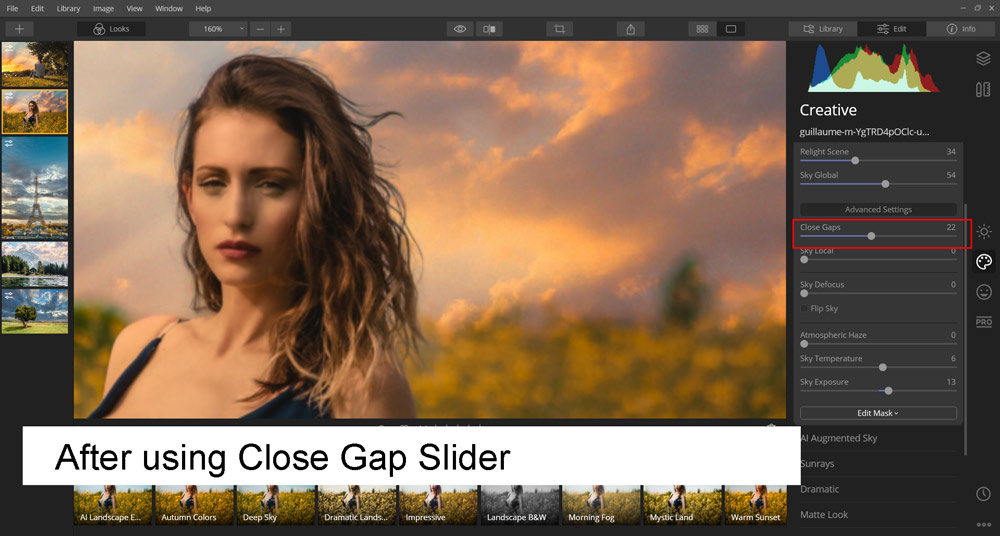
Step 7 – Fixing Small Details with Advanced Settings
You can fix the small details using Close Gap Slider. Here is the image and I attempted to change the sky but I know hairs will make it difficult to replace the sky and I’ll end up with harsh edges of the hair that won’t be filled while replacing the sky. You can see the small details that need to be fixed in the image below.
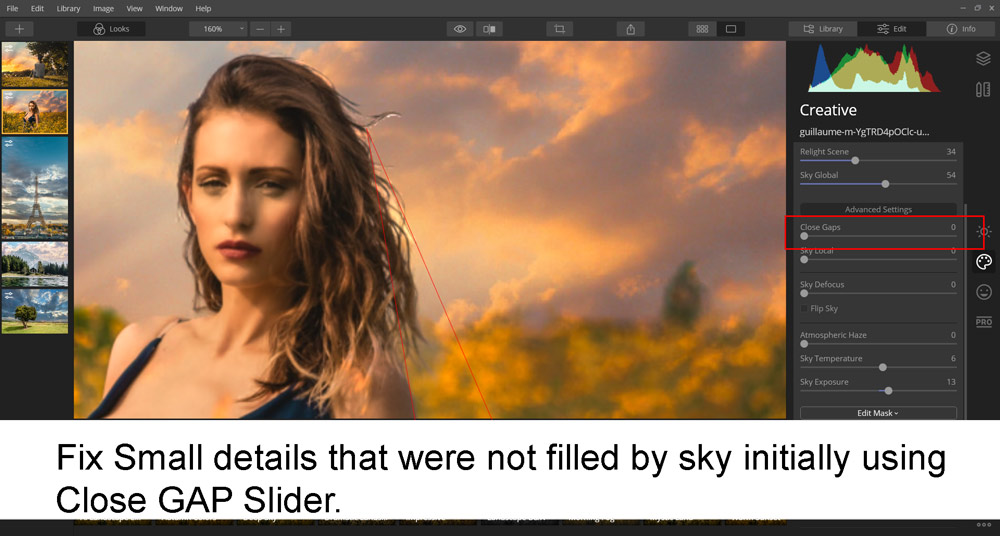
I increased the value of Close Gap to fix those small details with the new sky. So if you have found some details that are glitchy or hard, use this slider to fill up those details.
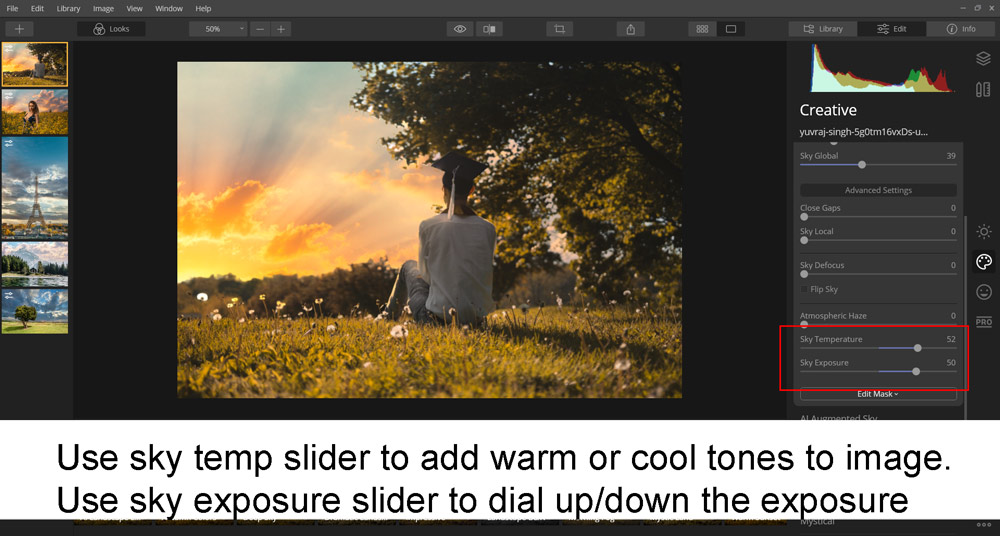
Step 8 – Subtle Coloring
Once you have everything set and you are happy with your new sky replacement by Luminar 4, you can add a little bit coloring to the sky by either adding warm/cool tones using the Sky Temperature Slider. Increase it to add warm tones and decrease it to add cool tones. I added warm tones to create a sunset mood in the image.
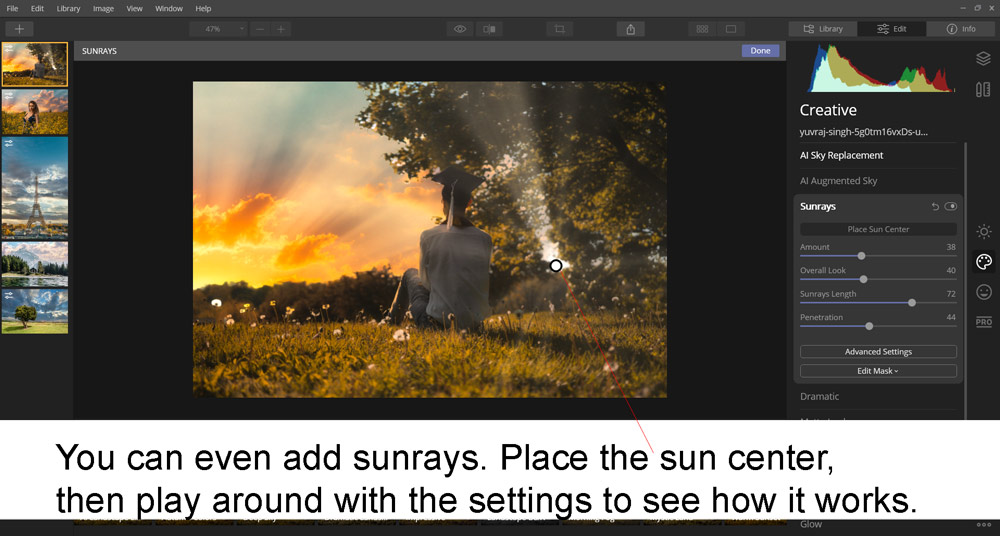
Step 9 – Play Around With Other Options
There is a lot of tabs just below the AI Sky Replacements such as Dramatic, Sunrays, Matte, Mystic, and many more. They all are self-explanatory and you can understand them by their names.
For example, I added sunrays effect to the image by placing a sun center, and then I played around with the sliders to add sunrays effect in the image.
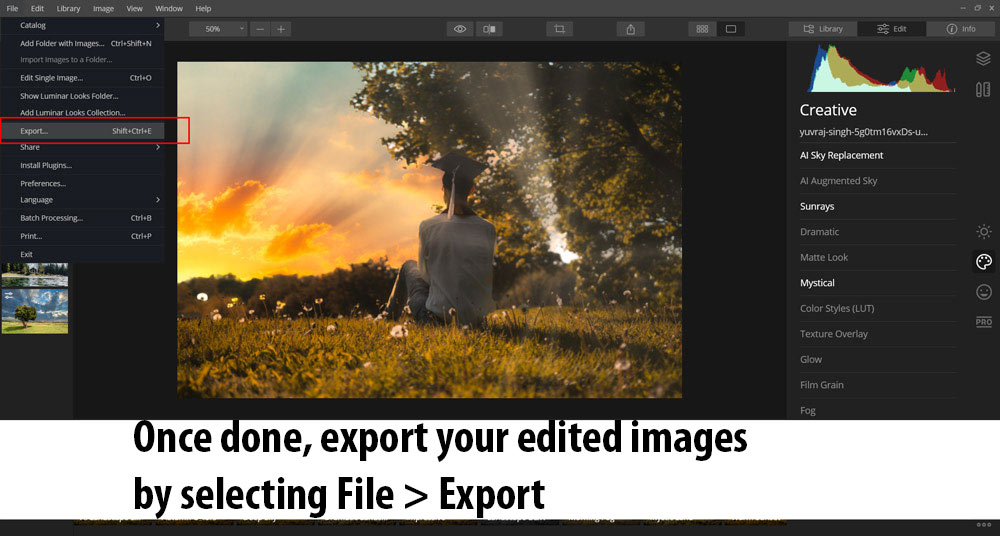
Step 10 – Export Your Creative Edits
Once you are done with all the editing, you can export the edited image by selecting File > Export.
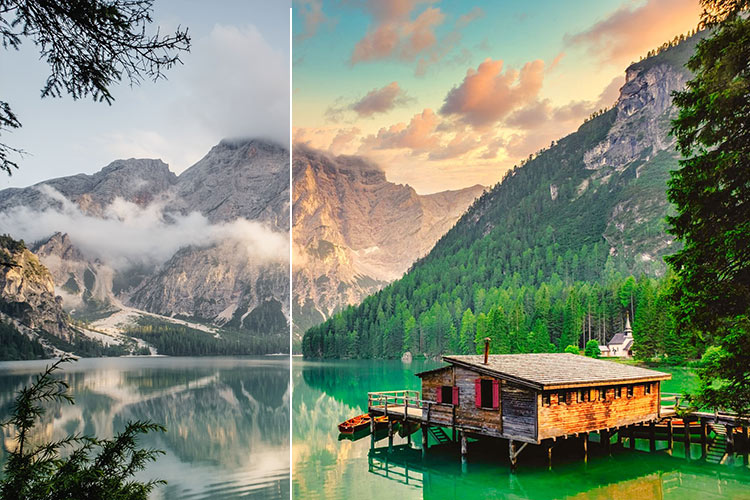
Before & After Examples of Sky Replacements
Example 1:
Example 2:

Example 3:
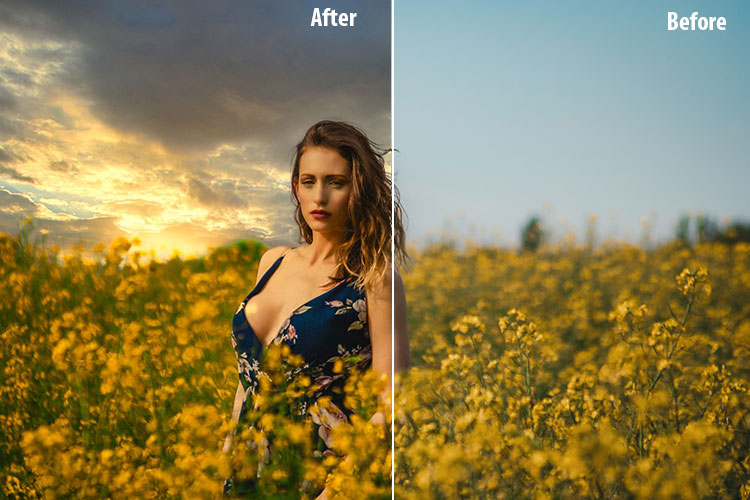
The AI Sky Replacement does its job and it even goes beyond the expectations, one can easily replace the sky in just seconds with Luminar 4. I think you just need to learn how to use it to get the most out of it. Using it with Photoshop will give you a variety of options as you can further edit & enhance the sky in Photoshop. I used it as a standalone photo editor and I don’t feel like the use of Photoshop so far.
I hope you enjoyed the tutorial and let me know if you find the tutorial useful by commenting in the comment section below. I’ll be posting a couple of more tutorials of Luminar 4 to get you going with this fantastic software.
Leave a Reply