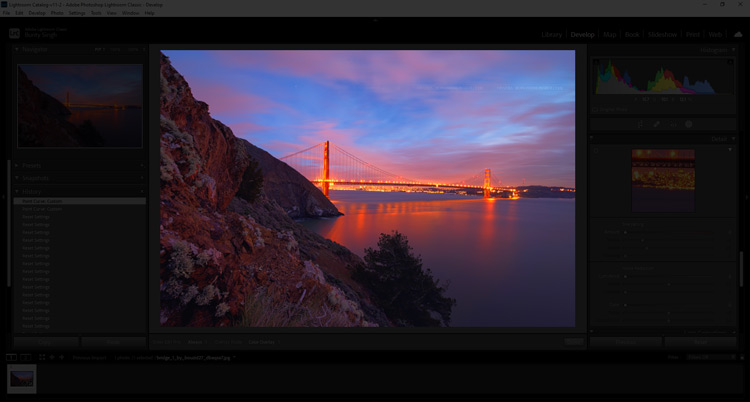
In this article, I’ll go through 10 essential panels that you need to know in Lightroom. These panel will help you during your photo editing workflow and understanding them can make your editing process a breeze. Let’s get into the post.
The Navigator Panel
First, we have The Navigator Panel helps you to move around and zoom in on your image in Lightroom. Simply begin by clicking somewhere over your image. Once you click, you’ll zoom in over the area where you clicked. A smaller box will appear over your image. Click and drag on the smaller box to adjust which zoomed-in area of your image you see in the main image area.
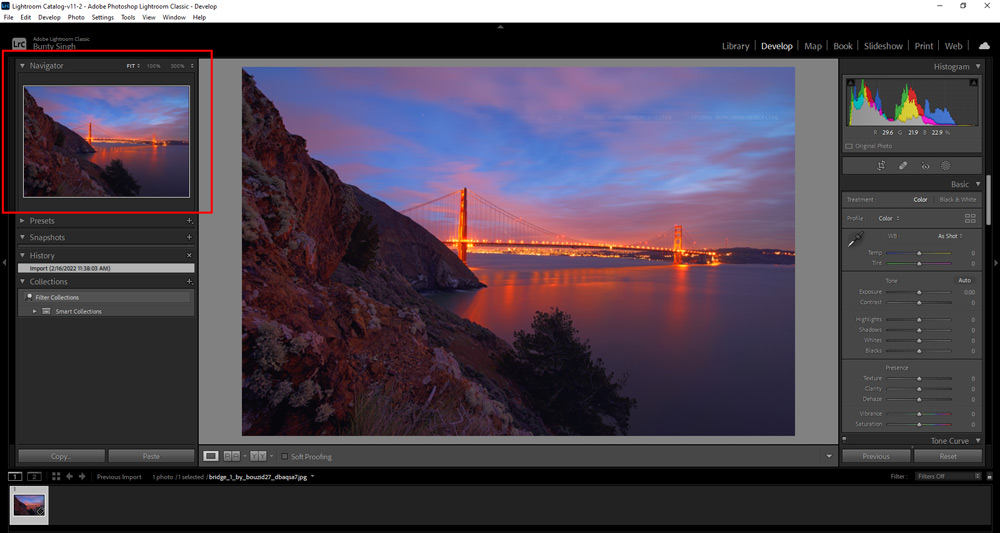
At the top of the Navigator Panel you’ll also see some words and numbers. These are also helpful to zoom in on your image.
- FIT—This will return your image to it’s natural fit within the main window.
- FILL—This will fill the main image space (including the gray that typically surrounds your image) with your image.
- 1:1—This will zoom the image in to 100%.
- 2:1—This will zoom the image in to 200%.
Next to this last set of numbers is a double arrow. When you click on this double arrow, it will show you many different ratios that you can use to zoom into your image
The Presets Panel
The Presets Panel is located right below the Navigator Panel on the left-side of the Develop Module. Presets are digital recordings of editing steps that can be applied with one click. You can purchase presets, create them yourself, or use the default ones included with Lightroom.
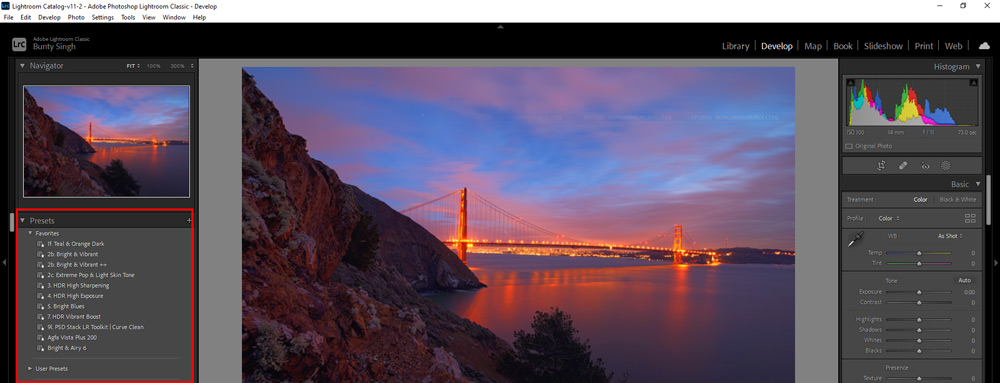
This panel is where Lightroom will store all the presets that you install as well as any that you make. To see a preview of a preset in the Navigator area before you apply it, just hover over the preset you want to see. If you want to apply the preset, simply click on it. You can download presets from our free presets library to save time in editing.
The History Panel
The Lightroom History Panel is where Lightroom records every step you change you have made to your image. This is one of the main reasons I choose to use Lightroom over other editing software.

Using the History Panel, you can go back to any point in your history and start from there or go all the way back to beginning and start over. And when you exit Lightroom, your history won’t go away. It will still be there the next time you open Lightroom and will still be there 5 years from now if you need it.
The Histogram
The Histogram Panel is the top panel on the right-side of the Develop Module. This panel will give you lots of information about your photo. The histogram is a graph of the different tones in your image. The darker tones are graphed on the left and the brighter tones are graphed on the right.
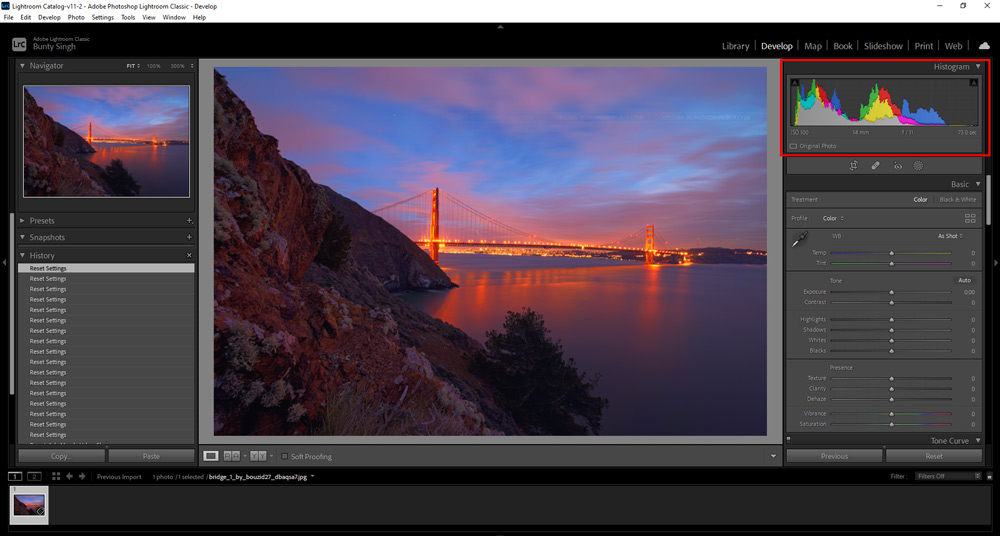
One of my favorite things you can do is view the RGB color values of any area of the photo that you hover over. This can help you edit skin tones and proof your photos. While hovering over a skin tone in your photo, the blue value should be lowest, the green should be higher than the blue, and the red should be the largest number. Such a powerful and helpful panel
The Local Adjustment Toolbar
Local Adjustment Tools that will allow you to make adjustments to small/local areas of your photo.
- New Masking Panel
- Crop Tool
- Red Eye Removal
- Spot Removal
- Crop Tool
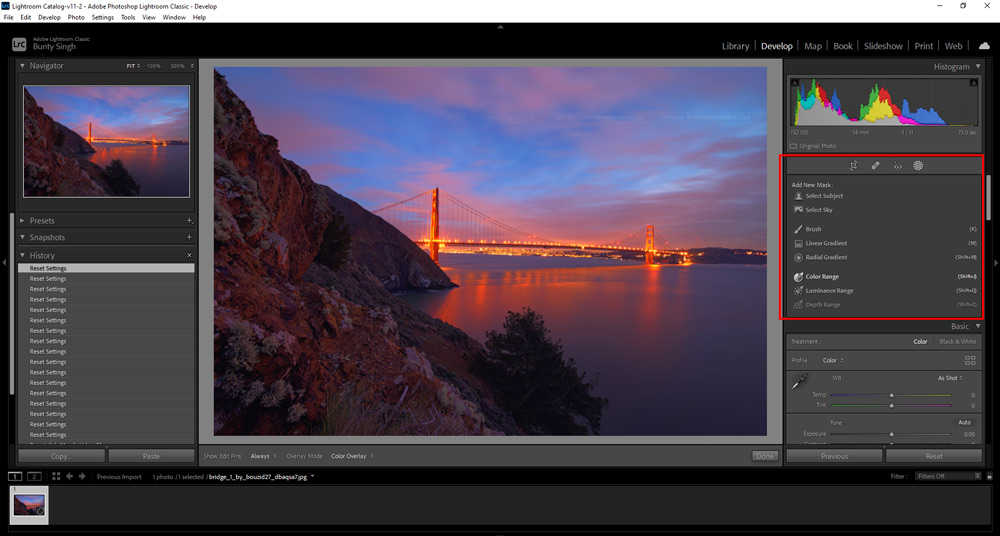
Clicking on any of these tools will open a new panel giving you options for using it. For the Select Sky, Select Subject, Brush, Radial Filter, and Graduated/Linear Filter those panels will look similar to the Basic Panel.
The Basic Panel
The basic panel will be your MOST used panel when making adjustments to your photo. This is where you will adjust your white balance, exposure, contrast, shadows/ highlights, clarity, and saturation. Moving any of these sliders to the right will increase the value and moving them to the left will decrease the value.
Also in the White Balance section of the Basic Panel, you will find Temp and Tint sliders.
- The Temp slider will adjust the coolness/warmth of your image. Moving the slider right will add warmth and left will add coolness.
- The Tint slider adjusts any green and red tint. Moving the slider to the right will increase the reds in your image. Moving the slider to the left will increase the greens.
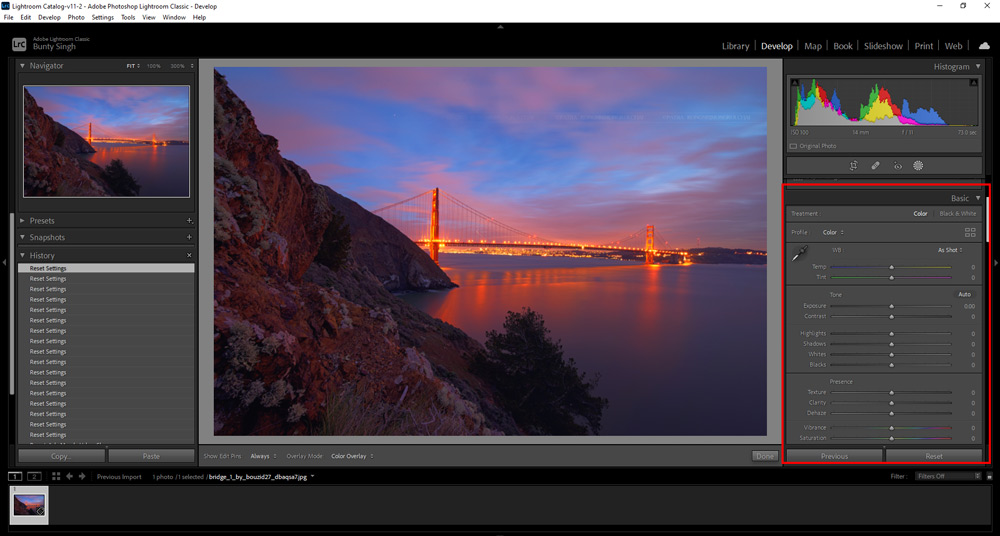
The Tone section of the Basic Panel is where you will adjust the overall brightness and contrast of your image.
- The Exposure slider will adjust the global brightness of the photo. Move the slider to the right to add light and to the left to darken.
- The Contrast slider will adjust the contrast between the light and darks. Use this slider sparingly as it can become quite harsh quickly.
All of the panels on the right-side of the Develop Module will edit your whole image. We call this global editing. There isn’t a way to paint off/on these edits or remove them from part of the image so keep that in mind when you are applying them.
- The Highlights and Whites sliders will help you adjust the bright areas of your image. If those need brightened, move the sliders to the right. If you need to recover
areas of your image that are too bright, slide them to the left. - The Shadows and Blacks sliders will help you adjust the dark areas of your image. If those areas need brightened, move sliders to the right. If those areas need darkened, adjust the sliders to the left.
The Tone Curve Panel
The Tone Curve panel is extremely powerful and has a lot of hidden functionality. What we are going to cover is a general overview of the Tone Curve panel and using it to add contrast and help adjust exposure.
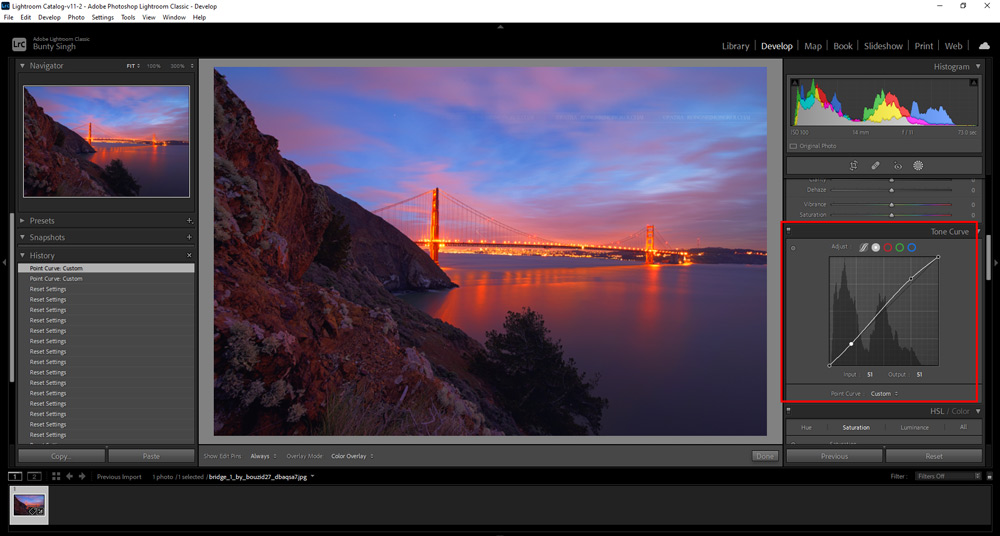
Brightening an image using the Tone Curve panel is as easy as clicking and dragging upward somewhere in the middle of the diagonal line. To darken an image, you will click and drag downward. The same targeting applies to darkening as well.
The HSL/Color Panel
The HSL panel is an abbreviated name for hue, saturation, and luminance. These words are a mouthful so Adobe shortened it to HSL/Color panel.
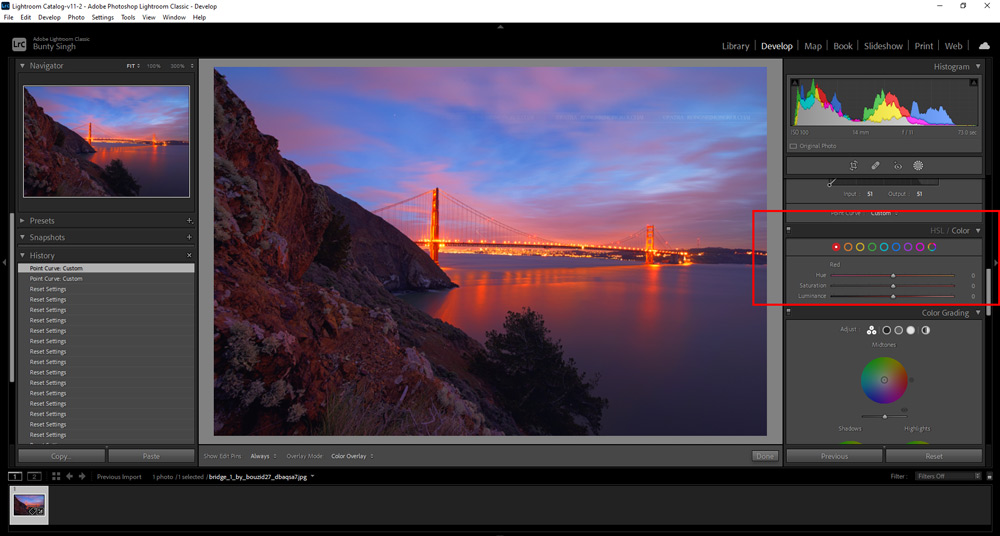
Hue: Generally, we think of hue in terms of the shade of a color on a gradient. It is dependant on the wavelength of the light reflected. For example, is the color red in your image more of an orange-red, or more purple?
Saturation: When we talk about saturation, we are referring to the intensity of a color. Super saturated colors usually convey brighter feelings like happiness and joy, whereas muted and desaturated color can lend a sense of brooding or sadness.
Luminance: Luminance is the reflective brightness of colors. It is handy when there are specific colors within an image that you feel should be either darker, or brighter.
Using the HSL sliders in Lightroom Classic can give you a lot more flexibility. You can perform better color correction based on particular colors that exist in your photo.
The Color Grading Panel
The Color Grading panel allows you to add a color tone to the midtone, shadow, or highlight areas of the image. You can use color grading to warm up or cool down the highlights or shadows rather than adjusting the temperature of the entire image.
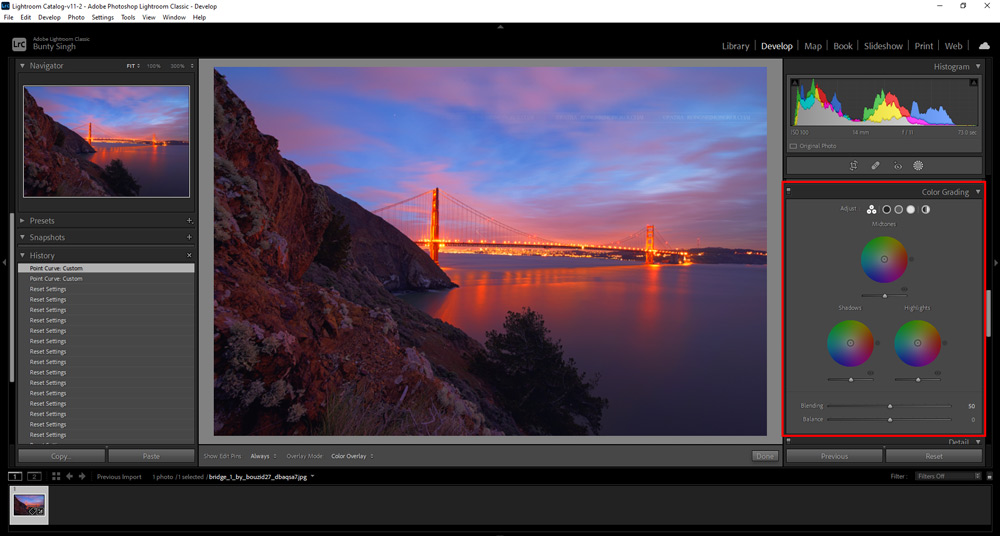
You can also use color grading to apply an overall color tint to your image. You can adjust just the highlights, just the shadows, just the midtones or all three and then select the blending and balance you want between them.
The Detail Panel
Last but not least the Detail panel helps pop details in photos. It is divided into multiple sections such as Sharpening, Noise Reduction, and Color. I am gonna only explain about the Sharpening Section.
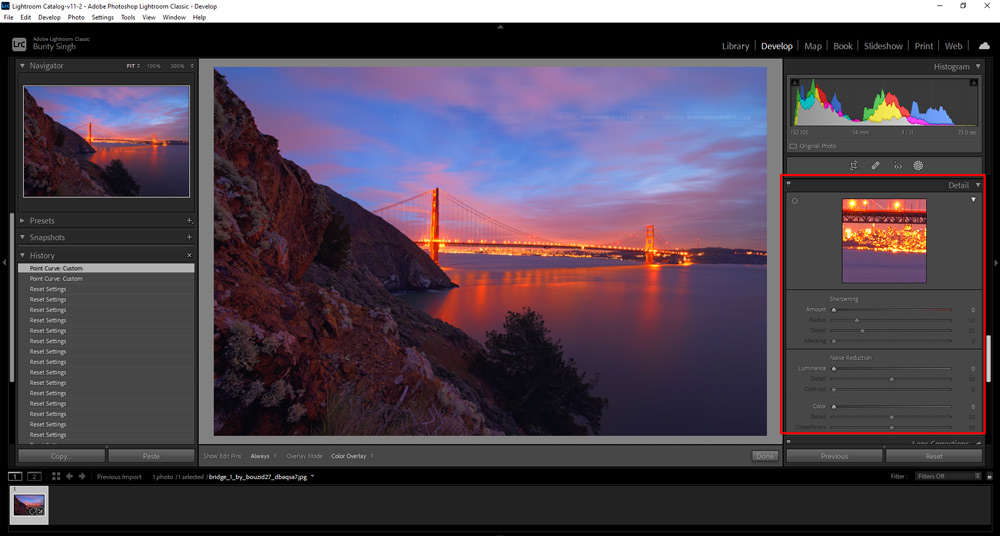
The Sharpening section has four options Amount, Radius, Details and Masking.
- The Amount slider will adjust the intensity of the sharpening
- The Radius slider is going to determine how far out from the edges the sharpening will be applied.
- The Details slider brings back a little detail after sharpening has been applied. The Masking slider is really a magic slider. It will look for solid or smooth areas and try to mask off the sharpening from those areas and keep it to justthe edges.
I hope you got a brief overview of the Lightroom Develop Module. If you have comment do let me know in the comment section below.
Leave a Reply