In this tutorial, we’ll be learning how to resize images at once in Photoshop using Photoshop Actions. I’ll take you through to some simple steps which will help you change your images size and their quality within a minutes. You’ll learn how to create an action set, create a new action and how to record it.
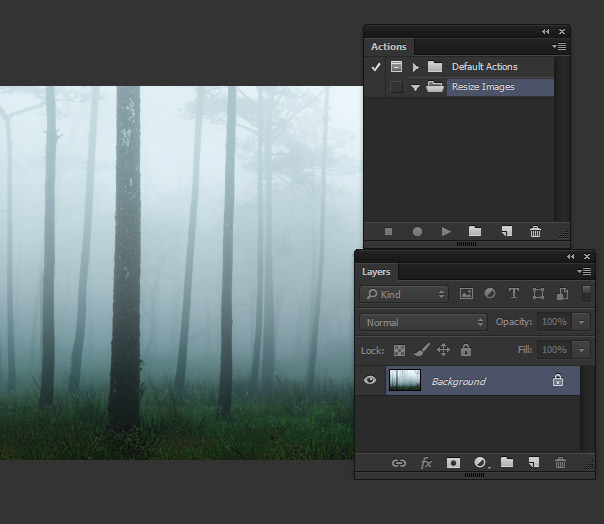
Photoshop Actions
Photoshop Actions help us to record every activity or whatever we do in Photoshop. You can record every step using actions then play it at any time as much as you can. Thus saving a lot of time in Photoshop.
Step 1 – Preparing the Images
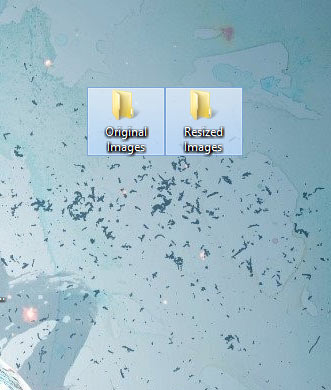
First, we’ll prepare our images by putting them in two separate folders. So create two folders on your PC, name the first one as Original Images it will contain all of your original images which are going to be resized.
In the second folder, name it as Resized Images, and this is the folder where all of your resized images will be saved.
Here you can see I created two folder:
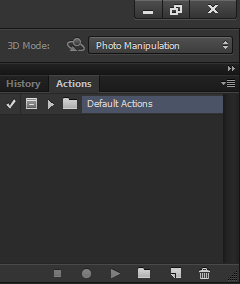
Step 2 – Accessing the Photoshop Action Panel
To access the Action Panel in Photoshop, you need to go to Window > Actions or you can also press ALT + F9 to access the action panel.
Here how it looks like:
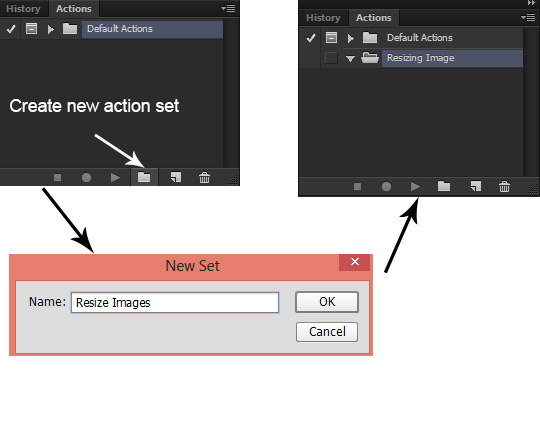
Step 3 – Creating a Action Set
To create any action, we need to create a new action set. So click on the Create New Set folder icon to create a new set. I am naming the set Resize Images and then hit OK to create the set.
Step 4 – Open the Image
Once you create the action set then you need to open the image which you want to resize. I am choosing an image from my original image folder and I opened in Photoshop by selection File > Open.
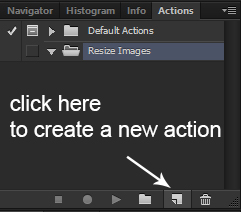
Step 5 – Create a new Action
Now click on the Create New Action icon to create a new action under the Resize Images action set.
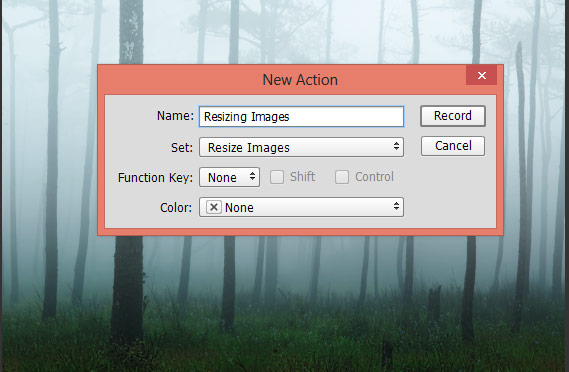
Name this action Resizing Images and then hit the Record button.
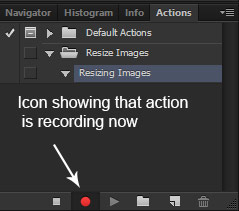
You can see that action is in the recording mode indicated by the Begin Recording icon:
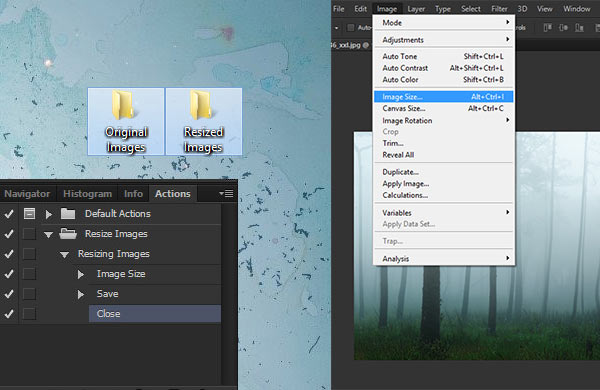
Step 6 – Changing Image Size
Now we’ll change the image size of the image. So go to Image > Image Size.
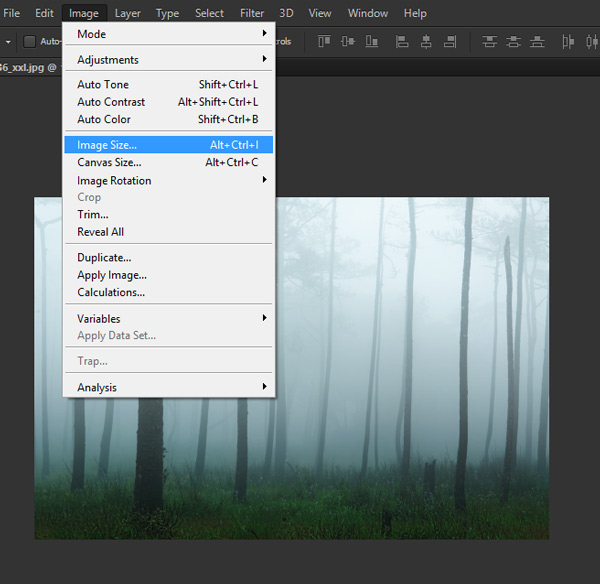
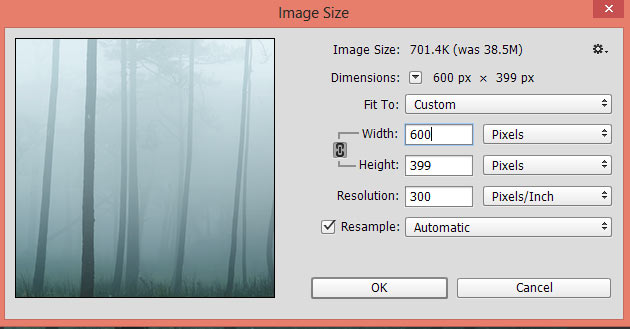
In the Image size dialog box, enter the dimension you’d like to keep the image, I use 600px size for each of images on my website so I entered the width here and then press okay.
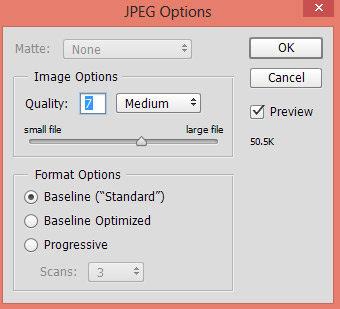
Step 7 – Saving the Image
Once you changed the dimension, Go to File > Save As and then save the image inside the Resized Images folder. You can also select the quality which you prefer and I set it to Medium and then save the image.
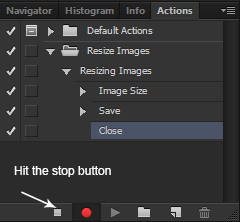
Step 8 – Stop the Action
After saving the image, we need to close the image so the action can close the image and then open the new one and then repeat the same process for all images. Otherwise, it will open all the images depending on how many you’ll have in the folder thus slowing down the PC.
So we better close the image, to do this, go to File > Close or alternatively you can press CTRL + W to close the image.
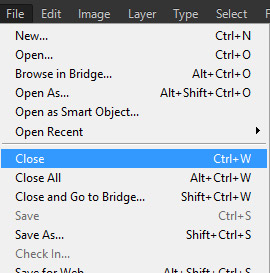
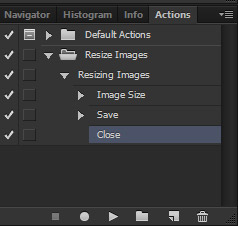
After closing the image, it’s time to stop the action. To do this, hit the Stop Recording icon to stop the action.
Here you can see the action is stopped now:
Step 9 – Using the Action
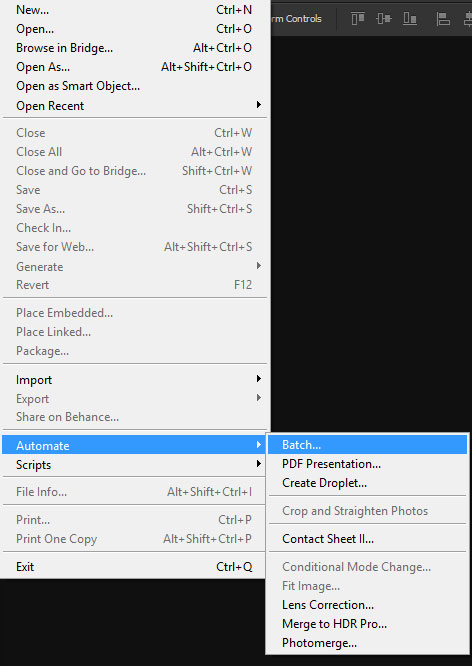
Now we’ll use the action to resize our images. Go to File > Automate > Batch
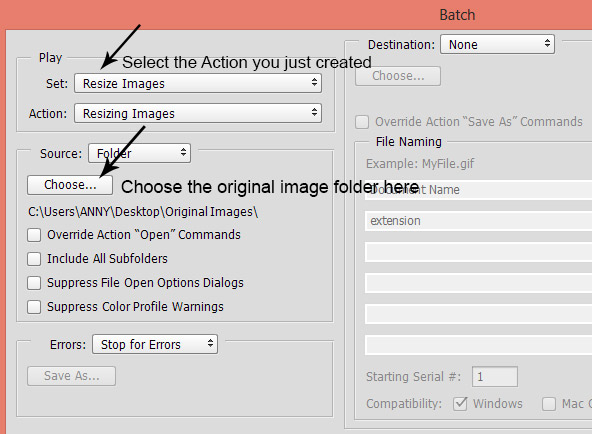
In the Batch dialog box, choose the source folder in which you have images for resizing, in my case I got in original image folder so I selected it. Since I just created the action, therefore, Photoshop automatically selected the action set and the action. But if it didn’t select for you then you can manually choose the action set and the action.
Once you did this then just press Okay and all of your images will be resized in seconds. Once the batch process is done check the Resized Images folder to check the images.
If you don’t want to change the image pixels size and only want to reduce the size of the images then you can read this tutorial here.
Leave a Reply