This tutorial will make you a traditional artist working on white paper canvas and using brushes strokes to create a watercolor painting. We’ll use paper texture, watercolor brushes, and filters to mimic watercolor painting effect in Photoshop. Let’s deep dive into it!
Step 1 – Add Paper Texture!
I am using a model image that you can download it here . You can use any image which you want maybe a portrait, or landscape, etc. And you don’t have to worry about colors or details such as contrast and brightness any image would be fine.
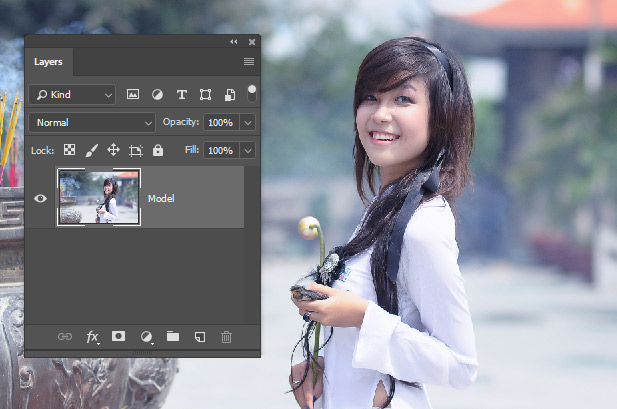
Once you have the image opened in Photoshop we have to add a paper texture to give the image a paper effect feel so it looks like it is painted on paper or canvas not digitally.
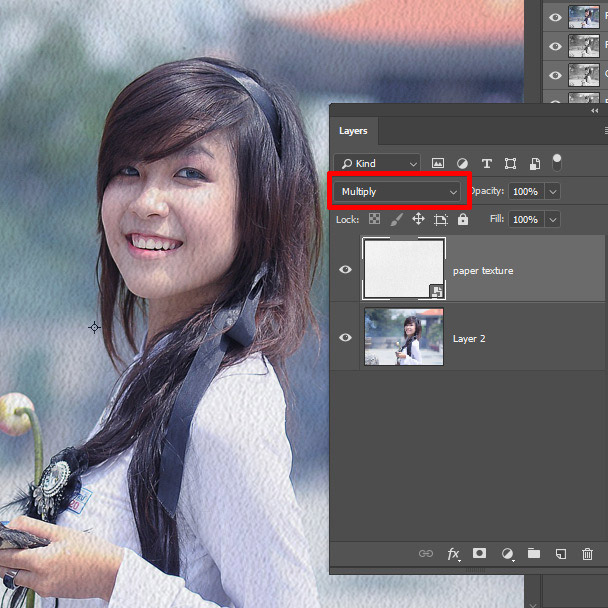
Download the paper texture from here and then add it on top of the model layer. You can select File > Place Embedded and then add it. You can even transform it so it can fit nicely into the document.
Once you added it, change its blending mode to Multiply so it can blend with the image.
Step 2 – Replicate Painting Effect using Filter
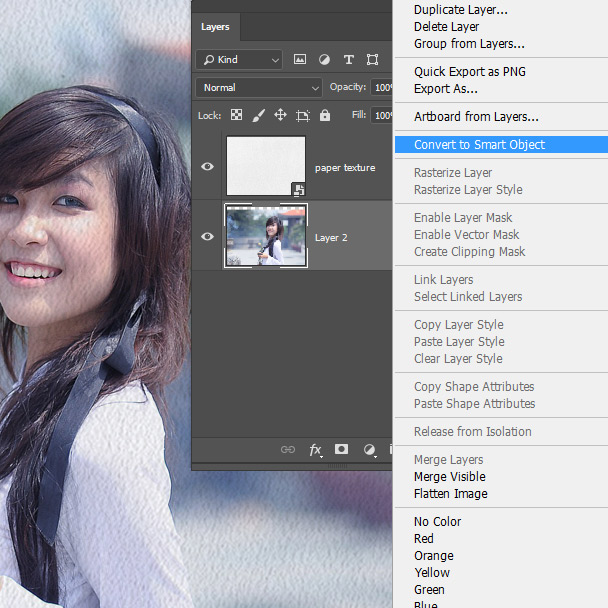
Now it’s time to use filters to achieve a painterly look. First, you need to convert the image into Smart Object. Right-click on the image and choose Convert to Smart Ojbect.
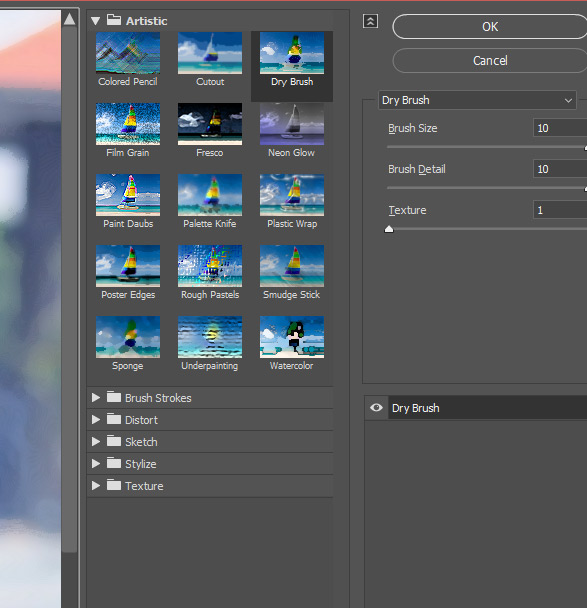
Go to Filter > Filter Gallery > Dry Brush and use the following settings:
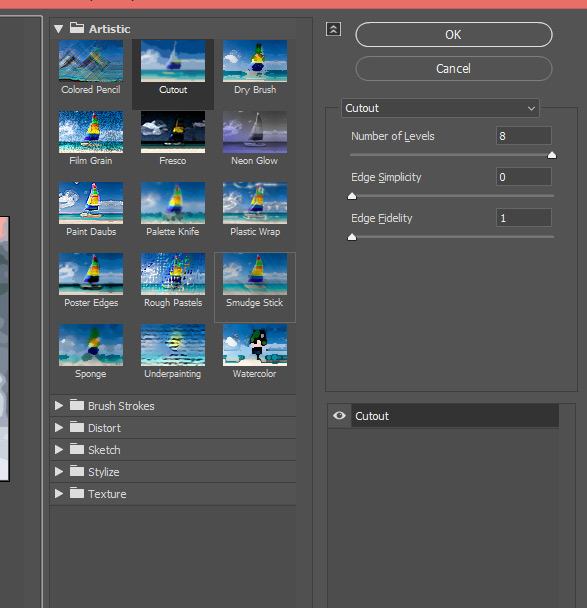
Go to Filter > Filter Gallery > Cut Out and use the values below:
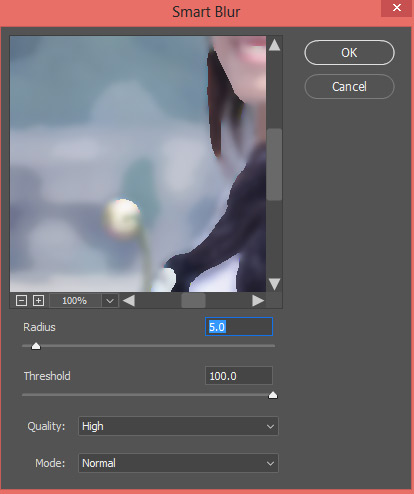
Go to Filter > Blur > Smart Blur use the settings below:
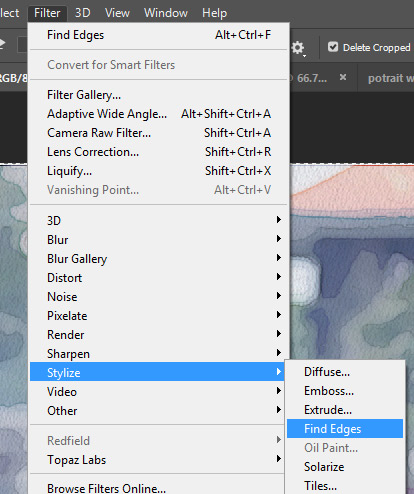
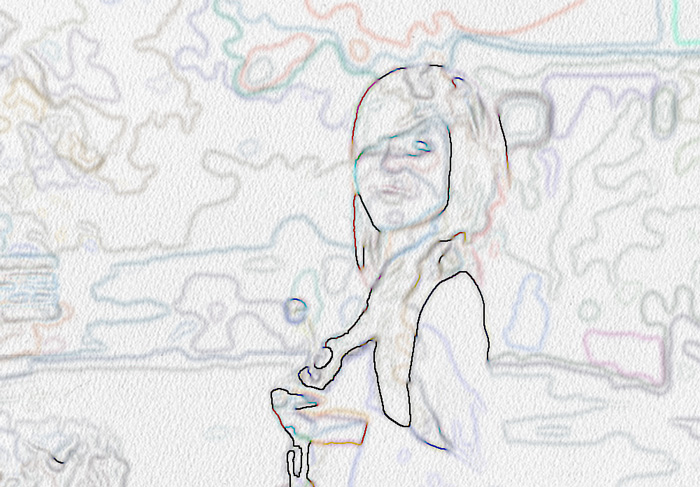
Finally, go to Filter > Stylize > Find Edges.
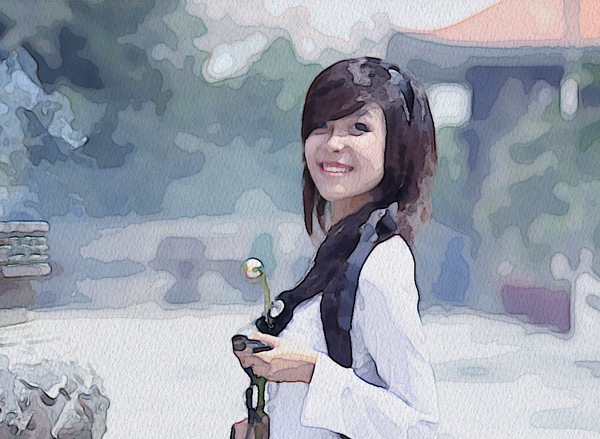
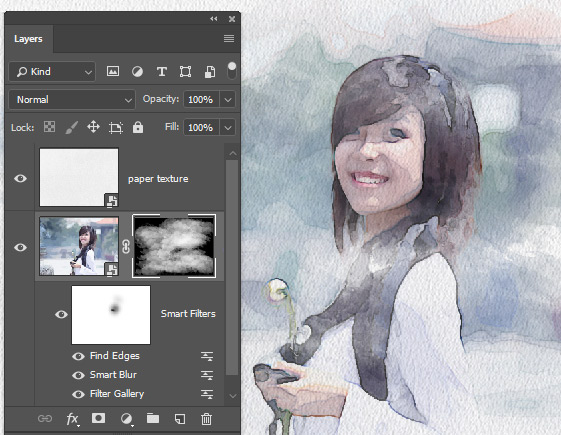
Results will resemble the below image and we have to edit 2 filters Smart Blur & Find Edges in order to bring back details of the photo. We can do this by editing the filter opacity and blending mode.
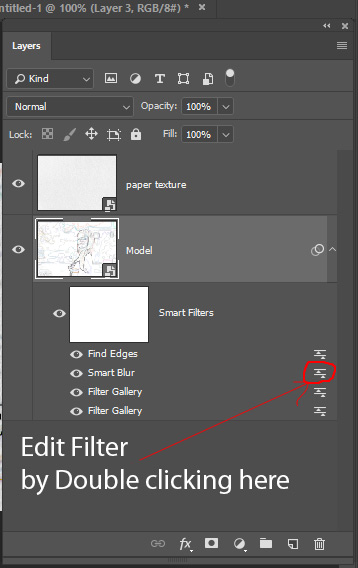
Step 3 – Edit Filter Opacity and Blend Mode
In order to edit filters, you can click on the icon right next to the filter shown below to edit it.
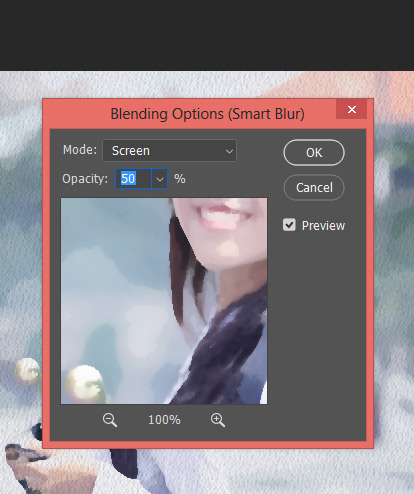
Edit the settings of Smart Blur filter, change the blending mode to Screen and reduce the opacity to 50%. This will brighten the image and reduce the smoothness on the image.
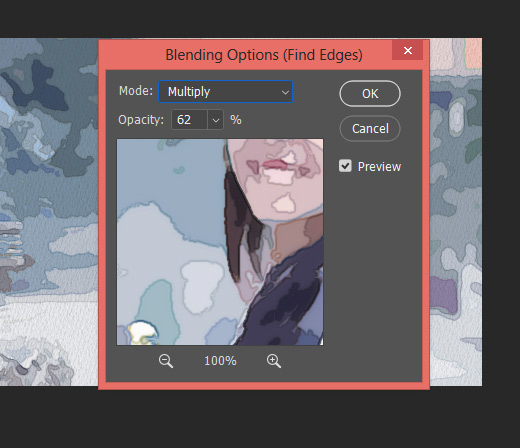
Now edit the settings of Find Edges Filter, change the blending mode to Multiply and reduce the opacity to 63%.
Here are results with an artistic painterly watercolor look:
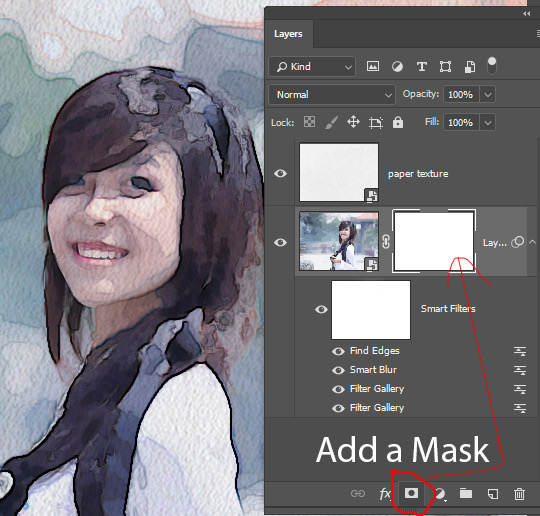
Step 4 – Add a Mask to Hide Image
In order to use watercolor brush stroke, we have to hide the image first and then we can reveal it by applying brush strokes on the layer mask.
So add a layer mask to the image by clicking on the Add Layer Mask Icon shown below:
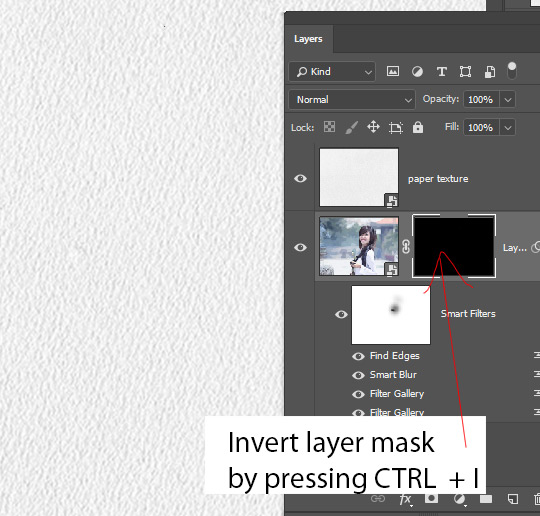
Invert the layer mask by pressing CTRL + I to hide the image. You will see the layer mask color will turn into black color.
Step 5
Without brush strokes, any painting looks incomplete or it is not painting at all. Download the watercolor brushes from here and then use any of them. I use the first one, selected white color and layer mask, then start revealing the image on a gradual basis.
You can see I’ve selected the first brush, then I selected white color and after I selected the layer mask I started painting on the image to reveal the image.
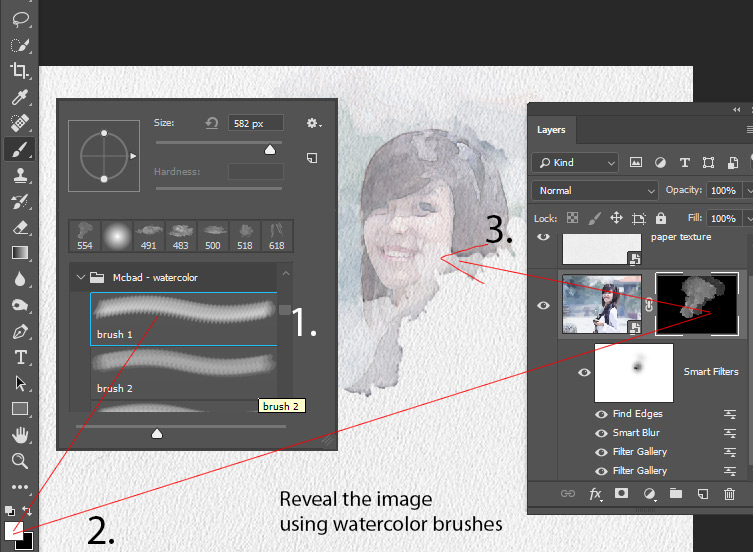
Here you can see how I revealed the image, so it’s a bit different than the original but I just wanted to show you how I did it.
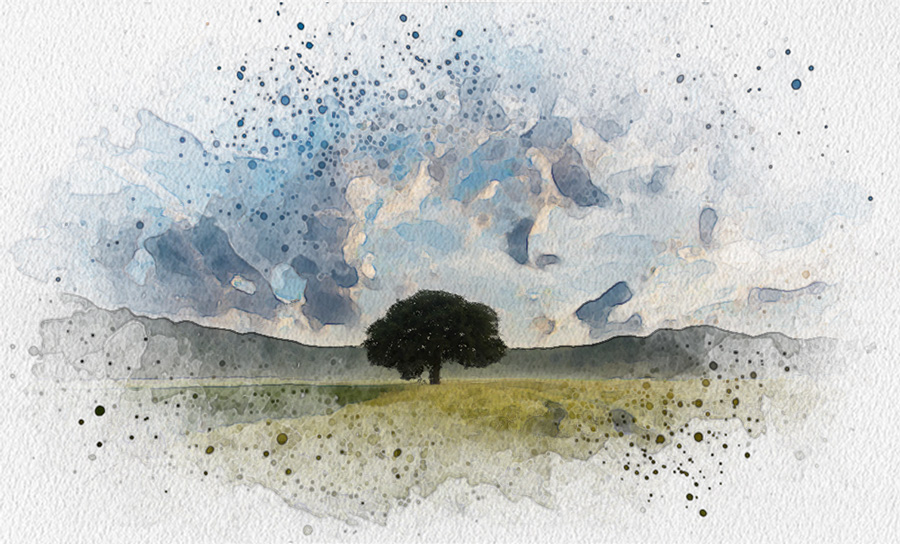
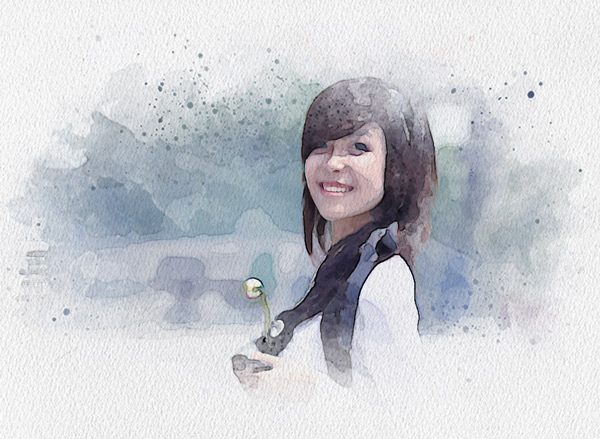
Here is final outcome:
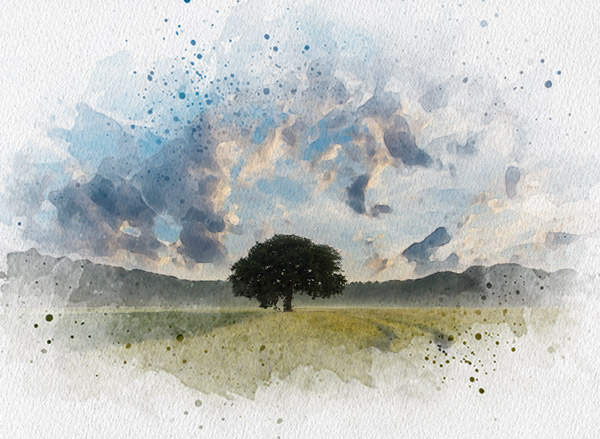
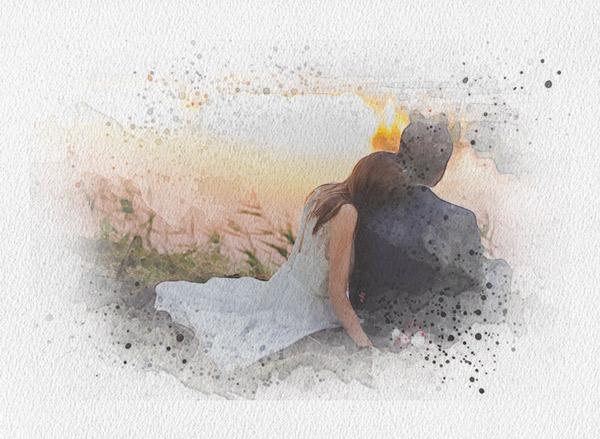
Here are some more examples:
Example 1:

Example 2:
Example 3:
thank you for this tutorial
Thanks, Francois!
Thank you…very nice tutorial, explained very well
very nice. Thank you so much. I love the effect. One question, how did you make the paint dripping?
You can use brushes for dripping effect. Use the brushes such as splash or debris brushes.
Thank you, they look great. I will try your technique.
Cheers – Robert
Thank You…very nice and simple tutorial