Step 10
Set the blend of the stars layer to Screen and get rid from the black background.
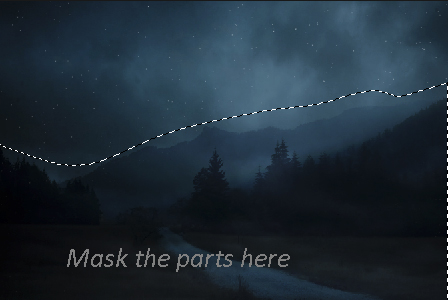
Since the stars appear in the sky then we should hide them from the lower parts. Add a Layer Mask to stars layer and use the soft black brush to hide the stars from the lower parts. You need to paint on the layer mask with a soft black brush in order to mask the parts.
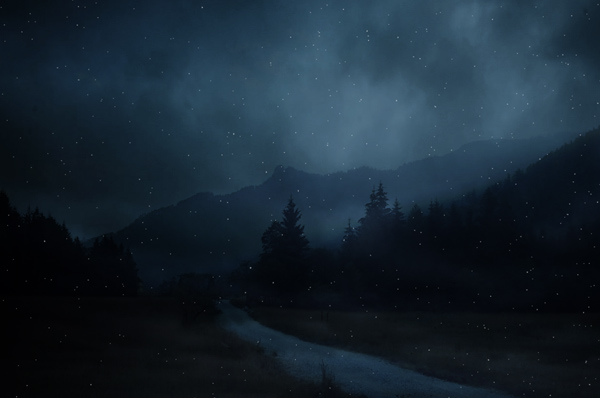
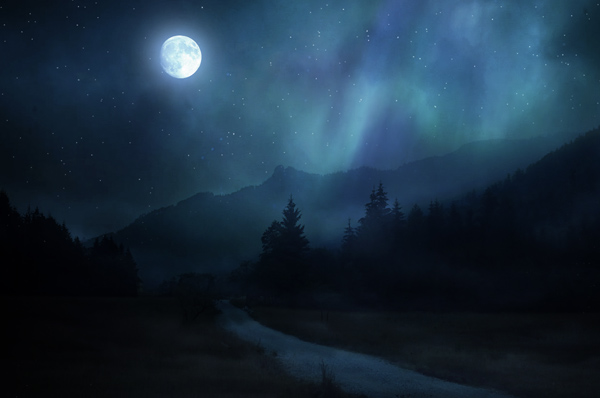
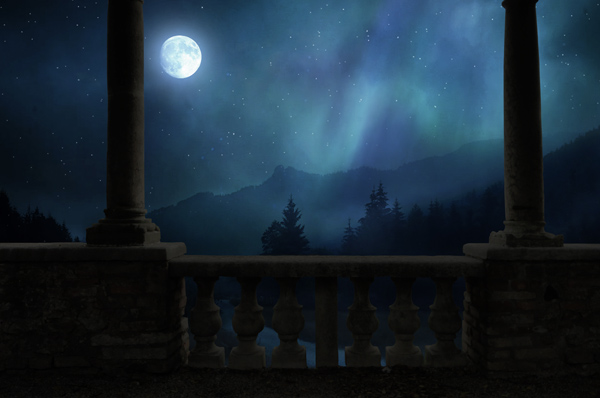
Results so far :

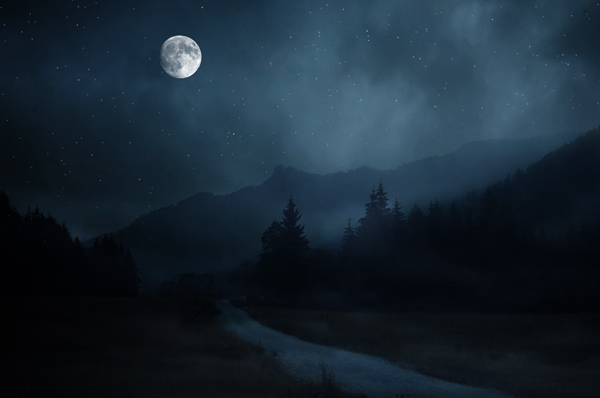
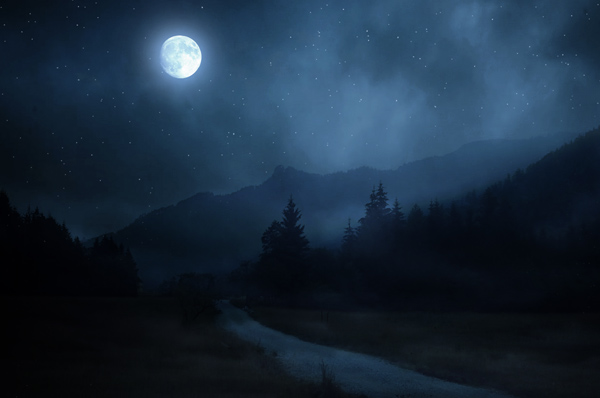
Add the Moon
Step 11
Place the moon to the main document and place it to the left side.
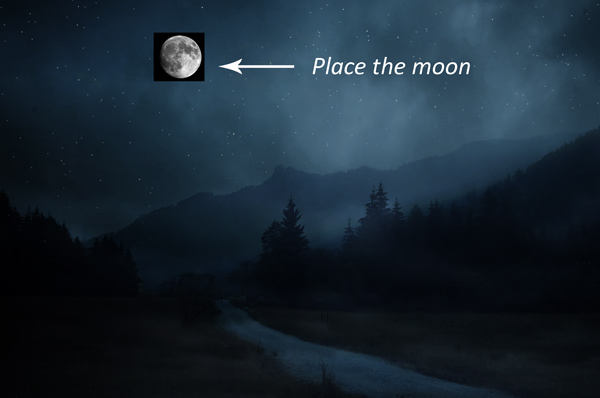
Set the blend mode to Screen.
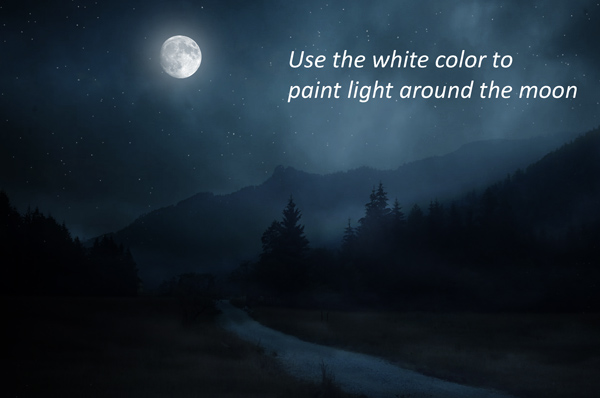
Step 12
Create a new layer and name it ‘moonlight’. Set the foreground color to white and activate the Brush Tool (B). Use a soft basic brush to paint glowing lights around the moon.
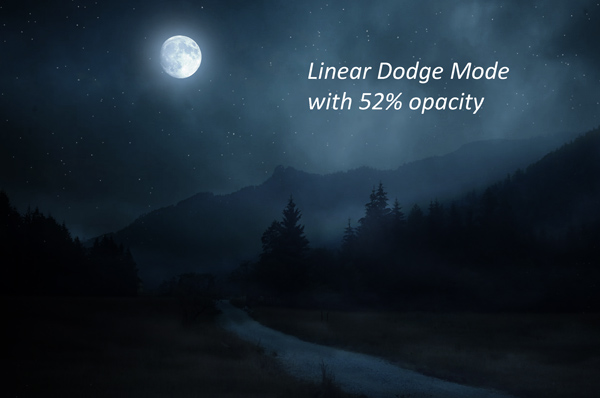
Step 13
Create a new layer again and name it ‘moonlight 2’. Set the foreground color to #112d4d and paint the light on the moon.
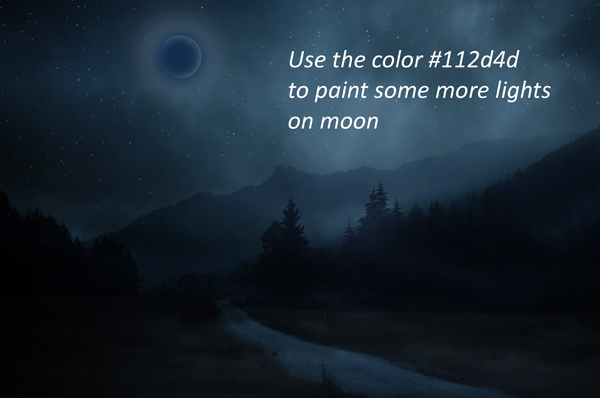
Change the blend mode to Linear Dodge and reduce the opacity to 52%.
Step 14
The sky looks dull and darker as it doesn’t have brightness like we see in the moonlight. We need to paint lights for the sky to make it brighter and shiny. To do this, create a new layer and name it ‘sky lights’. Use the same color as we used in the previous step and paint the lights on the sky as shown below.
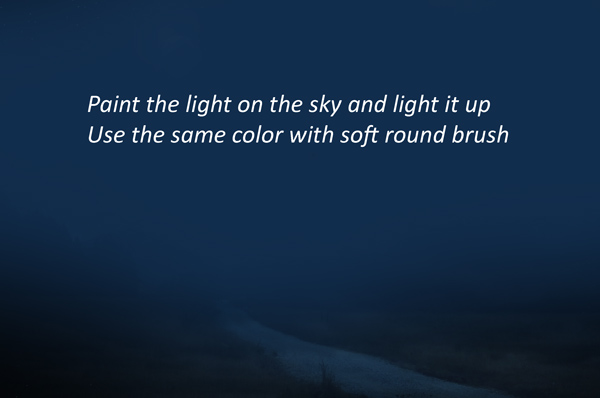
Change the blend mode of this layer to Color Dodge and reduce the opacity to 47%.
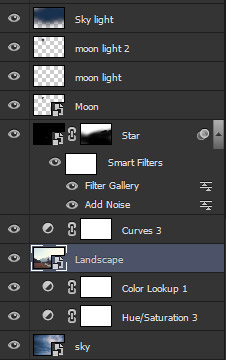
Results on layer panel so far:
Add the Aurora
Step 15
Place the aurora to main document.
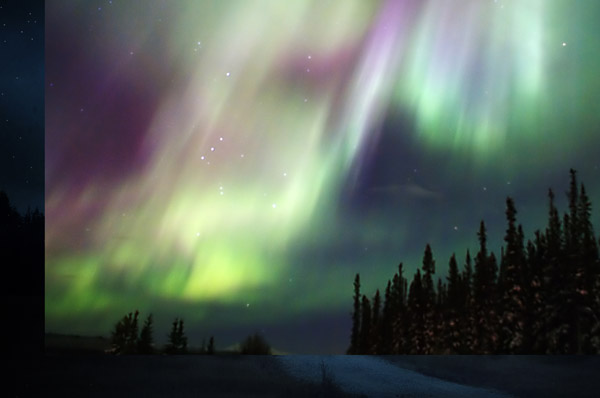
Add a layer mask to Aurora and mask the hard edges using soft round black brush.
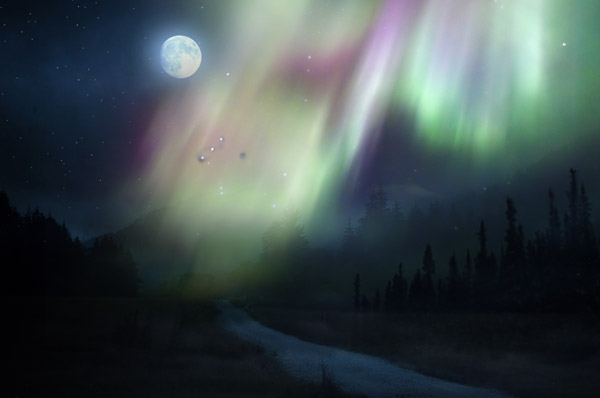
Step 16
Change the blend mode to Overlay and blend the aurora with the existing background.
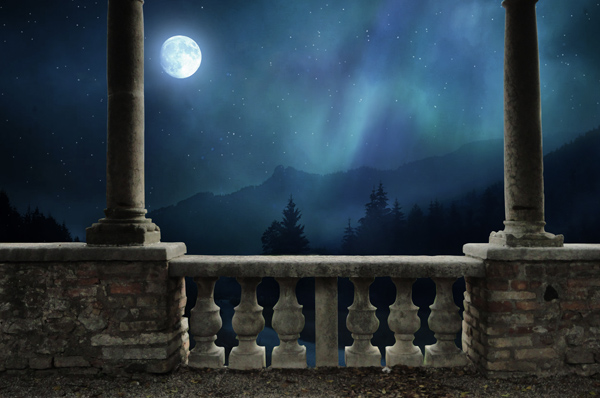
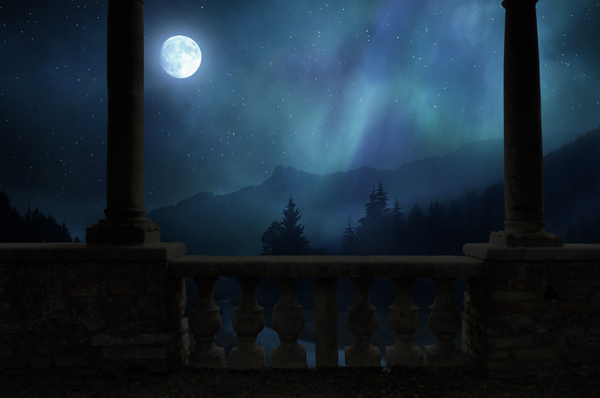
Add the Balcony
Step 17
Extract the balcony from its background and place it to main document and if needed use the Transform Tool (CTRL + T) to make it fit on the document.
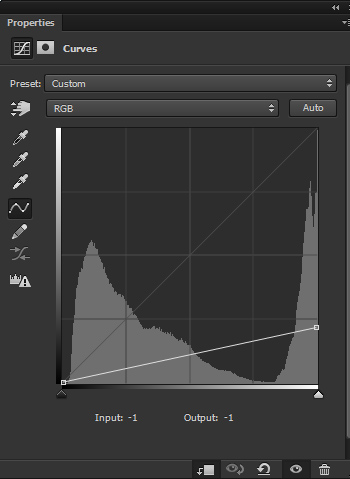
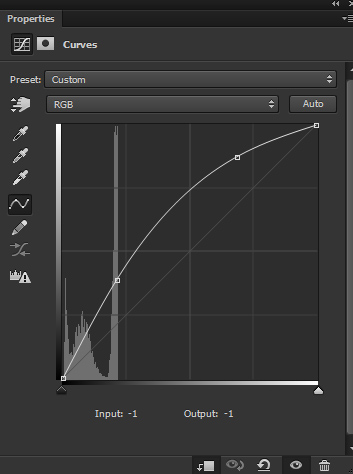
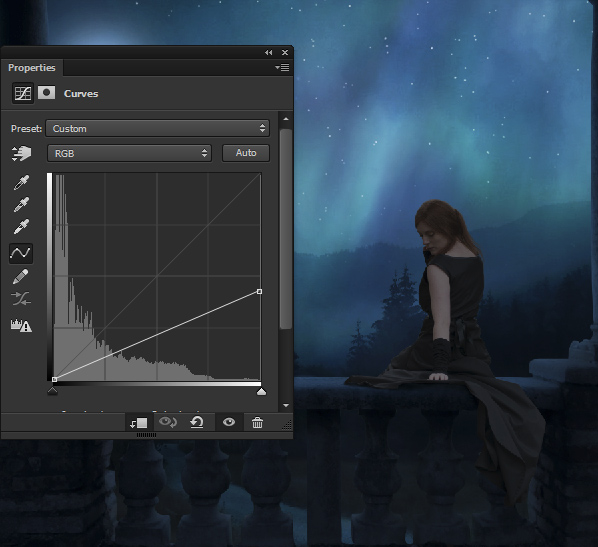
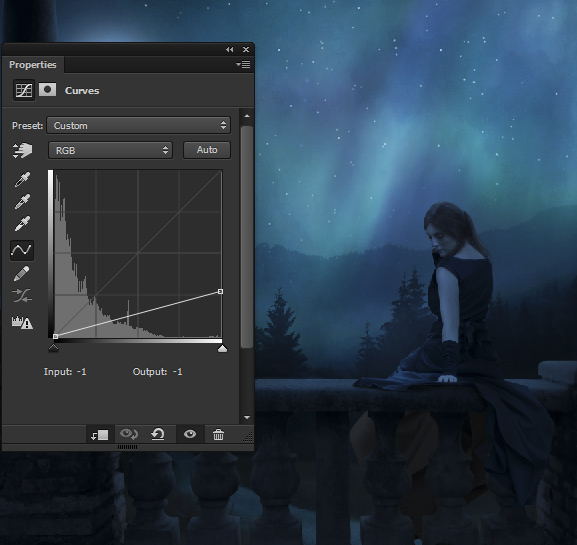
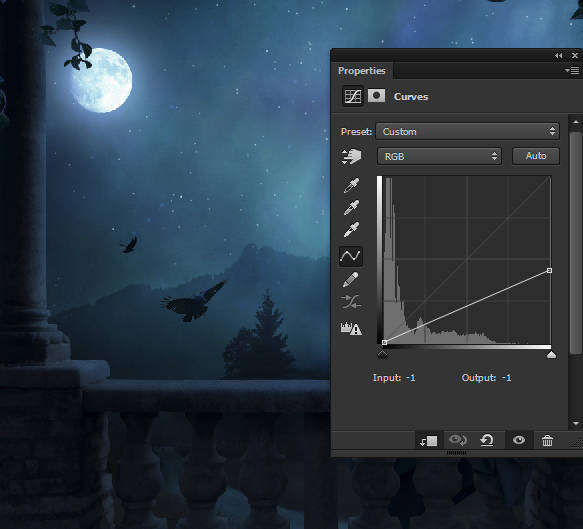
Step 18
Make a Curves adjustment layer for balcony and set it as Clipping Mask. Now reduce the brightness using the following settings :
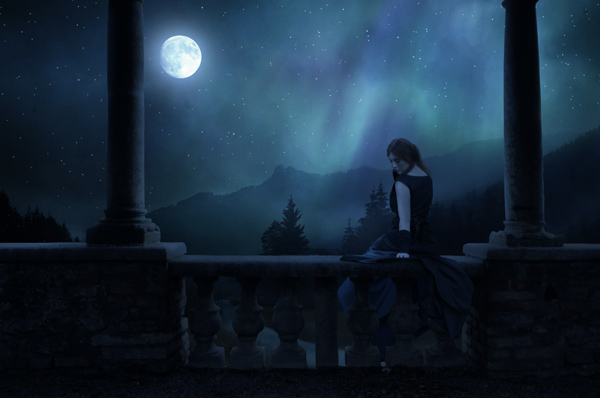
Results:
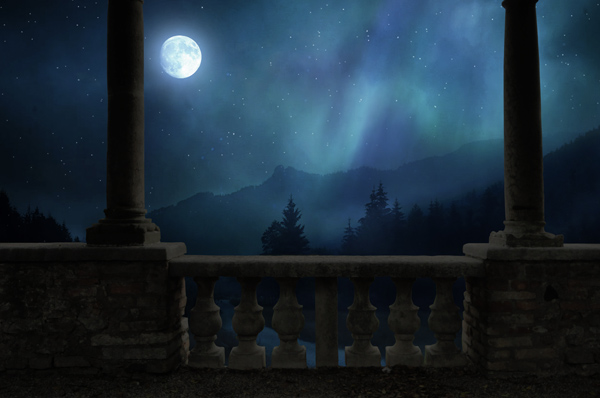
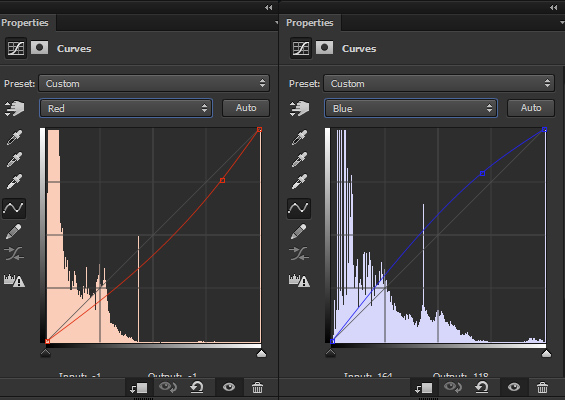
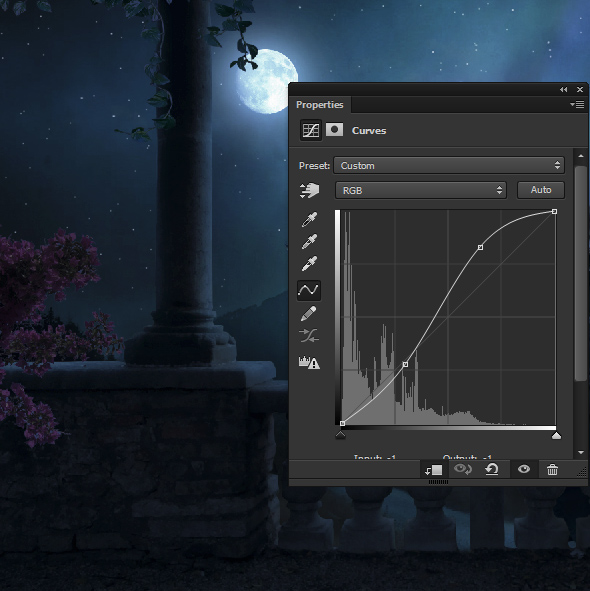
Step 19
Make a Curves adjustment layer again and this time increase the brightness on the highlights.
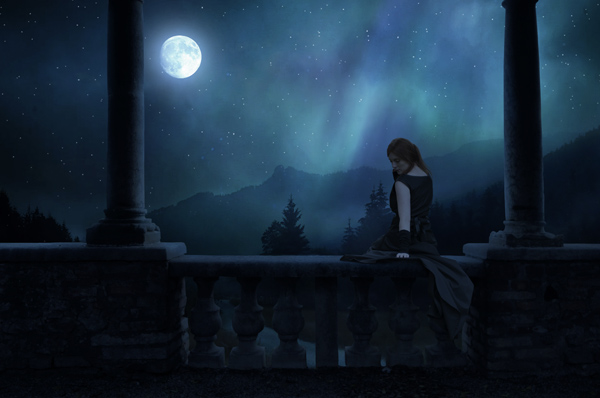
Results:
Step 20
Due to second Curves adjustment layer, we’ve increased highlights on the lower parts of balcony and I don’t want that. Also, these parts will be less illuminated by the moon light and then we should mask the effect there. To do this, select the Curves layer mask and using a soft black brush
hide the effect on the lower parts and strengthen the shade there.
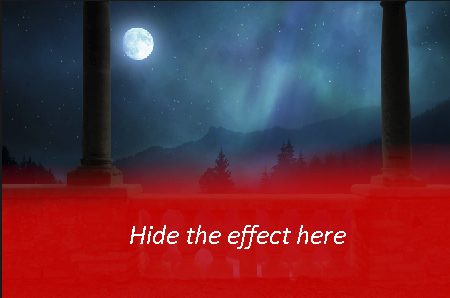
Reduce the opacity to 60%.
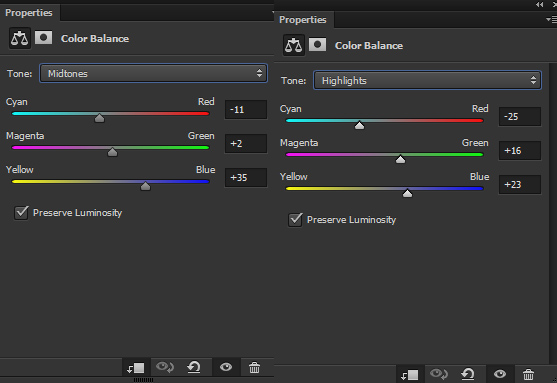
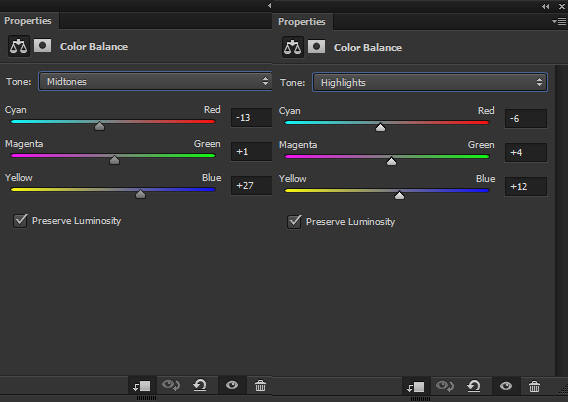
Step 21
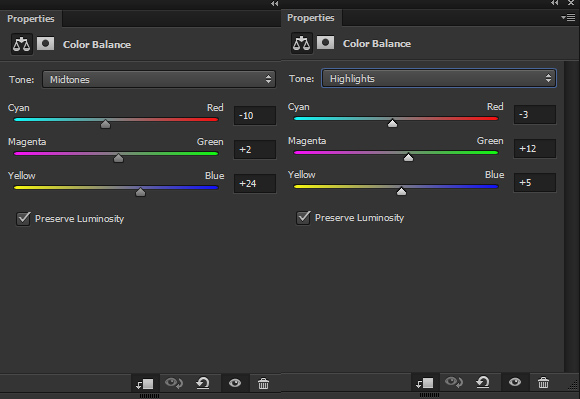
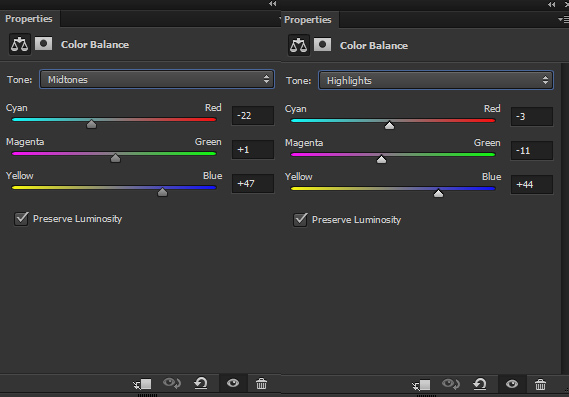
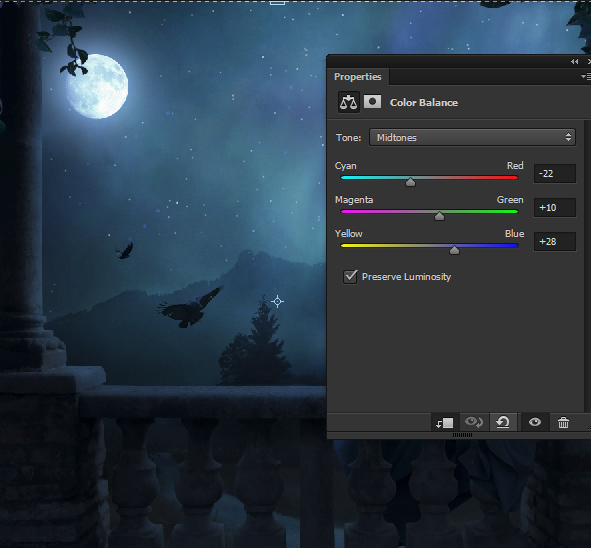
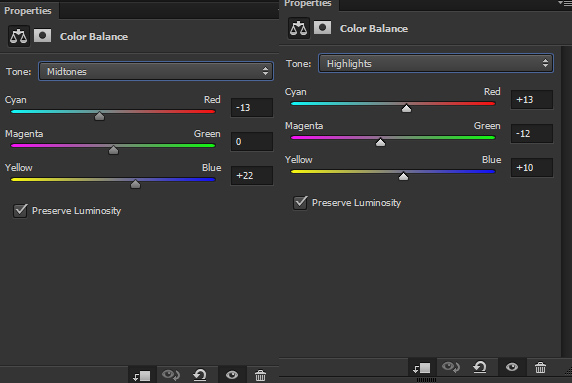
Use the Color Balance for balcony to add colors. Only change the value of Midtones and Highlights.
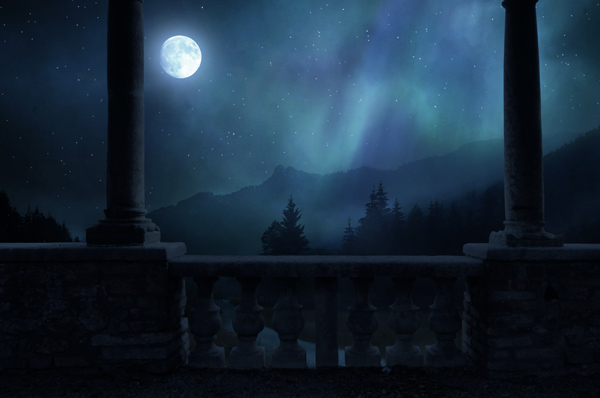
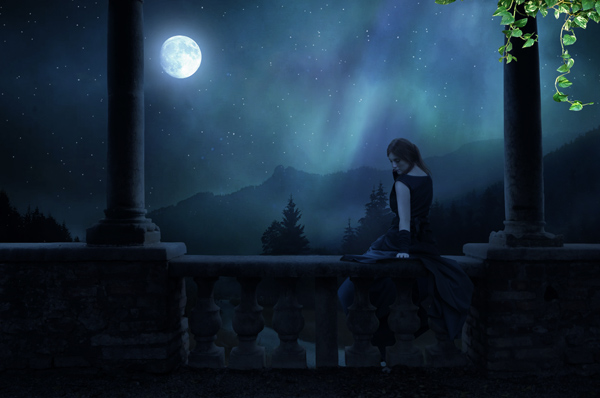
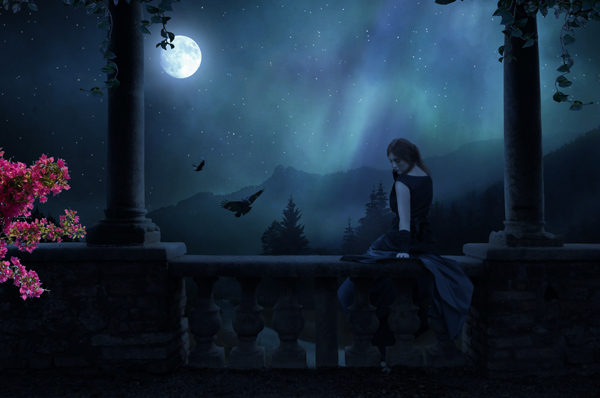
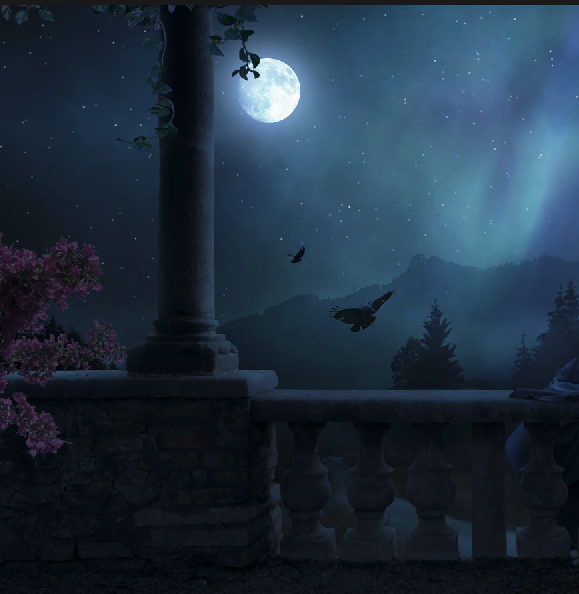
Results with added colors to balcony:
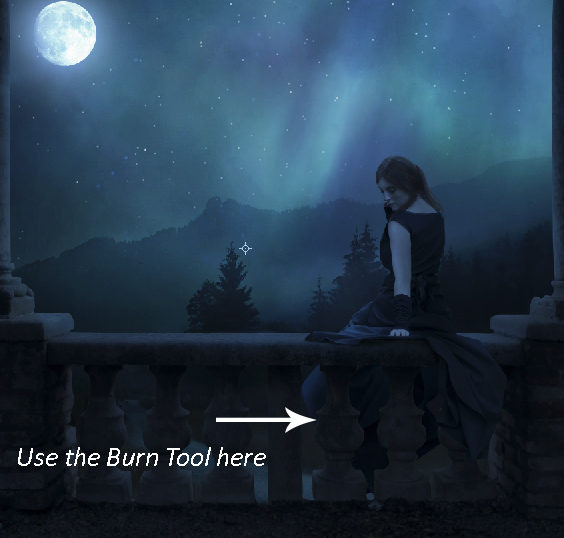
Step 22
Create a new layer and fill this layer with 50% gray color and change the blend mode to Overlay. Use this layer as Clipping Mask.

Select Burn Tool (O) with Midtones Range and Exposure about 9-10%. Now darken the part of balcony indicated by the arrow. I am adding the shade to this part because there will be our model’s dress which will reduce the lights exactly there.
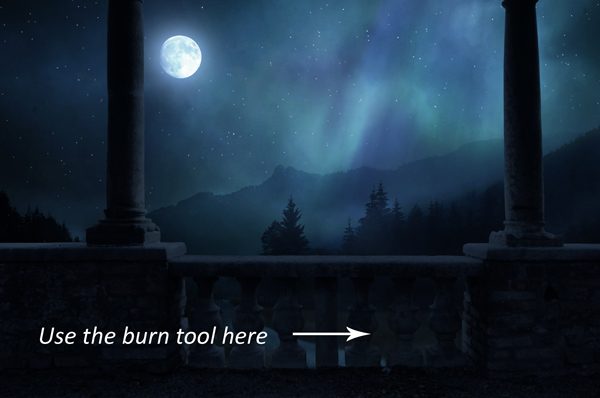
On the Overlay mode, you can clearly see where I used the Burn Tool (O) (only on highlights area).

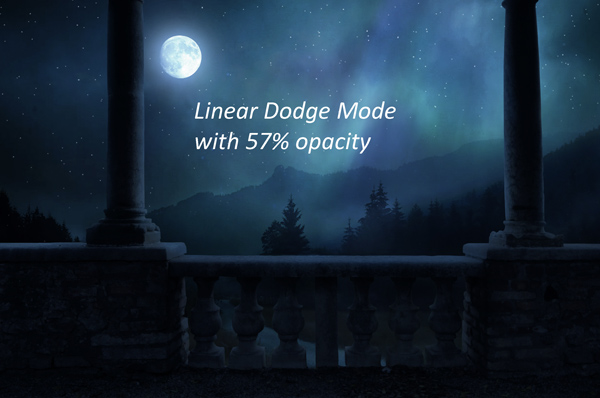
Step 23
Create a new layer and name it ‘lights’. Don’t forget to use it as a clipping mask. Change the foreground color to #17293e and paint the highlights on the edges as indicated by white arrows.
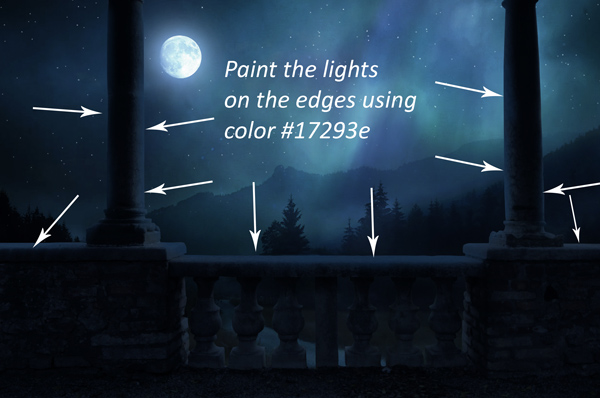
Change the blend mode to Linear Dodge and reduce the opacity to 57%.
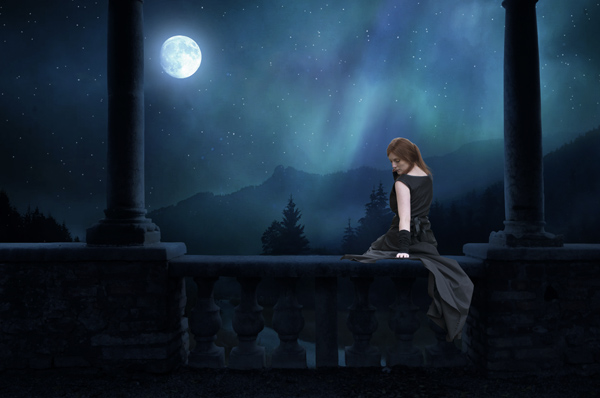
Add the Model
Step 24
Extract the model from its background and place it above the balcony.
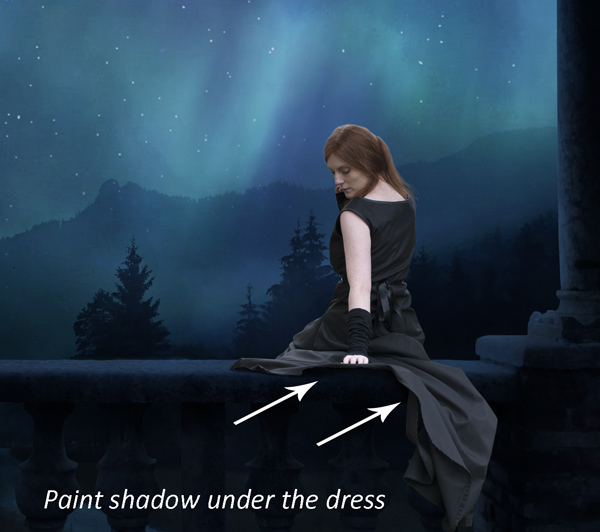
Step 25
Create a new layer under the model and name it ‘shadow’. Use a soft black brush to paint the shadow under the model’s dress. Lower the brush opacity around 30% for better results.
Step 26
Make the Curves adjustment for model and reduce the brightness.
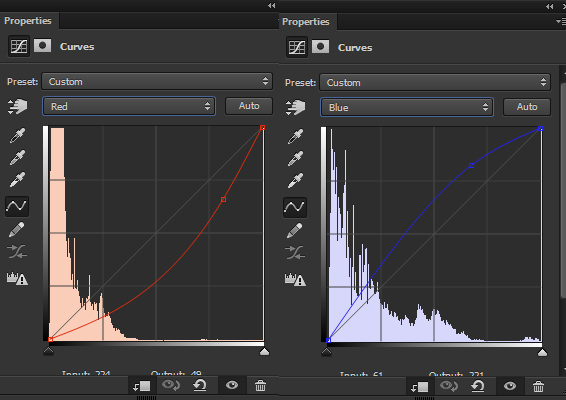
Step 27
Use the Curves again and add the color to model. Use it with the following settings :
Results:
Step 28
Continue coloring the model using Color Balance adjustment layer. Only the change the values of Midtones and Highlights.
Results:
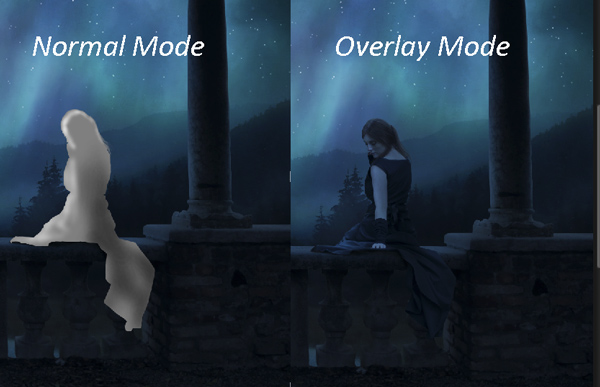
Step 29
Create a new layer and set it as clipping mask. Fill this layer with 50% gray color and change the mode to Overlay. Select the Burn Tool (O) with Midtones Range, Exposure about 10-12%. Now darken those parts of the model that are less illuminated by moonlight and strengthen the shade on back parts. Similarly select Dodge Tool (O) to refine the light on the model front parts and bring more light there. You can see the results in both Overlay and Normal that how I did it.
Step 30
You may notice that model has an incomplete dress and we need to fix it. To do this, select the selected part from model dress using Polygon Lasso Tool (L) .
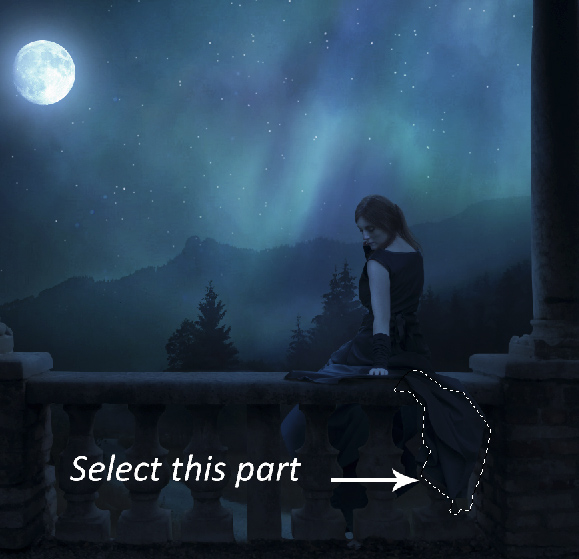
Step 31
Drag this part under the balcony layer using Move Tool (V). Now use the Free Transform Tool to enlarge and complete the dress part. Just enlarge this part so it can cover the existing dress.
Step 32
Decrease the lightness of this part using Curves adjustment layer.
Step 33
Use the Curves adjustment layer again and use it with following setting to add the same color as the model has.
Reduce the opacity to 66% and subtle the effect. Results:

Step 34
Continue coloring it using Color Balance adjustment layer.
Results:
Step 35
Create a new layer and set it as clipping mask. Fill this layer with 50% gray color and change the blend mode to Overlay. Use the Burn Tool (O) with same settings as used for model and darken the indicated area of dress parts as shown by arrow.
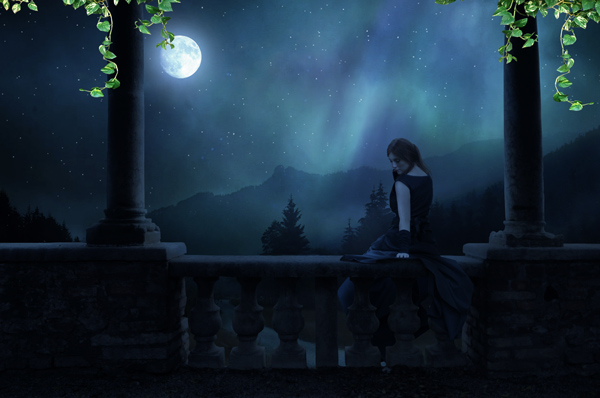
Add the Vines
Step 36
Place the vines at the top right corner of the document.
Duplicate the vine layer by pressing CTRL + J and use the Transform Tool (CTRL + T) to fip it horizontally and place it to left side.
Step 37
Select both vine layers and press CTRL + G to group them. Change the blend mode of this group to Normal. Now, make a Curves adjustment layer inside the group and reduce the brightness of vines.

Results:

Step 38
Use the Color Balance to match the color with the rest of the background.
Results:

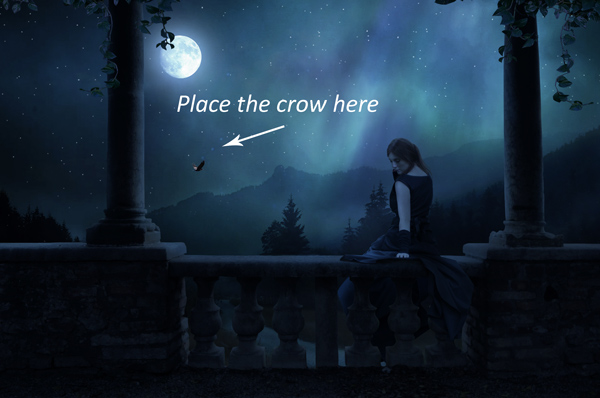
Add the Crow
Step 39
Extract the crow from its background and place it as shown below.
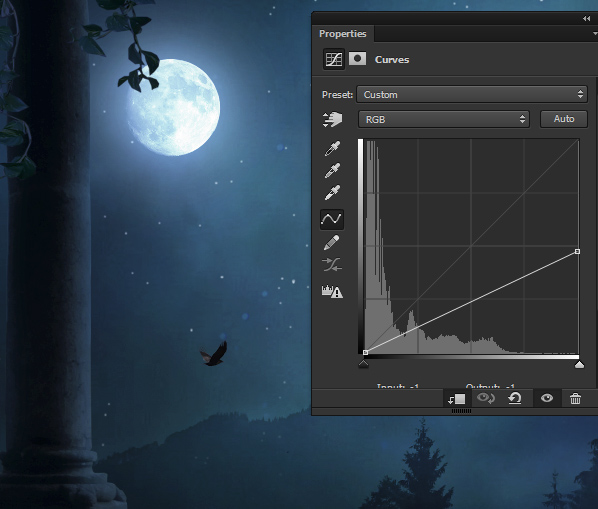
Step 40
Reduce the brightness using Curves adjustment layer.
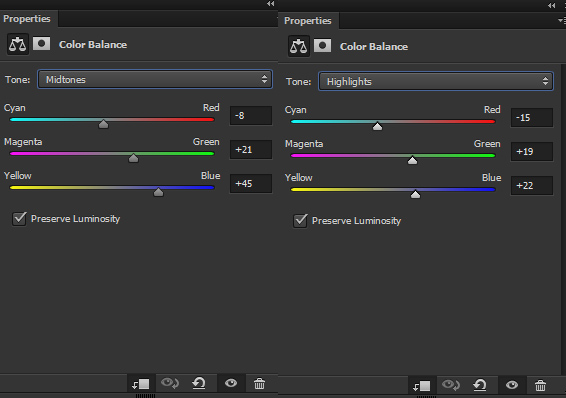
Step 41
Use the Color Balance adjustment layer to match the color of crow.
Results:
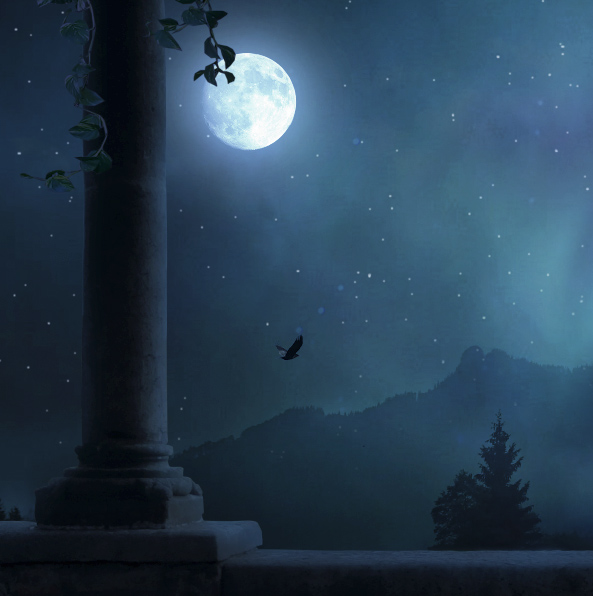
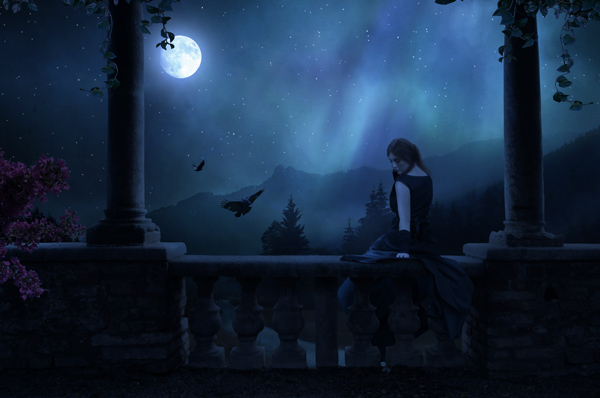
Results so far:

Add the Crow 2
Step 42
Place the crow 2 to main document.

Step 43
Reduce the brightness using a Curves adjustment layer.
Continue adding colors to crow 2 using Color Balance adjustment layer and only change the value of Midtones.
Step 44
Isolate the flower from its background and place it to the left side as shown below.
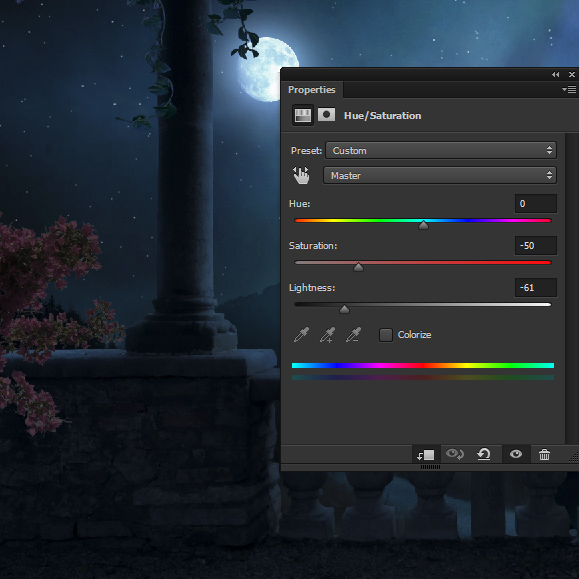
Step 45
Use the Hue/Saturation adjustment layer to decrease the saturation and lightness.
Step 46
Add the color to flowers using Color Balance adjustment layer.
Results:
Step 47
Add Curves adjustment layer to increase the brightness on the highlights parts.
Final Adjustment
Step 48
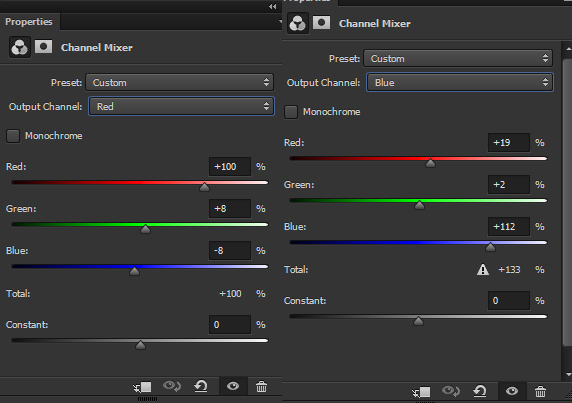
It’s time for final adjustments. First, create a Channel Mixer adjustment layer and use it with following settings:
Results:
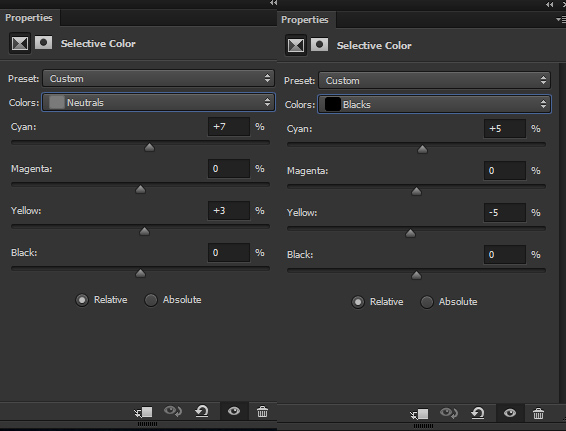
Step 49
Use the Selective Color adjustment layer to add cyan color to Midtones and Shadows parts.
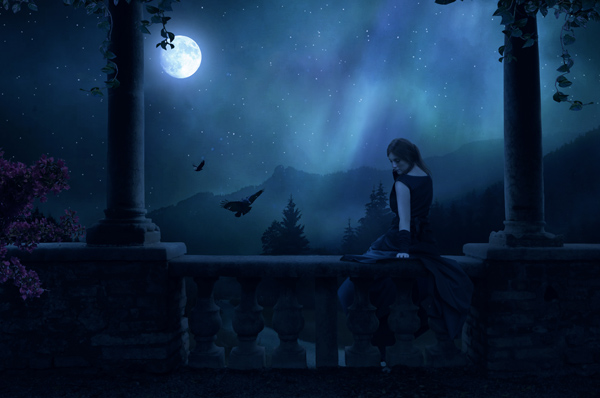
Results:
Step 50
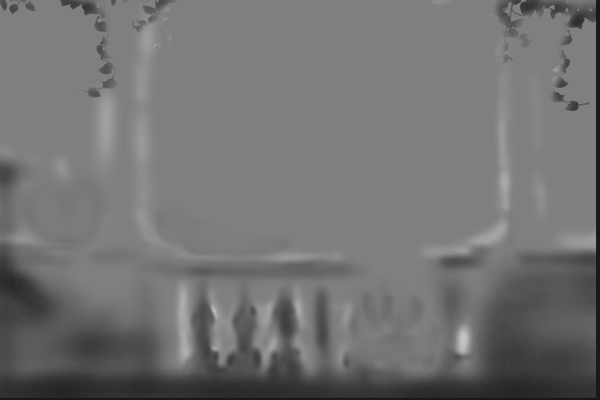
There are a lot of things which needed to refined like the flower, vines, balcony and many others. Create a new layer, change the mode to Overlay 100% and fill this layer with 50% gray. Use the Dodge & Burn Tool to refine the light and contrast of the floor, vines, flower, balcony, left and right side of the scene. You can see the result in below image that how I did it in Overlay mode.
Results in Normal mode:
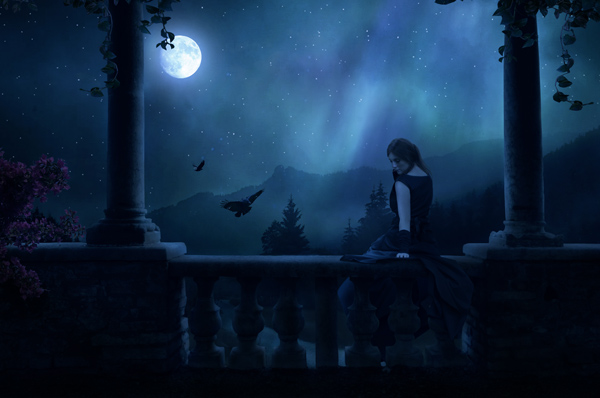
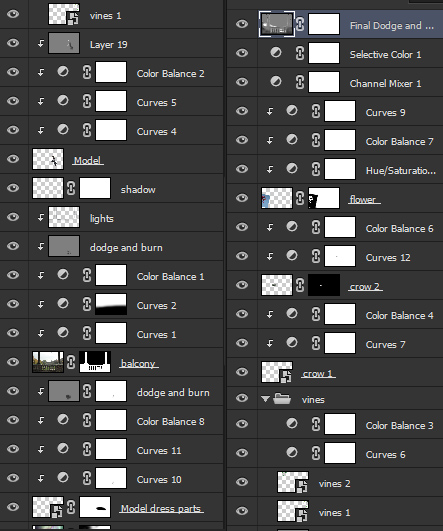
Layer panel arranged:
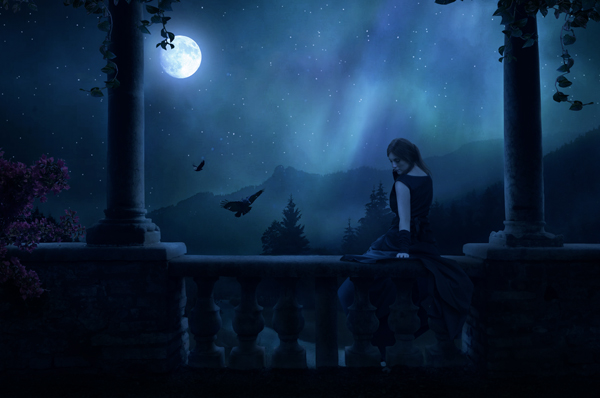
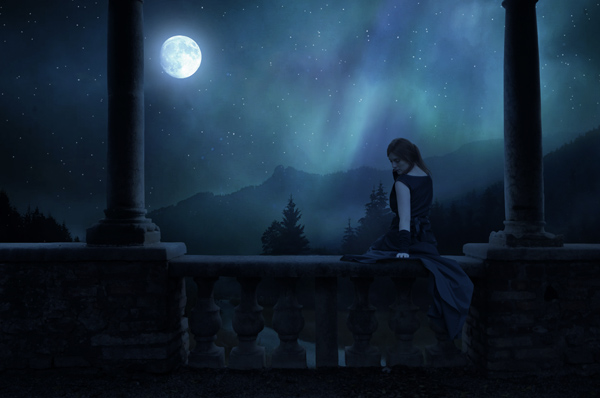
Conclusion
Thanks for following the tutorial and hope you like it. I would love to welcome your thoughts and feedback on the tutorial. Have a great day!
Lovely tutorial! <3
Thanks and also, without your stock permission it wouldn’t be possible!
I really liked easy to understand tutorial on photoshop. Would like to see more such tutorials in future.
Yeah man!
There are lot more to come!
Beautiful moonlight photo effect!