
In this Photoshop tutorial I’ll show you how to create a glowing light text effect in Photoshop. We’ll learn how to add a colourful glowing light effect to a text using blending options, blending modes and using a variety of colors. At the end, we’ll create some shapes and arrange them around our text. Read on and enjoy!
Tutorial Resources
Prepare the Background
Step 1
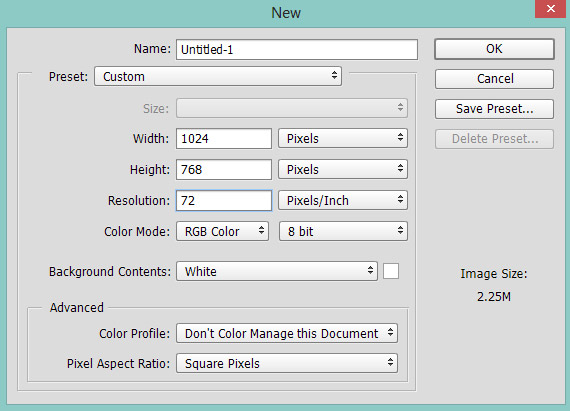
Create a new blank document in Photoshop by selecting File > New and give the following values:
Step 2
We created a white document and we need fill this document with black color. Press (D) to set the foreground/background color to default black/white. Now press Alt + Backspace to fill our newly created document with black color.

Step 3
We are going to fill this black document with some colors. It will later glow our text effect with colorful lights. Create a new layer and name it ‘glow 1’ Activate the Brush Tool (B). Set its opacity and flow about 40-50% (maybe you can vary the brush opacity and flow). Now use the variety of colors to paint on the black document.
You can see I chose four colors blue(to the left), red(in the center), green (to the right) and yellow (at the bottom). Feel to choose a different color. If you want to glow the text with different colors then simply choose different colors. Later, you can also adjust the opacity of this layer to determine how much glow you want on the text.
Here you can see how I painted the colors. Pretty much easy to do it.

Type the Text
Step 4
Download the text from the given link in tutorial resources section and install it in Photoshop. Now type the text like I typed “PSD STACK TUTS” and feel free to type your own text. Also, you know I’m using Myriad Pro Regular font for this tutorial but feel free to try different font.

Apply the Blending Options
Step 5
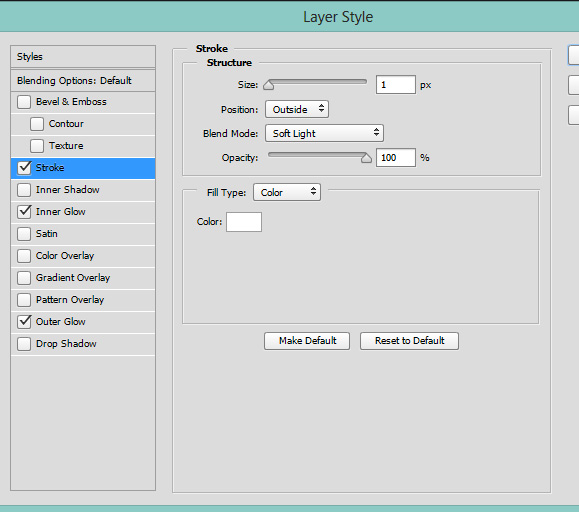
Now we are going to apply Blending Options to our text and it’ll add basic glowing to our text. Right click on the text layer and choose ‘Blending options’. Now apply the following effect with given values to each.
Stroke Settings:
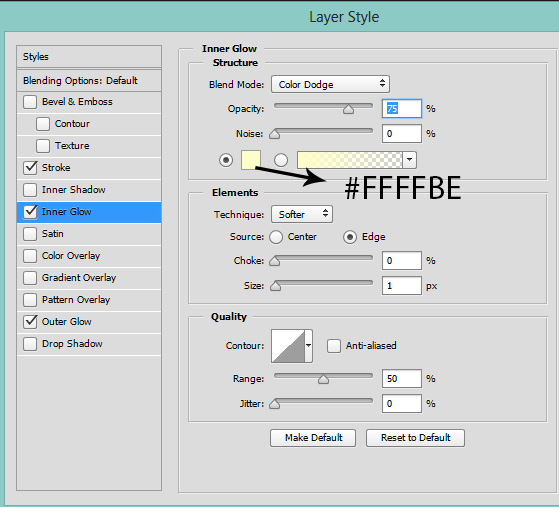
Inner Glow settings with default color :
The Color I used for Inner Glow is default but I thought it would be good that I’ll give the code of default color.
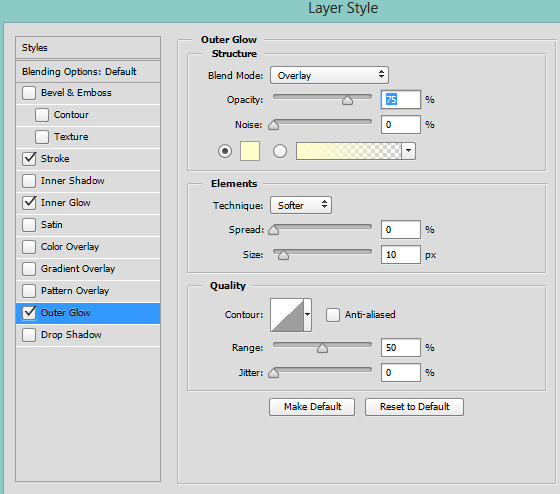
Outer Glow settings with default color:
Results:

Step 6
Actually you’ll see nothing until you change the blending mode of text layer to Overlay. So just change the blend mode of text layer to Overlay to see the Blending Options effect. Here you can see the results with some glow around the text:

Make the Text Glow
Step 6
Now we’ll make the text glow with different lighting colors. Activate the Brush Tool (B). Create a new layer (above the text layer) and name it ‘glow 2’. Paint some colorful brush strokes on the text. You can I see I used Red, Blue, Green, and Magenta color. Basically, it depends on the color which you used for underlying layer (glow 1). Here you can see how I painted the colors:

Change the blending mode of glow 2 layer to Color Dodge 100%. Here are the the result with glowing colorful light on our text:

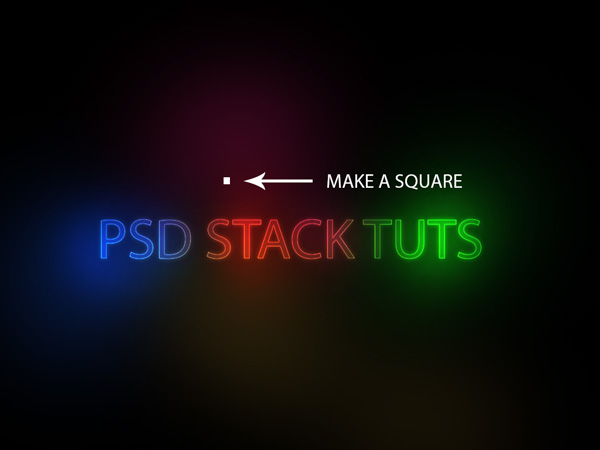
Create the Shapes
Create a new layer and use the Rectangular Marquee Tool (M) to create a square and fill this shape with white color.
You can the see the shape in below image:
Set the blend mode of shape layer to Overlay 100%.

Step 9
Similarly create circle with Elliptical Marquee Tool (M) and fill this circle with white color. Now simply change the blend mode to Overlay.

Duplicate the square and circle layer many times to arrange them around the circle. Also, use the Transform Tool (CTRL +T) to rotate the shapes to enlarge them and generate randomness. Here you can see the final results:

Conclusion
Although I’m not good in creating text effects I always try. I hope you like the techniques for creating a glowing light text and thanks for following the tutorial. If you really like the tutorial then do share it with the world till then Happy Photoshopping!
wonderful. Thank you for giving us learning.
You are welcome Mayur!